
Talon FWD L4-1997cc 2.0L DOHC Turbo VIN F SMFI (1998)
4. Use suitable thread protectors on connecting rod bolts before inserting piston and connecting rod assembly into cylinder block. Do not nick
crank pin.
5. Use a suitable piston ring compressor tool to install piston and connecting rod assembly into cylinder block.
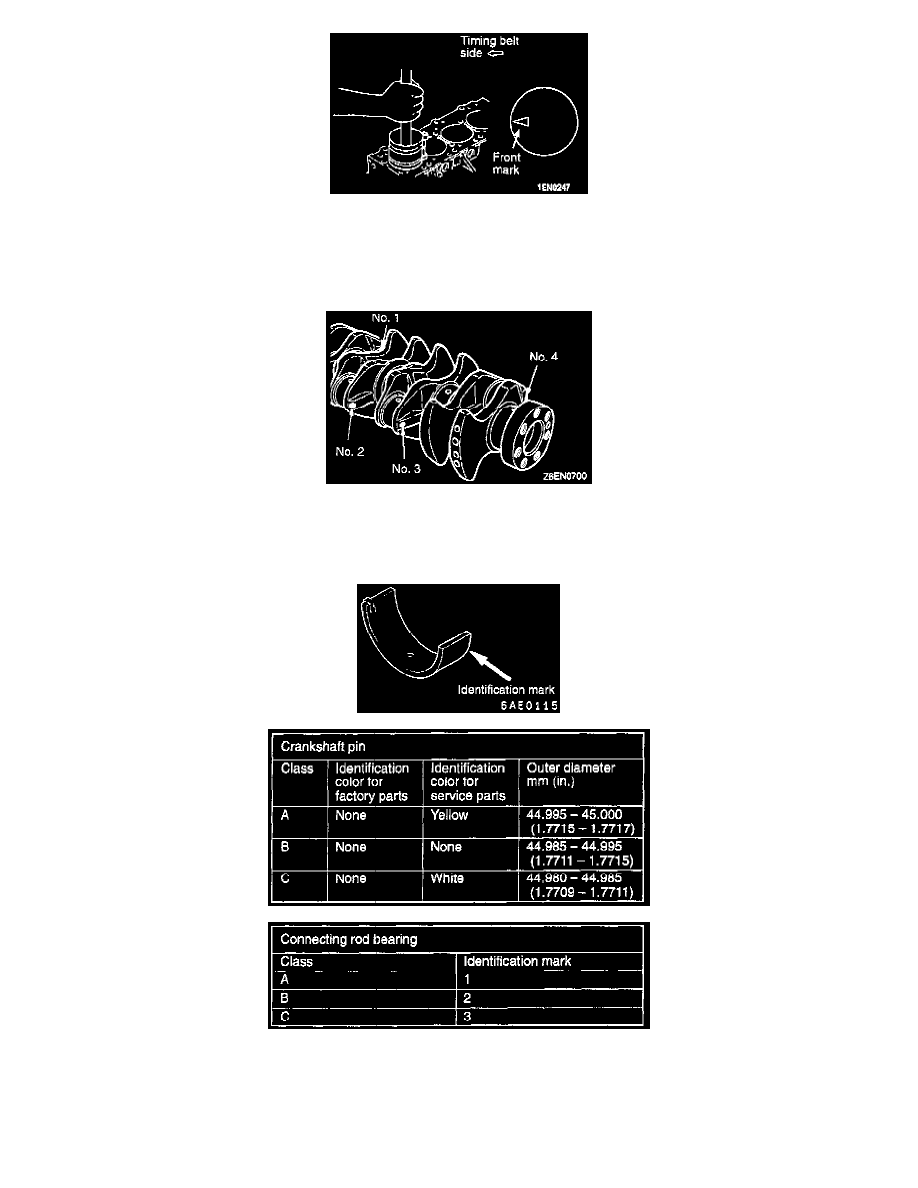
CAUTION: Insert the front mark (arrow) on the top of the piston so it faces the engine front (timing belt side).
D. Connecting Rod Bearing Installation.
When replacing the bearing, choose a bearing as follows.
1. Measure the diameter of the crankshaft pin and then understand which class the pin belongs to in the following table.
In addition, a service part has its own identification color as shown in the figure.
2. The figure shows an identification mark of a connecting rod bearing.
3. Choose a bearing according to the above table.
[Example]
If the measured value of a crankshaft pin outer diameter is between 44.995 and 45.000 mm (1.7715 and 1.7717 inch), the pin is classified as
"A" in the table.