
Vision V6-3.5L VIN F (1997)
PROCEDURE
Follow pressure bleeder manufacturer's instructions, for use of pressure bleeding equipment. When bleeding the brake system. Some air may be
trapped in the brake lines or valves far upstream. As much as ten feet from the bleeder screw. Therefore, it is essential to have a fast flow of a large
volume of brake fluid when bleeding the brakes. This will ensure all the air is bled from the brakes hydraulic system.
1.
Remove rubber dust caps from all 4 bleeder screws.
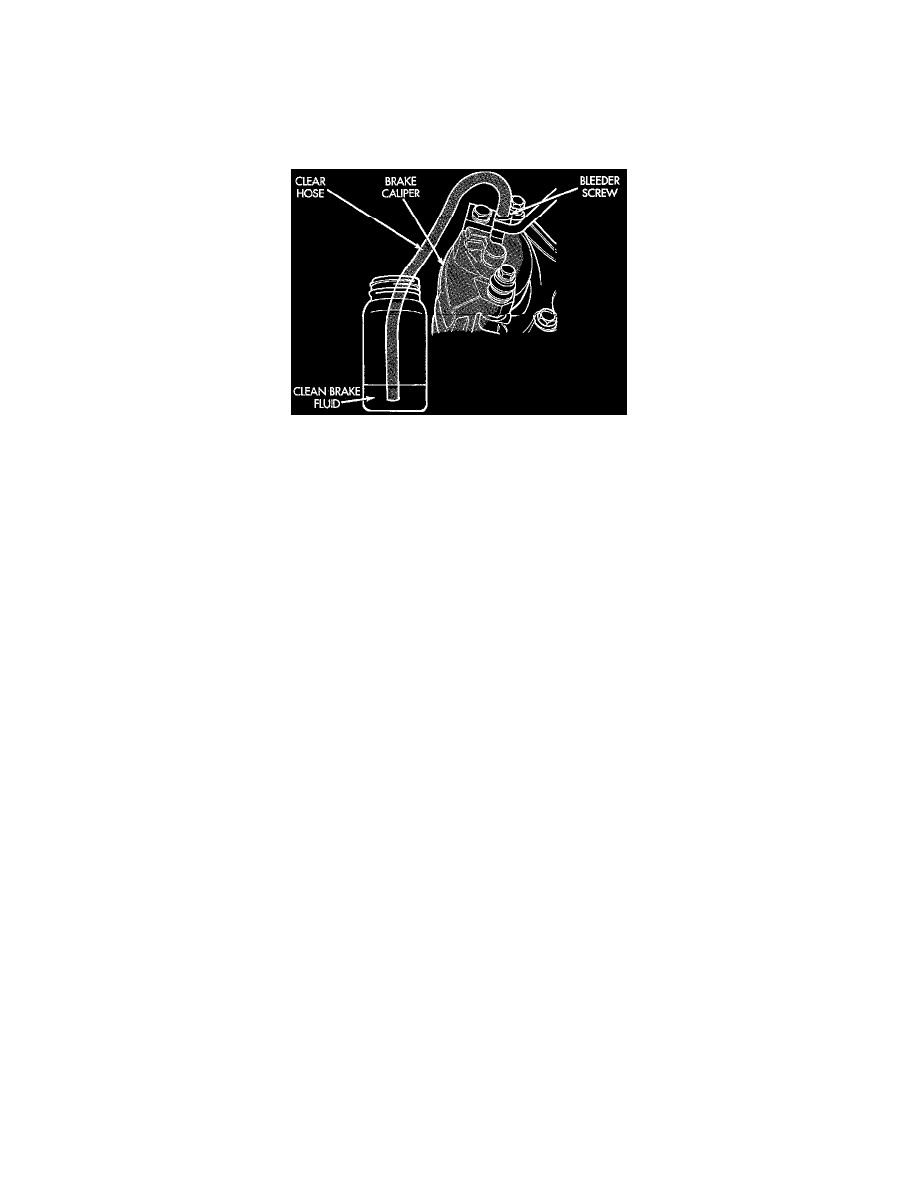
Method For Purging Air From Brake System
2.
Attach a clear hose to the bleeder screw at one wheel and feed the hose into a clear jar containing fresh brake fluid.
CAUTION: Opening the bleeder screw less than 1 turn may restrict fluid flow, and a slow weak fluid discharge will NOT get all the air out.
3.
Open bleeder screw on caliper assembly or wheel cylinder, at least one full turn or more to obtain an adequate flow of brake fluid.
4.
After 4 to 8 ounces of brake fluid has been bled through an individual wheel's brake hydraulic system. And an air-free flow (no bubbles) is
maintained in the clear plastic hose and jar, this will indicate a good bleed of this individual hydraulic circuit.
5.
Repeat the procedure at all the other remaining bleeder screws. Then check the pedal for travel. If pedal travel is excessive or has not been
improved. Enough fluid has not passed through the system to expel all the trapped air. Be sure to monitor the fluid level in the pressure
bleeder. It must stay at the proper level so air will not be allowed to re-enter the brake system through the master cylinder.
6.
Replace all 4 bleeder screw rubber dust caps.