
Crown Victoria V8-4.6L VIN W (2000)
4.
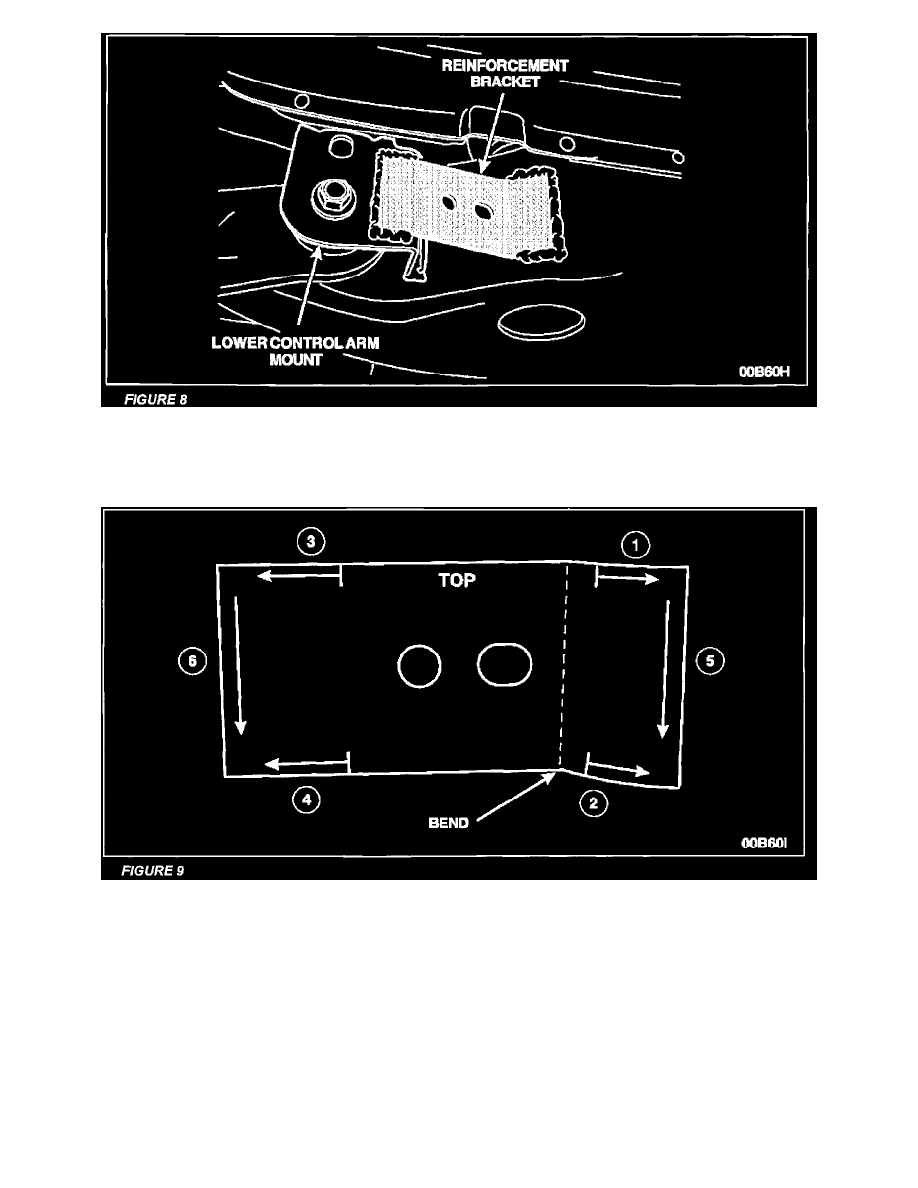
Prep the frame rail/lower control arm mount by removing the E-coat in the reinforcement bracket mounting area. See Figure 8.
5.
Position the lower control arm mount reinforcement bracket. The bracket must fit flush to the frame rail and flush with the outer face of the lower
control arm mount. To begin, clamp the bracket to the frame rail only. See Figure 8.
6.
Tack weld the lower control arm mount reinforcement bracket to the frame rail. Then clamp and tack weld the bracket to the lower control arm
mount. Remove the clamp(s). Then finish weld the bracket following the sequence and direction as indicated in the illustration. See Figure 9.
FINAL ASSEMBLY
1.
Remove weld blankets, if previously installed.
2.
Install all of the control arms and/or flag nut(s) that were removed. Do not final tighten at this time.
3.
Remove the safety stands.
WARNING
RIDE HEIGHT MUST BE ACHIEVED BY SUPPORTING THE REAR AXLE WITH SHORT SAFETY STANDS WITH THE FRONT
WHEELS ON THE FLOOR. ATTEMPTING TO POSITION THE REAR AXLE TO RIDE HEIGHT WHILE THE VEHICLE IS STILL
SUPPORTED BY THE HOIST MAY RESULT IN SUDDEN SHIFTING OF THE VEHICLE ON THE HOIST AND PERSONAL INJURY.