
Escape 4WD L4-2.5L (2010)
NOTICE: Do not spill brake fluid on painted or plastic surfaces or damage to the surface may occur. If brake fluid is spilled onto a painted or
plastic surface, immediately wash the surface with water.
NOTE: The Hydraulic Control Unit (HCU) bleeding procedure must be carried out if the HCU or any components upstream of the HCU are installed
new.
NOTE: Pressure bleeding the brake system is preferred to manual bleeding.
NOTE: Due to the complexity of the fluid path within the hybrid brake system, it is necessary to pressure bleed this system.
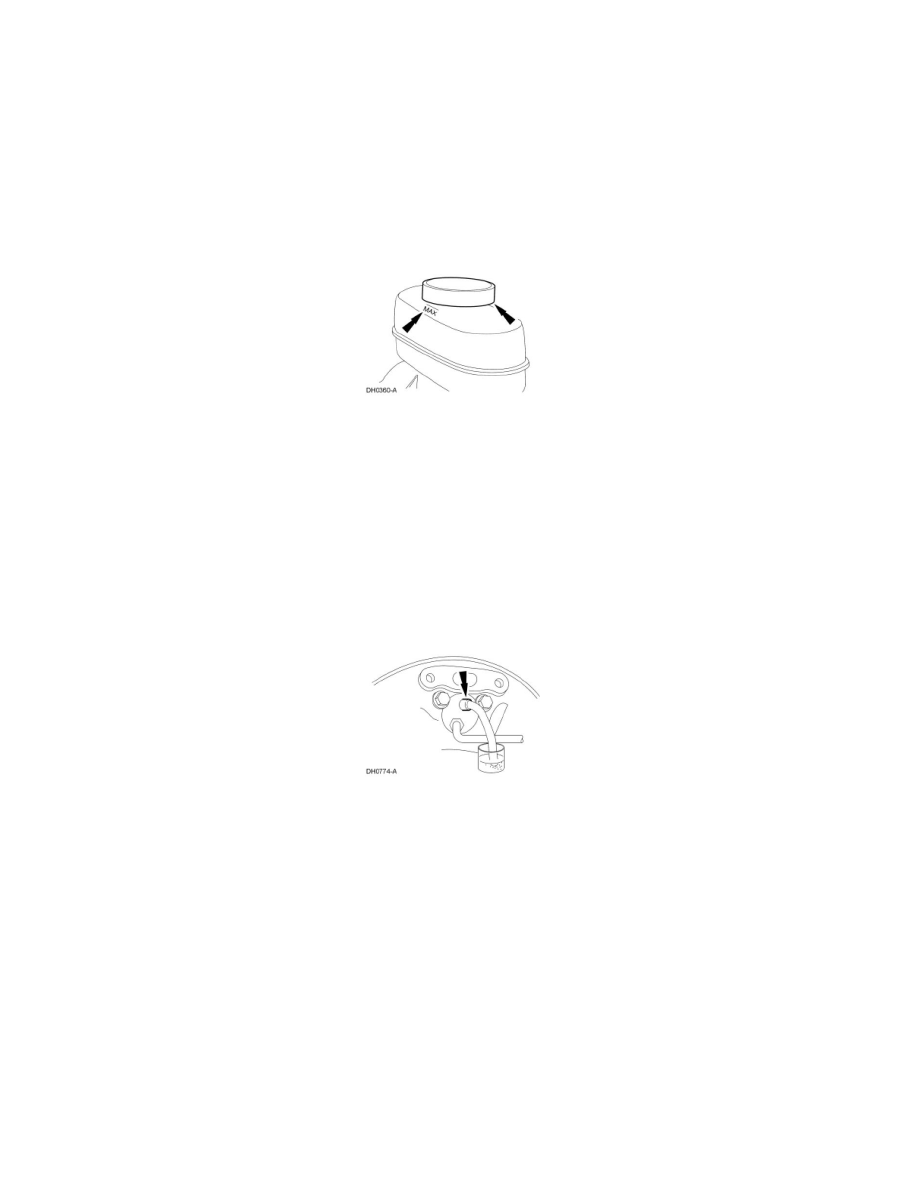
1. Clean all dirt from the brake master cylinder filler cap and remove the filler cap.
-
Fill the brake master cylinder reservoir with clean, specified brake fluid.
2. NOTE: Master cylinder pressure bleeder adapter tools are available from various manufacturers of pressure bleeding equipment. Follow the
instructions of the manufacturer when installing the adapter.
Install the bleeder adapter to the brake master cylinder reservoir, and attach the bleeder tank hose to the fitting on the adapter.
3. NOTE: Make sure the bleeder tank contains enough clean, specified brake fluid to complete the bleeding operation.
Open the valve on the bleeder tank.
-
Apply 207-345 kPa (30-50 psi) to the brake system.
4. Remove the RR bleeder screw cap and place a box-end wrench on the bleeder screw. Attach a rubber drain hose to the RR bleeder screw and
submerge the free end of the hose in a container partially filled with clean, specified brake fluid.
5. Loosen the RR bleeder screw. Leave open until clear, bubble-free brake fluid flows, then tighten the RR bleeder screw to specifications. Refer to
Specifications. Remove the rubber hose.
6. Continue bleeding the rest of the system, going in order from the LR bleeder screw to the RF bleeder screw, ending with the LF bleeder screw.
-
Tighten the brake caliper and wheel cylinder bleeder screws to specifications. Refer to Specifications.
7. Close the bleeder tank valve and release the pressure. Remove the tank hose from the adapter and remove the adapter. Fill the reservoir with clean,
specified brake fluid and install the reservoir cap.
8. NOTE: On hybrid vehicles, the brake booster push rod has an elongated slot that attaches to the brake pedal with a clevis pin. The elongated slot
allows for a small amount of pedal travel (free play) to occur without the brake pedal applying pressure on the booster push rod. When performing
a bleed procedure, it is important to push the pedal through the air gap, so that the clevis pin is contacting the brake booster push rod. Except when
required by the scan tool, the ignition key must remain off during the bleed procedure to allow minimal force required to push through the gap.
With the ignition off, press the brake pedal through the gap to seat the clevis pin against the brake booster push rod and then confirm the pedal is
firm.
-
If the brake pedal feels spongy (soft), repeat the Pressure Bleeding procedure to remove any remaining air from the system.
Hydraulic Control Unit (HCU) Bleeding