
Explorer 4WD V6-4.0L (2009)
6. Remove and discard the tie-rod nut.
-
To install, tighten the new nut to 103 Nm (76 lb-ft).
7. Using the C-Frame and Screw, separate the tie rod from the knuckle.
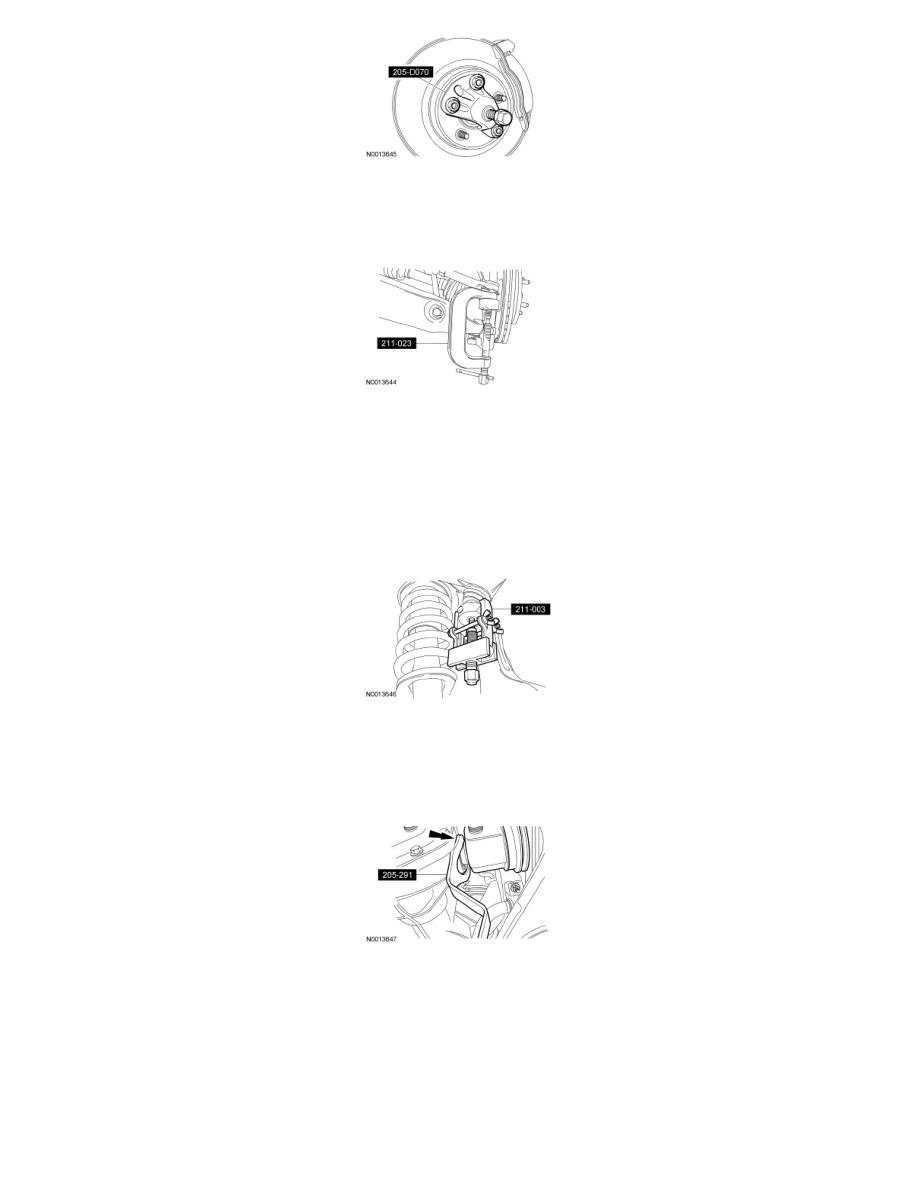
8. Remove and discard the stabilizer bar link nut.
-
To install, tighten the new nut and grommet to 35 Nm (26 lb-ft).
9. Remove and discard the upper ball joint nut.
-
To install, tighten the new nut to 55 Nm (41 lb-ft).
10. NOTE: Do not allow the knuckle to hang freely. It is possible to overextend and internally separate each inner CV joint from its housing.
Using the Steering Arm Remover, disconnect the upper ball joint from the knuckle.
LH halfshaft
11. NOTICE: Do not damage the axle shaft oil seal or the machined sealing surface on the inboard Constant Velocity (CV) joint housing.
Using the Halfshaft Remover, disengage the LH CV joint housing from the side gear.
12. Remove the LH halfshaft.
RH halfshaft
13. NOTE: Install a new retainer circlip on the outboard spline end of the axle shaft before reseating the axle shaft in the differential side gear.
Pull the RH halfshaft and the axle shaft away from the axle tube, and separate the inboard CV joint housing from the axle shaft.