
Explorer Sport Trac 2WD V6-4.0L (2009)
-
Tighten to 8 Nm (71 lb-in).
3. NOTICE: Damage may occur to transmission fluid filter seals if they are not lubricated with transmission fluid.
NOTE: Make sure that the transmission fluid filter seals are correctly seated on the transmission fluid filter.
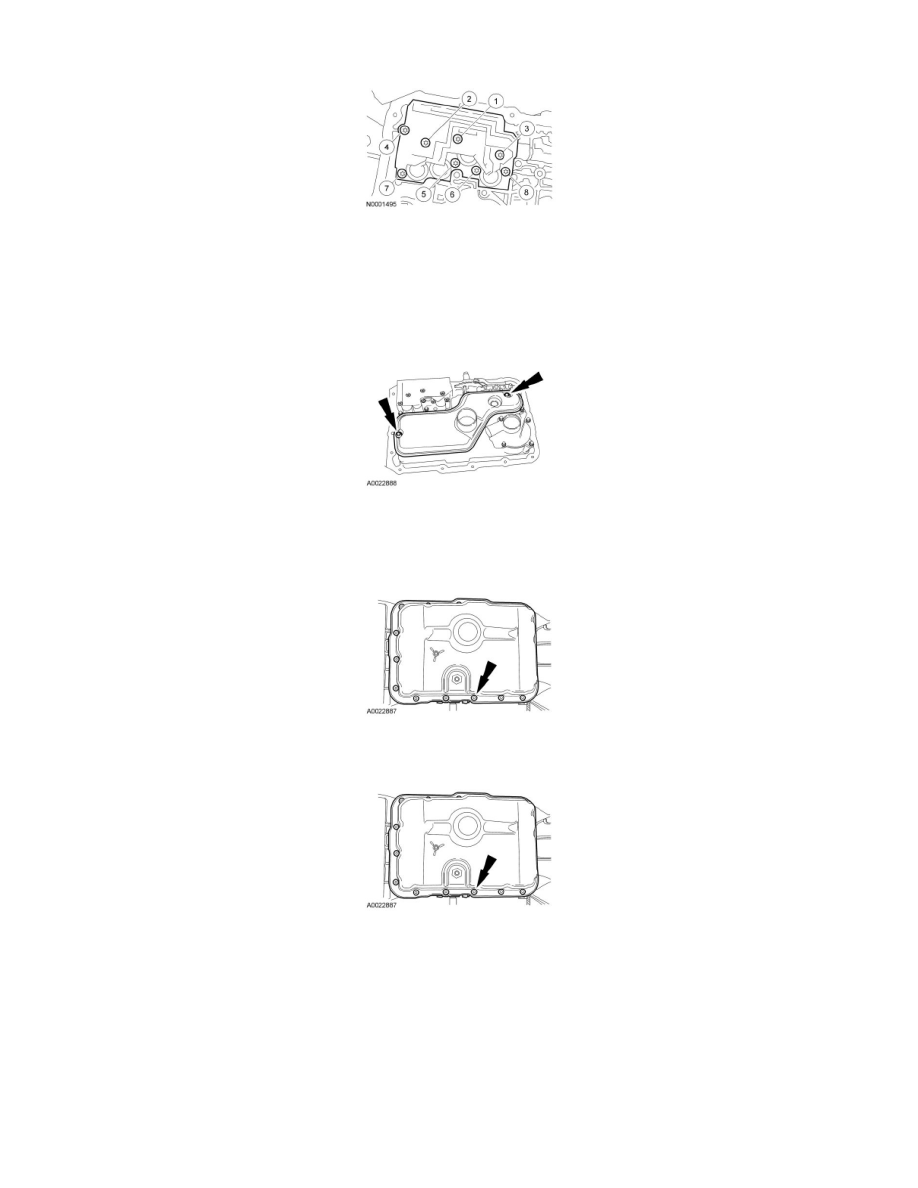
Lubricate the transmission fluid seals and install the transmission fluid filter.
-
Tighten to 10 Nm (89 lb-in).
4. NOTE: The transmission fluid pan gasket is reusable, clean and inspect for damage. If not damaged, the transmission fluid pan gasket should be
reused.
Install the transmission fluid pan and transmission fluid pan gasket and loosely install the transmission fluid pan-to-case screws.
5. Tighten the transmission fluid pan-to-case screws in a crisscross sequence.
-
Tighten to 11 Nm (97 lb-in).
6. NOTICE: Damage will occur to the transmission vehicle harness connector if the screw is tightened above specification.
NOTE: Always install new O-ring seals on transmission control solenoid body harness connector.
NOTE: Clean the area around the transmission vehicle harness connector to prevent contamination of the transmission control solenoid body
connector.
NOTE: Use petroleum jelly to lubricate the O-ring seals to aid in the installation process.
Install and lubricate new O-ring seals on the transmission control solenoid body harness connector and connect the connector.
-
Tighten to 5 Nm (44 lb-in).