
F 150 4WD V8-4.6L VIN 8 (2010)
8. Inspect the pinion flange for burrs and damage. Inspect the end of the pinion flange that contacts the pinion bearing cone, pinion nut counterbore
and drive pinion seal surface for nicks. Discard the pinion flange if damaged.
9. NOTICE: Do not damage the axle housing.
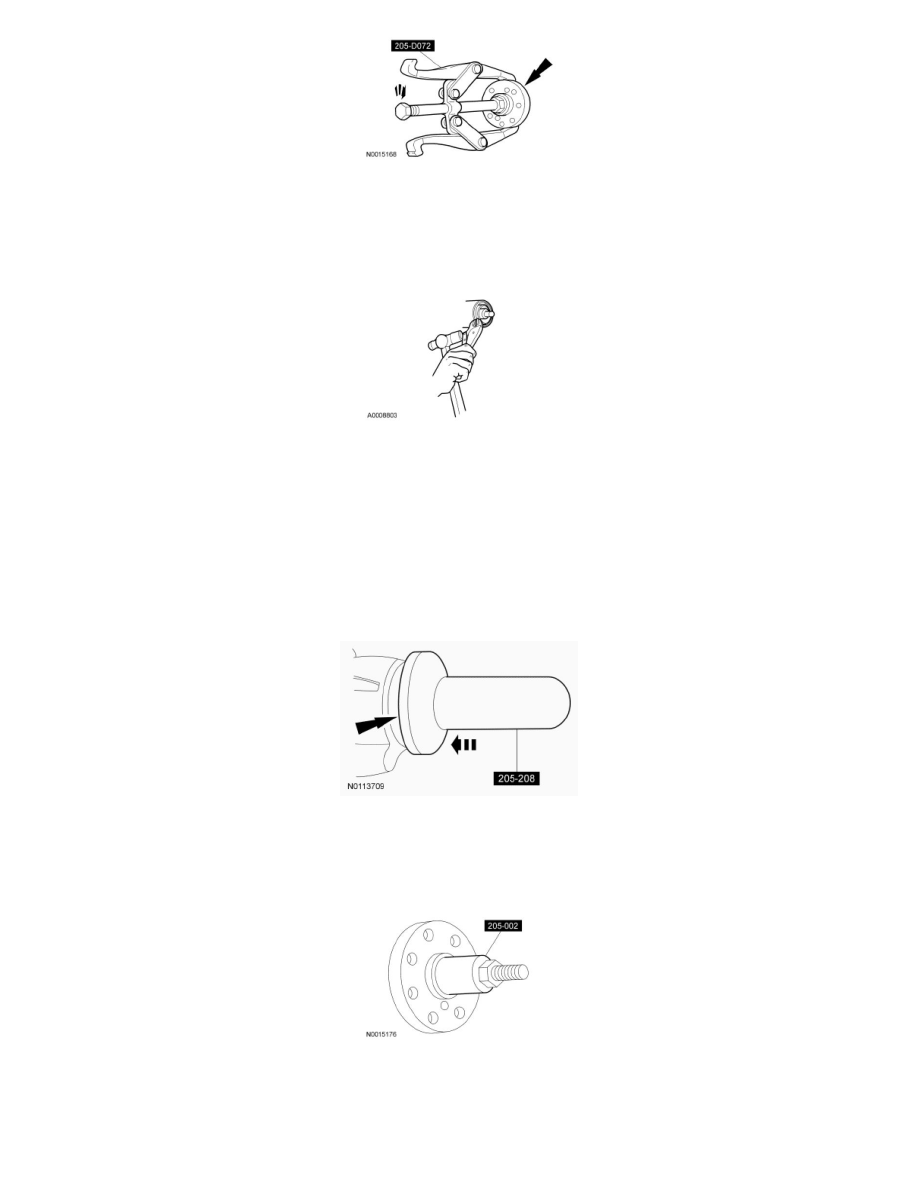
Force up on the metal flange of the drive pinion seal. Install gripping pliers and strike with a hammer to remove the drive pinion seal.
10. Verify the splines on the drive pinion gear are free of burrs. If burrs are evident, remove them with a fine crocus cloth.
11. Clean the drive pinion seal bore.
Installation
1. NOTE: Lubricate the drive pinion seal lips with axle lubricant.
NOTE: Drive pinion seal must be fully seated all the way around or drive pinion seal damage will occur.
Using the Drive Pinion Oil Seal Installer, install the drive pinion seal.
2. NOTICE: Never use a hammer or install the pinion flange with power tools.
NOTE: Lubricate the pinion flange splines with axle lubricant.
Align the index marks made during removal and, using the Drive Pinion Flange Installer, install the pinion flange.
3. NOTICE: The color on the rear face of the drive pinion nut is critical to this repair. Use the same color new drive pinion nut for
installation as the original. If a new collapsible spacer must be installed for pinion bearing preload reduction, install the nut supplied with
the new spacer or damage to the component may occur.
Select the correct pinion nut for installation.