
F 350 2WD Super Duty V8-5.4L (2008)
15. Disconnect the degas bottle coolant inlet hose position retainer from the cooling fan shroud and position aside.
16. If equipped with four wheel drive (4WD), remove the bolt and position the 4WD differential vacuum valve aside.
^
To install, tighten to 8 Nm (71 lb-inch).
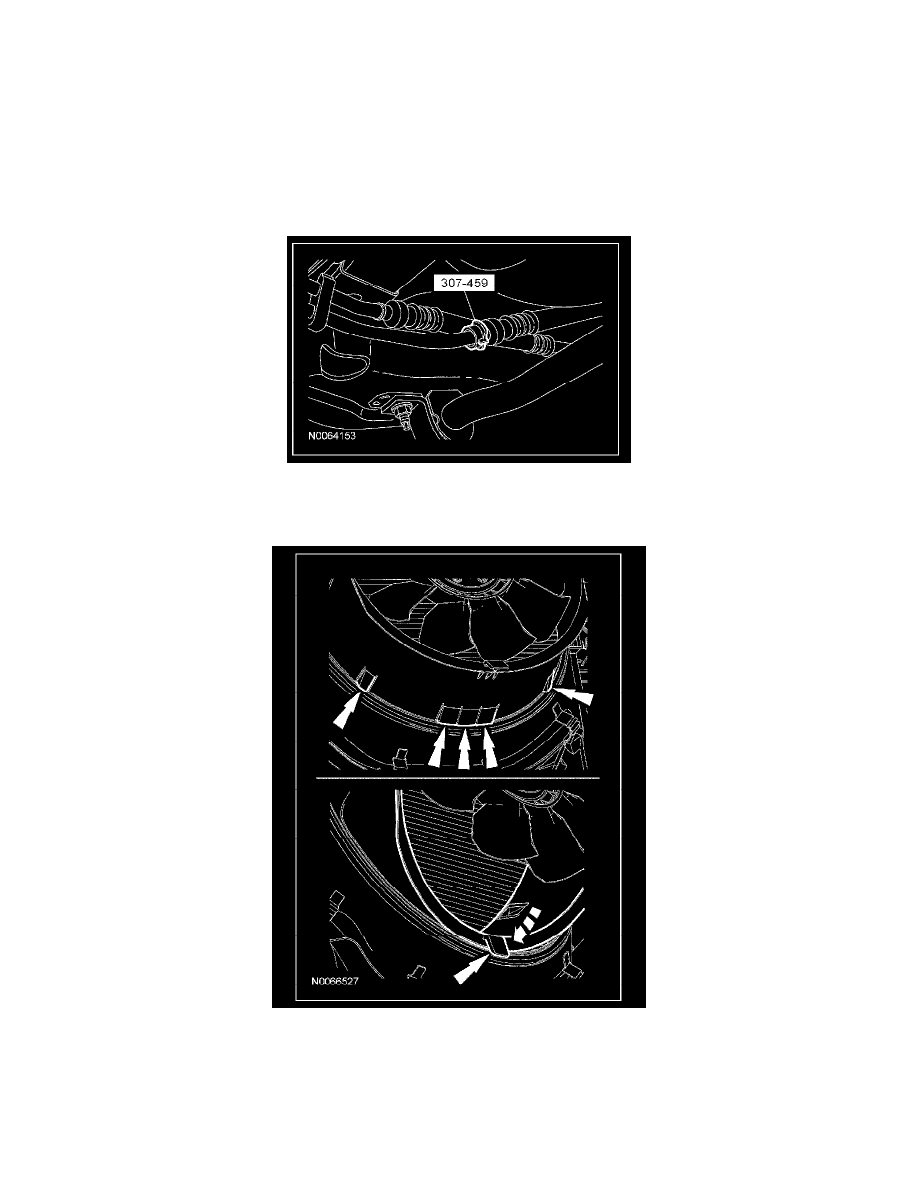
17. Remove the clip and disconnect the lower radiator coolant hose quick connect coupling.
18. Remove the nut and disconnect the A/C compressor-to-condenser tube.
^
Discard the gasket seal and the O-ring seals.
19. Remove the nut and disconnect the A/C condenser outlet tube.
^
Discard the gasket seal and the O-ring seals.
20. Disconnect the RH air deflector retainer.
21. Remove the 2 secondary latches and using the special tool, disconnect the transmission auxiliary fluid cooler tube quick connect couplings and
position retainers.
22. Disconnect the 4 position retainers and position the engine compartment wiring harness aside.
23. Remove the 3 lower air deflector retainers.
24. Press the 5 position retaining tabs and rotate the lower cooling fan shroud upward until the position retainer tab locks into position.
25. Remove the 6 radiator upper support bolts and the engine cooling module.
Installation
1. Position the engine cooling module into the vehicle and install the 6 upper radiator support bolts finger tight.
2. Tighten the 4 radiator support top bolts.
^
Tighten to 40 Nm (30 lb-ft).
3. Tighten the 2 radiator support front bolts.