
F 350 2WD Super Duty V8-5.4L (2008)
Exhaust Pipe: Service and Repair
Exhaust Y-Pipe
Exhaust Y-pipe - Gasoline Engines
Removal
NOTE: Exhaust fasteners are of a torque prevailing design. Use only new fasteners with the same part number as the original. Torque values must be
used as specified during reassembly to make sure of correct retention of exhaust components.
1. With the vehicle in NEUTRAL, position it on a hoist. For additional information, refer to Maintenance/Service and Repair.
2. Disconnect the 2 heated oxygen sensors (HO2S) and the 2 catalyst monitor sensor electrical connectors.
3. Remove the 2 exhaust Y-pipe flange bolts.
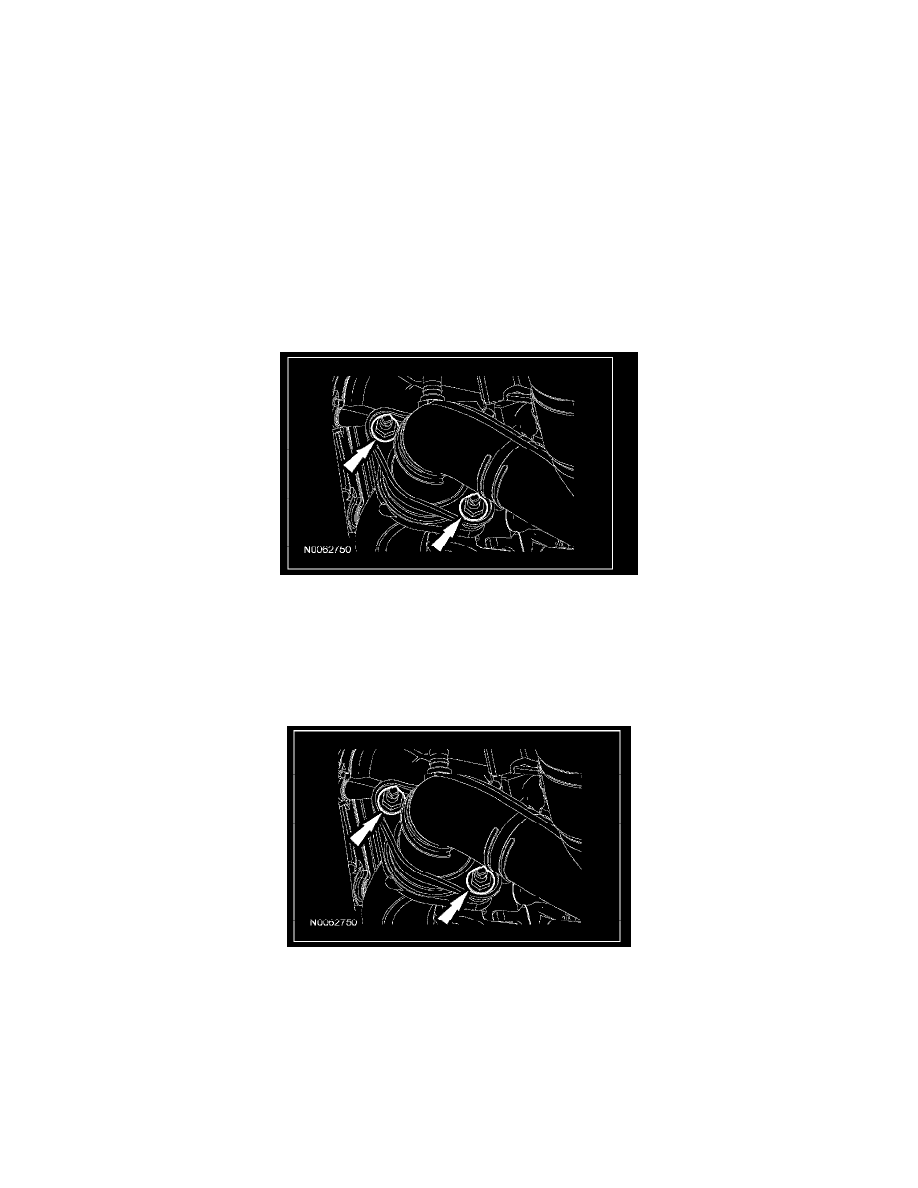
4. NOTE: LH exhaust manifold-to-exhaust Y-pipe shown, RH similar.
With the help of an assistant, remove the 4 exhaust manifold-to-exhaust Y-pipe nuts and the exhaust Y-pipe assembly from the vehicle.
^
Discard the nuts.
Installation
NOTE: Do not tighten any fasteners until all components are aligned.
1. NOTE: LH exhaust manifold-to-exhaust Y-pipe shown, RH similar.
With the help of an assistant, position the exhaust Y-pipe into the vehicle and loosely install 4 new exhaust Y-pipe-to-exhaust manifold nuts.
2. Loosely install the 2 exhaust Y-pipe flange bolts.
3. NOTE: Make sure the exhaust Y-pipe is aligned to provide maximum clearance to adjacent parts.
To seat the LH exhaust manifold-to-exhaust Y-pipe nuts, tighten the nuts in the following sequence.
^
Tighten the lower LH exhaust manifold-to-exhaust Y-pipe nut to 20 Nm (177 lb-inch).
^
Tighten the upper LH exhaust manifold-to-exhaust Y-pipe nut to 40 Nm (30 lb-ft).
^
Tighten the lower LH exhaust manifold-to-exhaust Y-pipe nut to 40 Nm (30 lb-ft).