
F 350 4WD Pickup V8-351 5.8L VIN H EFI (1997)
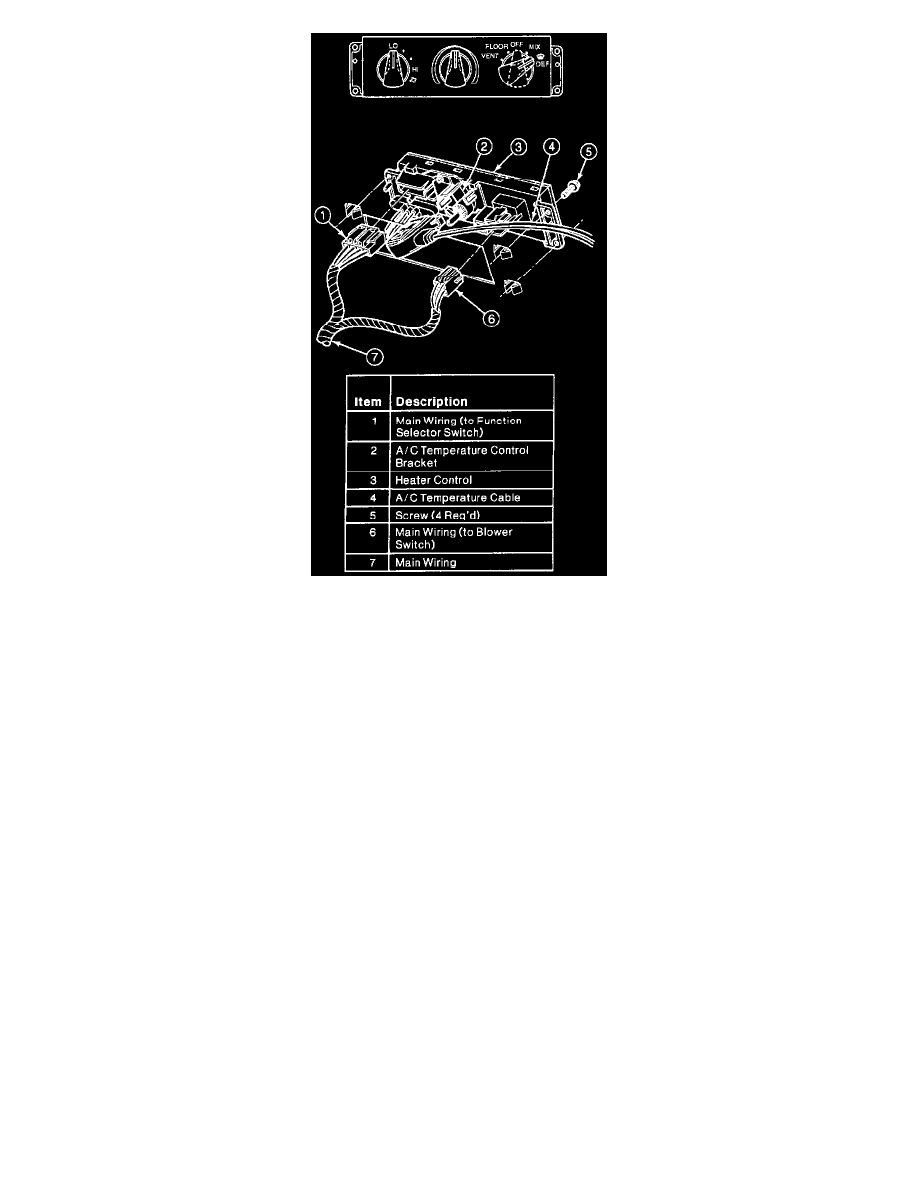
Heater Control, Rear View
1. Pull the A/C temperature cable through the opening in the instrument panel for a distance of approximately 200 mm (8 inches).
2. Hold the heater control near the instrument panel. Attach the A/C temperature cable to the gear rack.
3. Place the heater control back to the position it occupies for insertion into its opening. Snap the bullet end into the bracket. Make sure the end is
firmly seated.
4. Connect the wire harness to the heater blower motor switch and control illumination lamp. Attach the vacuum hose harness to the heater control
and to the plenum harness.
5. Attach the connector to the stowage notch in the heater outlet floor duct.
6. Position the heater control into its opening while being careful that the vacuum hose harness and electrical harness are properly stowed, and install
four retaining screws.
7. Install center finish trim panel with two retaining screws.
8. Install the trim strip above the heater control and glove compartment area after installing the two retaining screws.
9. Connect the battery ground cable(s).
NOTE: When the battery has been disconnected and reconnected, some abnormal drive symptoms may occur while the Powertrain Control
Module (PCM) relearns its adaptive strategy. The vehicle may need to be driven 16 km (10 miles) or more to relearn the strategy.
10. Check the system for proper operation.
Climate Control Assembly Bulbs
REMOVAL
1. Remove trim strip above heater control and glove compartment area.
2. Remove two screws that attach the center finish trim panel to the instrument panel.
3. Remove four screws that attach the heater control to the instrument panel.
4. Pull heater control away from the instrument panel far enough to gain access to the instrument panel lamp socket and bulb (two in control).
5. Rotate instrument panel lamp socket and bulb one quarter turn and remove from the heater control.
6. Pull miniature bulb from socket and replace.
INSTALLATION
1. Follow removal procedure in reverse order.