
Flex FWD V6-3.5L (2010)
2. Working through the glove compartment opening, detach and disconnect the temperature blend door actuator jumper harness electrical connector.
3. Detach the instrument panel wire harness pin-type retainer from the heater core and evaporator core housing support.
4. Remove the 2 RH temperature blend door actuator screws.
5. Reposition the RH temperature blend door actuator to allow access to the electrical connector and disconnect the RH temperature blend door
actuator electrical connector.
6. Remove the RH temperature blend door actuator.
7. To install, reverse the removal procedure.
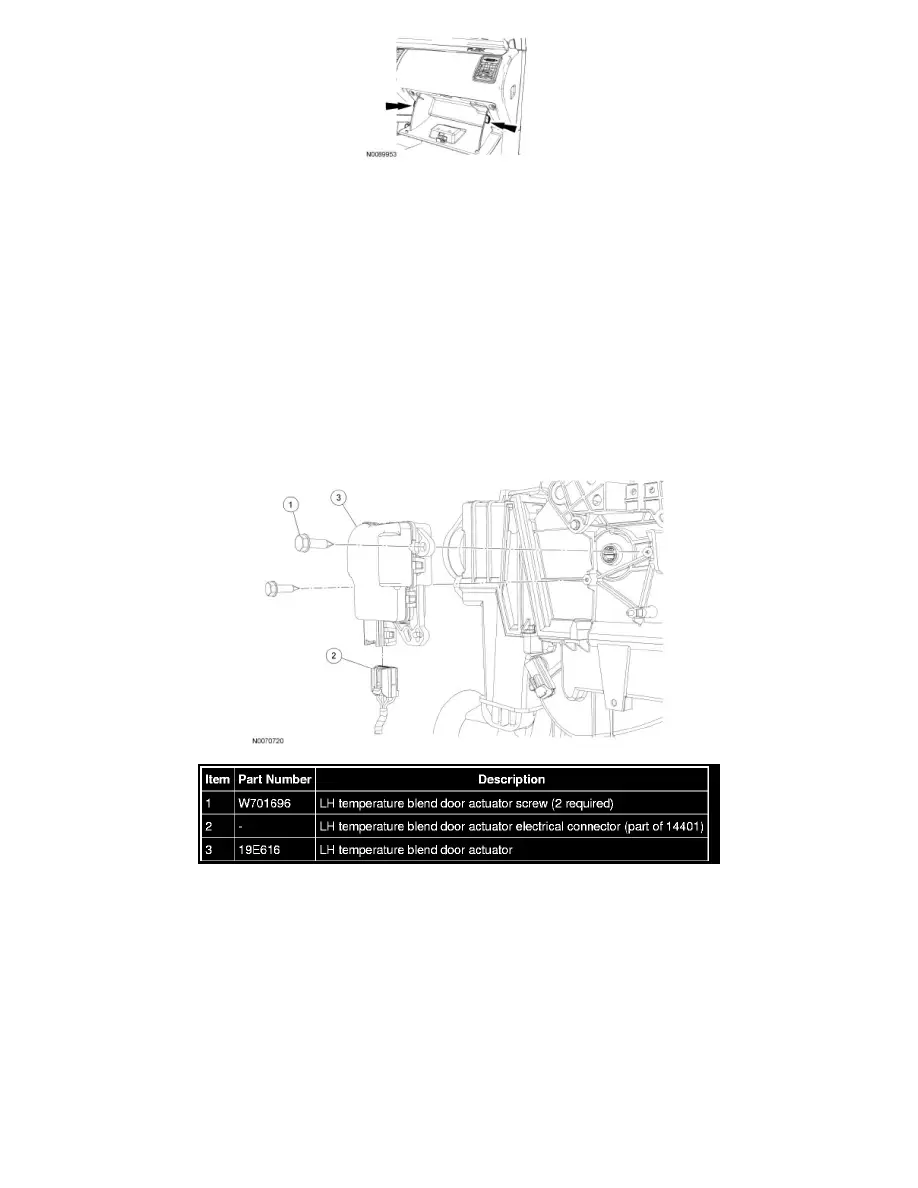
Temperature Blend Door Actuator - LH
Temperature Blend Door Actuator - LH
Removal and Installation
NOTE: The LH temperature blend door actuator can be accessed from below the LH side of the instrument panel.
1. Remove the 2 LH temperature blend door actuator screws.
2. Disconnect the LH temperature blend door actuator electrical connector.
3. Remove the LH temperature blend door actuator.
4. To install, reverse the removal procedure.
5. NOTE: The purpose of the module actuator position calibration is to allow the HVAC module to reinitialize and calibrate the actuator stop points.
To carry out calibration, carry out the following steps.