
Mustang V8-4.6L (2009)
Accumulator HVAC: Service and Repair
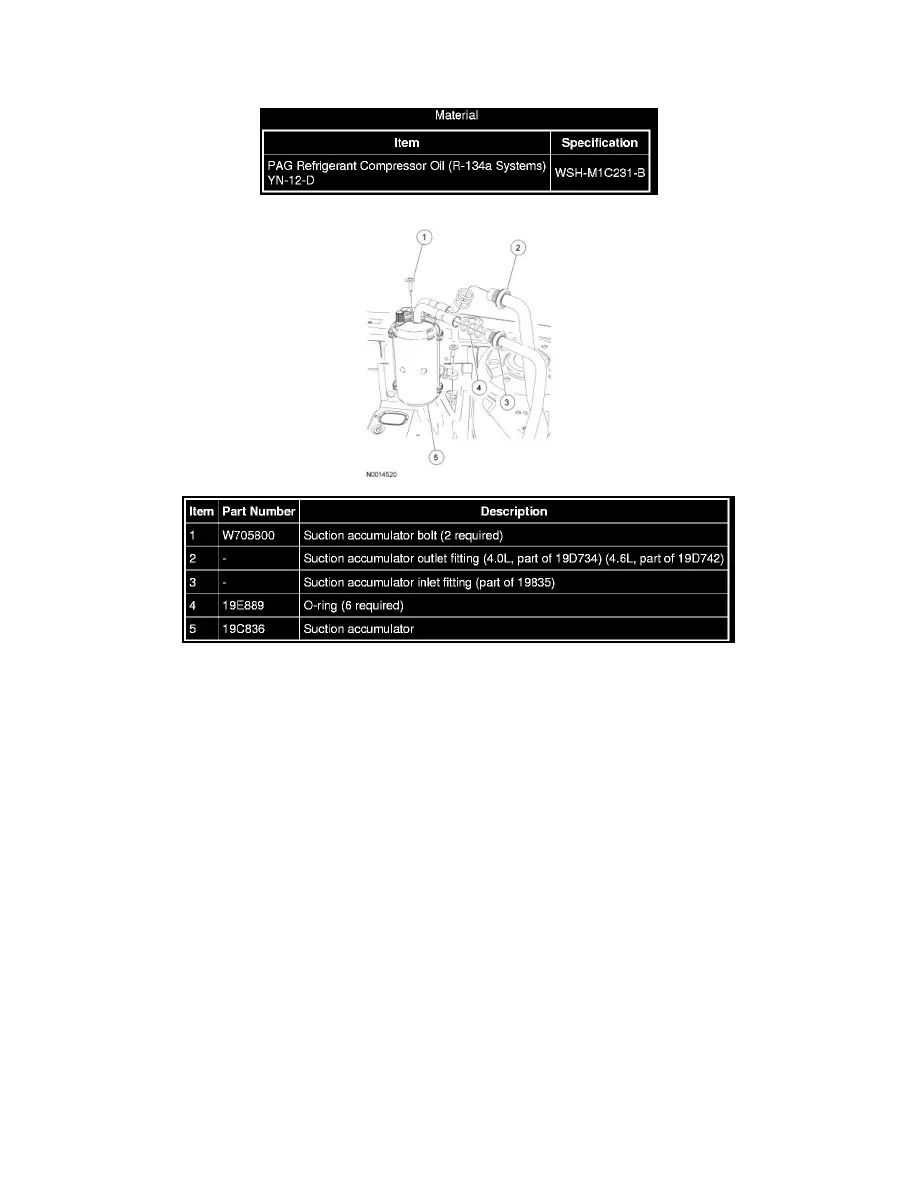
Suction Accumulator
Removal and Installation
NOTE: Installation of a new suction accumulator is not required when repairing the A/C system, except when there is physical evidence of
contamination from a failed A/C compressor or damage to the suction accumulator. Damage to the suction accumulator includes leaks in the suction
accumulator, physical damage to the suction accumulator shell or desiccant, or moisture contamination. Moisture contamination results only from a
complete loss of refrigerant and equalization of the refrigerant system pressure with atmospheric pressure for a period longer than one hour. If even a
slight amount of positive refrigerant pressure is present in the system before repairs are carried out, the suction accumulator should not be replaced.
1. Recover the refrigerant.
2. Disconnect the suction accumulator inlet fitting.
-
Discard the O-ring seals.
3. Disconnect the suction accumulator outlet fitting.
-
Discard the O-ring seals.
4. Remove the 2 suction accumulator bolts.
5. Remove the suction accumulator.
6. NOTE: Care should be taken to minimize exposure of the suction accumulator desiccant to the atmosphere. Do not remove the shipping caps from
the new suction accumulator until immediately before the line fittings are to be attached.
To install, reverse the removal procedure.
-
Install new O-ring seals.
-
Lubricate the refrigerant system with the correct amount of clean PAG oil.