Mustang Cobra V8-281 4.6L DOHC VIN V MFI (1997)

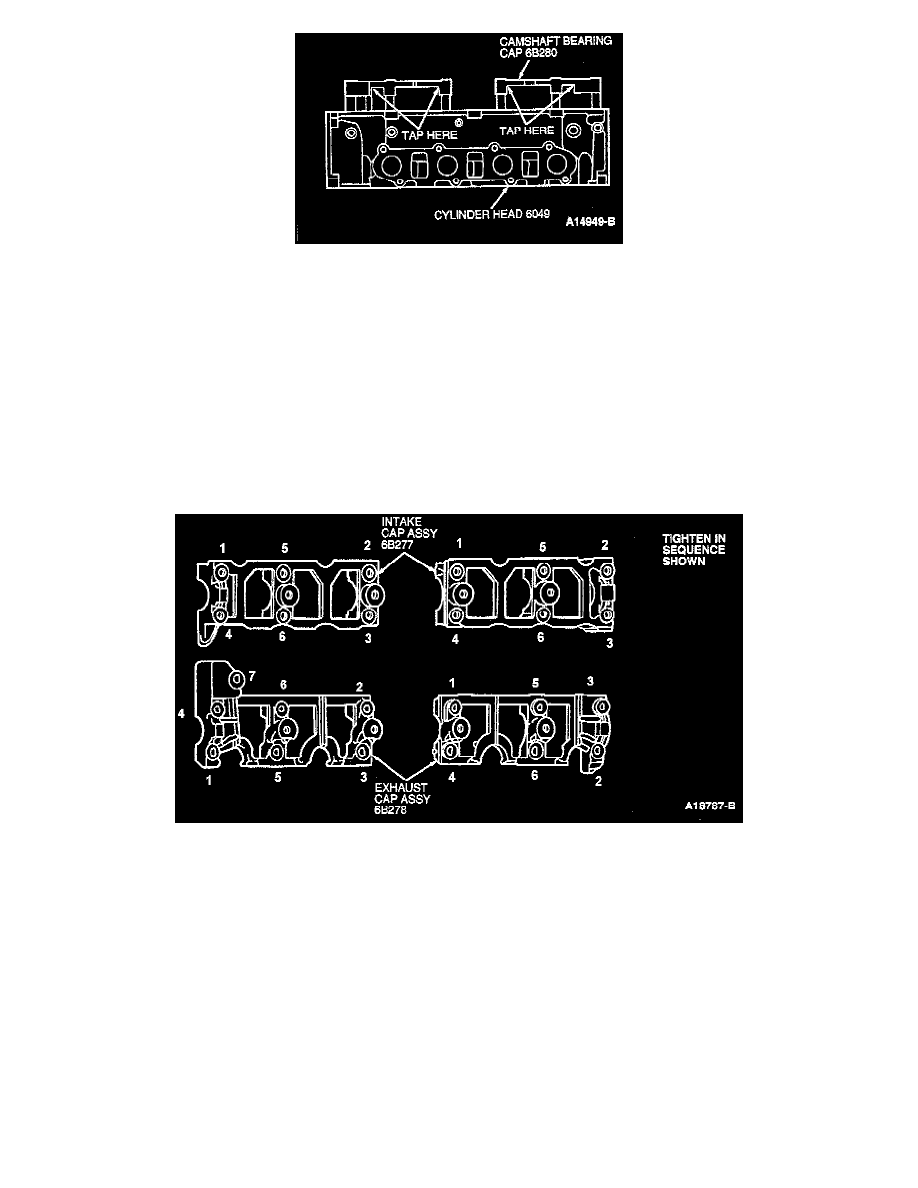
9. Lightly tap upward on camshaft cap clusters at positions shown and gradually lift camshaft cap clusters from cylinder head.
10. Remove camshaft straight upward to avoid bearing surface damage.
11. Steps 6 through 15 will remove only one bank of camshafts. If both banks are being serviced, repeat Steps 7 through 15 to remove other camshafts.
INSTALLATION
NOTE: When cleaning sealing surfaces of the engine front cover and oil pan-to-cylinder block joints, use extreme caution not to damage the
rubber bead of the oil pan gasket (6710). If a leak should occur upon reassembly, remove the oil pan (6675) and replace the oil pan gasket.
1. Clean and inspect valve cover, engine front cover and cylinder head sealing surfaces.
2. If removed, install valve tappets (6500).
3. Apply clean engine oil meeting Ford specification WSS-M2C153-F to journals and lobes of camshaft. Position camshaft on cylinder head.
4. Install and seat camshaft cap cluster assemblies. Hand-start 12 (52 mm long) bolts into intake camshaft caps, 7 (52 mm long) bolts into inboard
side of exhaust camshaft and 6 (42 mm long) bolts into outboard side of exhaust camshaft caps.
5. Tighten camshaft cap cluster retaining bolts in sequence to 8-12 Nm (71-106 inch lbs.).
NOTE: Each camshaft cap cluster is tightened individually.
6. Loosen 25 camshaft cap cluster retaining bolts approximately two turns or until head of bolt is free.
7. Retighten all bolts in sequence to 8-12 Nm (71-106 inch lbs.).
NOTE: Camshafts should turn freely with a slight drag.
8. Check camshaft end play on all reinstalled camshafts.
CAUTION: Timing chain procedures must be followed exactly or damage to valves and/or pistons (6108) will result.
9. Install timing chains.
