
Probe V6-153 2.5L DOHC (1994)
Fluid Pump: Service and Repair
DISASSEMBLE
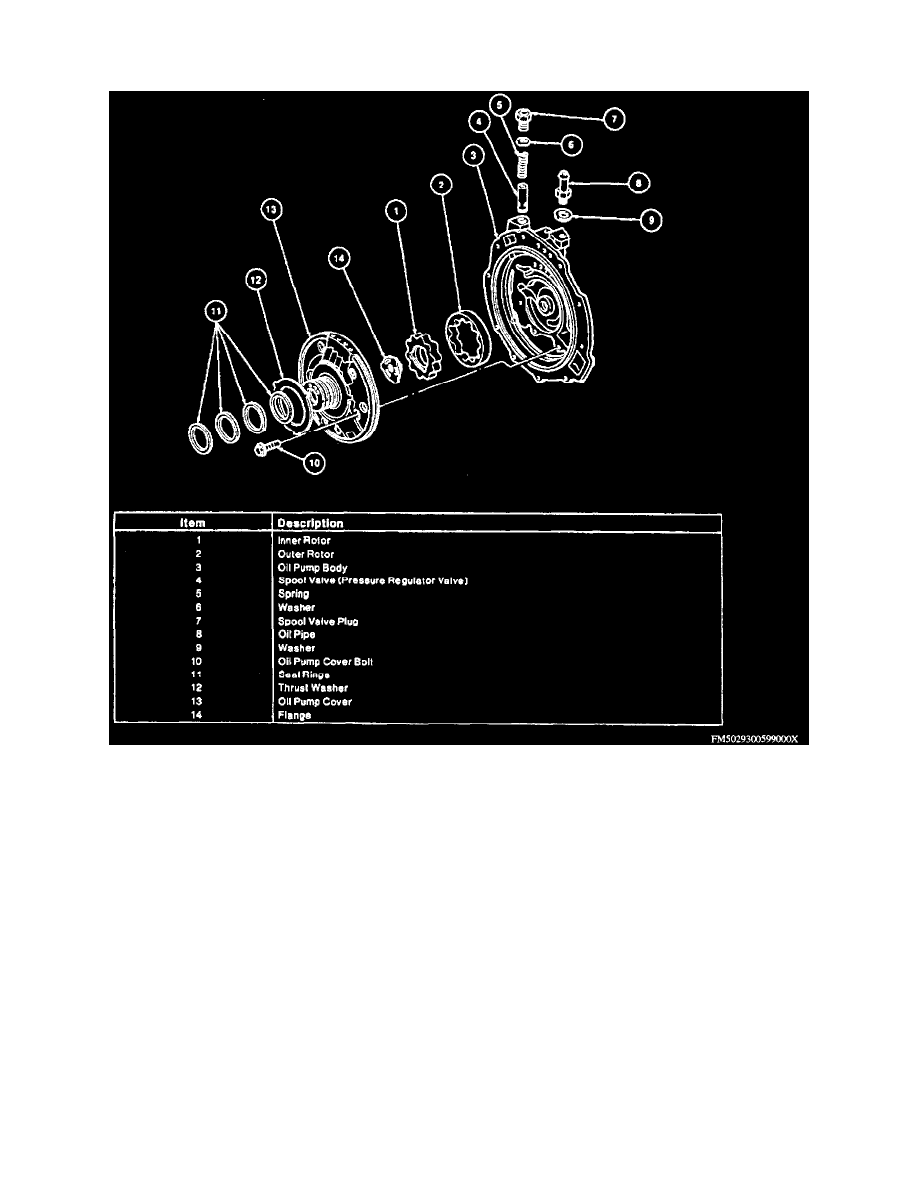
Exploded View Of Oil Pump
NOTE: Refer to the Exploded View Of Oil Pump image when disassembling the oil pump.
1. Inspect sliding surfaces of oil pump cover and oil pump body damage for wear.
2. Inspect seal ring for damage.
3. Inspect spring for weakness.
4. Using suitable feeler gauge, measure the following clearances:
a. Seal pin to oil pump cover. Maximum clearance is 0.002 inch.
b. Rotor to oil pump cover. Maximum clearance is 0.0002 inch.
c. Cam ring to oil pump cover. Maximum clearance is 0.002 inch.
d. Vane to oil pump cover. Maximum clearance is 0.003 inch.
e. Vane to rotor groove. Maximum clearance is 0.0026 inch.
5. Check wear for each of the following:
a. Using a vernier caliper, check oil pump body sleeve O.D. wear limit. Standard limit is 1.102 inch.
b. Using a dial indicator, check rotor bushing I.D. wear limit. Maximum is 1.104 inch.
c. Using a micrometer, check guide ring O.D. wear limit. Minimum is 0.272 inch.
d. Using a micrometer, check valve O.D. wear limit. Minimum is 0.467 inch.
e. Using a micrometer, check seal pin O.D. wear limit. Minimum is 0.231 inch.
ASSEMBLE
1. Install spool valve and spring, then new washer and spool valve plug. Torque plug to 24-34 ft lbs.
2. Install outer rotor, then the inner rotor. Line up alignment mark between inner and outer rotor.