
Ranger 2WD V6-4.0L (2010)
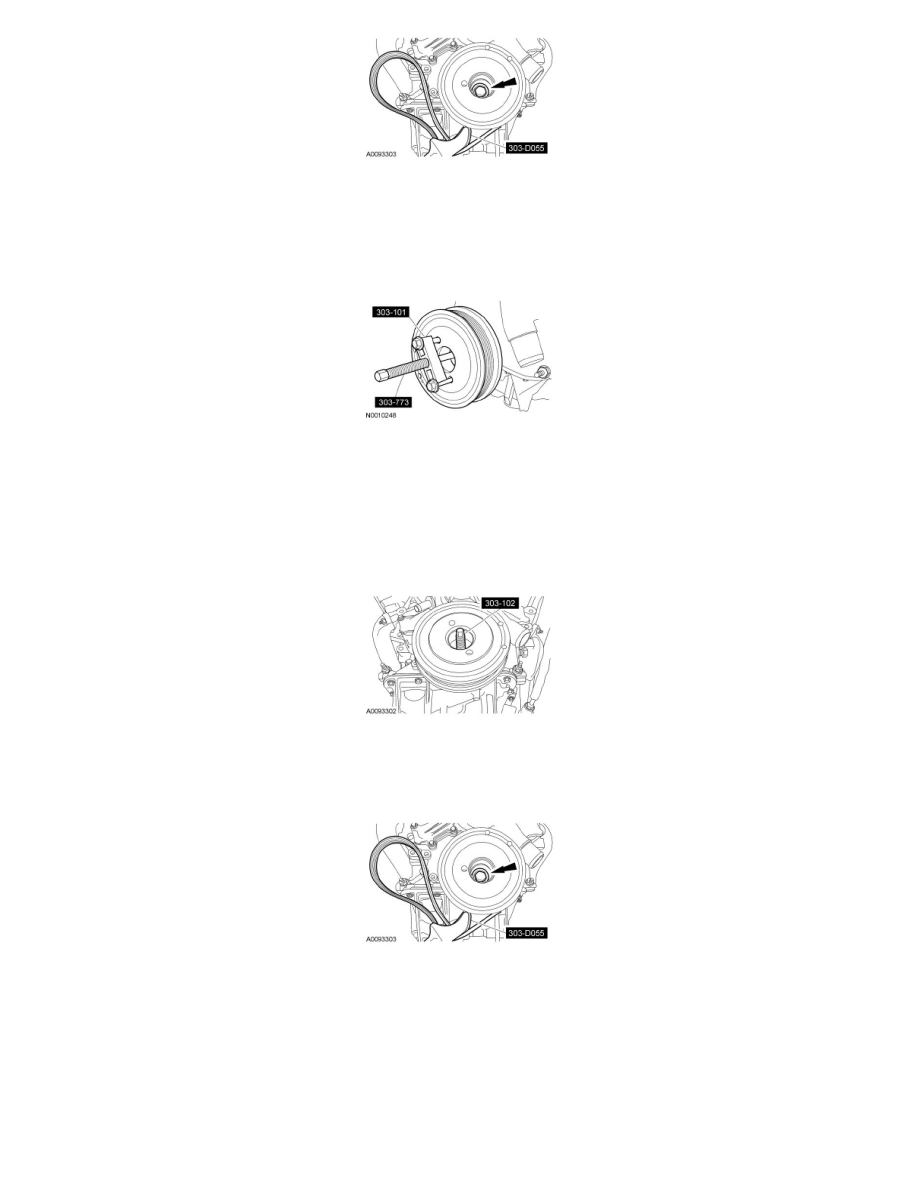
5. NOTE: If the pulley bolt is not installed, the tool will bottom out before the pulley is off.
Install the crankshaft pulley bolt 2 to 3 turns. Using the 2 Crankshaft Vibration Damper Removers and the two 8-mm bolts, remove the crankshaft
pulley.
-
Discard the crankshaft pulley bolt and washer.
Installation
1. NOTE: If not secured within 4 minutes, the sealant must be removed and the sealing area cleaned. To clean the sealing area, use silicone gasket
remover and metal surface prep. Follow the directions on the packaging. Failure to follow this procedure can cause future oil leakage.
Apply silicone gasket and sealant to the Woodruff key slot on the crankshaft pulley.
2. Using the Crankshaft Vibration Damper Installer, install the crankshaft pulley.
3. Using the Strap Wrench to hold the crankshaft pulley, install a new crankshaft pulley bolt and washer. Tighten the bolt in 2 stages.
-
Stage 1: Tighten to 55 Nm (41 lb-ft).
-
Stage 2: Tighten an additional 85 degrees.
4. Install the accessory drive belt. For additional information, refer to Drive Belts, Mounts, Brackets and Accessories.
5. Install the fan shroud. For additional information, refer to Cooling System &/or Engine Block Heater.