
Canyon 4WD V8-5.3L (2009)
13. Remove the seal and discard.
14. Clean the driveshaft bar, Use a wire brush to remove any rust in the seal mounting areas (grooves).
Check the D/O joint housing for unusual wear, cracks, or other damage. Replace the assembly if any damaged parts are evident.
Installation Procedure
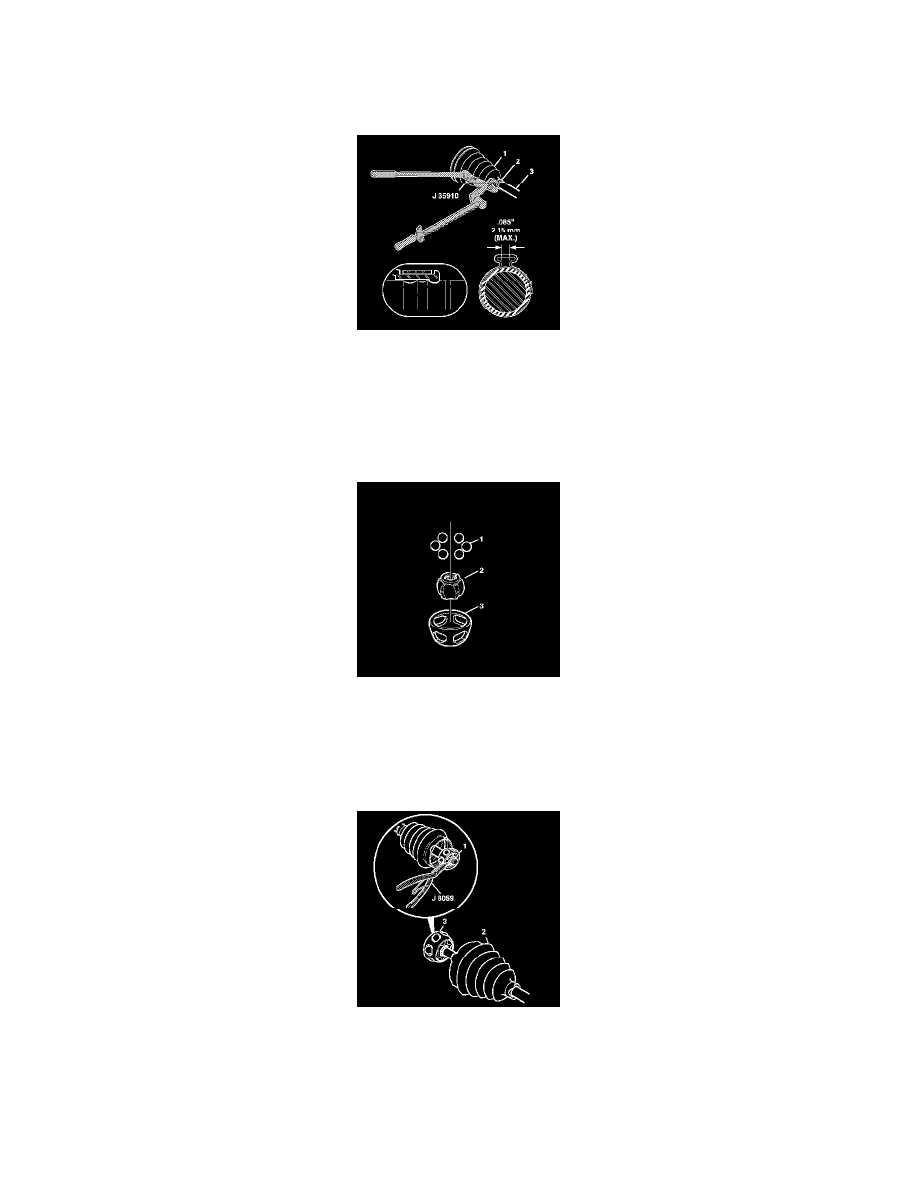
1. Install the new small retaining clamp (2) onto the neck of the seal (1).
2. Slide the small retaining clamp and seal to their proper position on the driveshaft bar (3).
Caution: Refer to Fastener Caution (See: Service Precautions/Vehicle Damage Warnings/Fastener Caution).
3. Secure the small retaining clamp using J 35910 (or equivalent), a breaker bar, and a torque wrench.
Tighten the small retaining clamp (2) to 136 Nm (100 lb ft).
Note: The cage (3) is NOT symmetrical; the larger outside diameter is the bottom of the cage.
4. Place the cage on the table large diameter side up.
5. Place the inner race (2) with retaining ring side up into the cage.
6. Place the six balls (1) in the cage windows.
7. Slide the cage/inner race assembly, small cage diameter first, onto the driveshaft bar.
8. Install the small retaining ring (1) using J 8059 into the groove of the driveshaft bar.