
K 2500 3/4 Ton Pickup 4WD V8-379 6.2L DSL VIN J FI (1982)
Once this inspection has been completed, the dealer should then perform a pressure test on the suspect tank to determine if there are any leaks. If the tank
does not pass the pressure test, the fuel tank should be removed and the sender unit retaining ring inspected visually for evidence of any "Lifting up" or
unevenness from the tank surface. "Lifting up" or unevenness of the sender unit retaining ring is an indication of fractured welds. Further verification of
fractured welds can be made by trying to pass a "feeler gauge" through the welds. Tanks with fractured sender unit retaining ring welds should be
replaced at no charge to the customer.
1.
With ignition key in run position, check fuel gauge to insure there is no more than 3/4 of a tank of fuel in vehicle. For auxiliary fuel tanks the fuel
tank transfer switch in the cab will need to be switched to "right side" position.
NOTICE:
In cases where fuel gauge indicates above 3/4 of a tank of fuel, remove enough fuel from tank so that a 3/4 gauge reading is indicated. Drain fuel tank
as described in section 6C of service manual.
2.
Disconnect negative battery cable after noting all electronic device settings.
3.
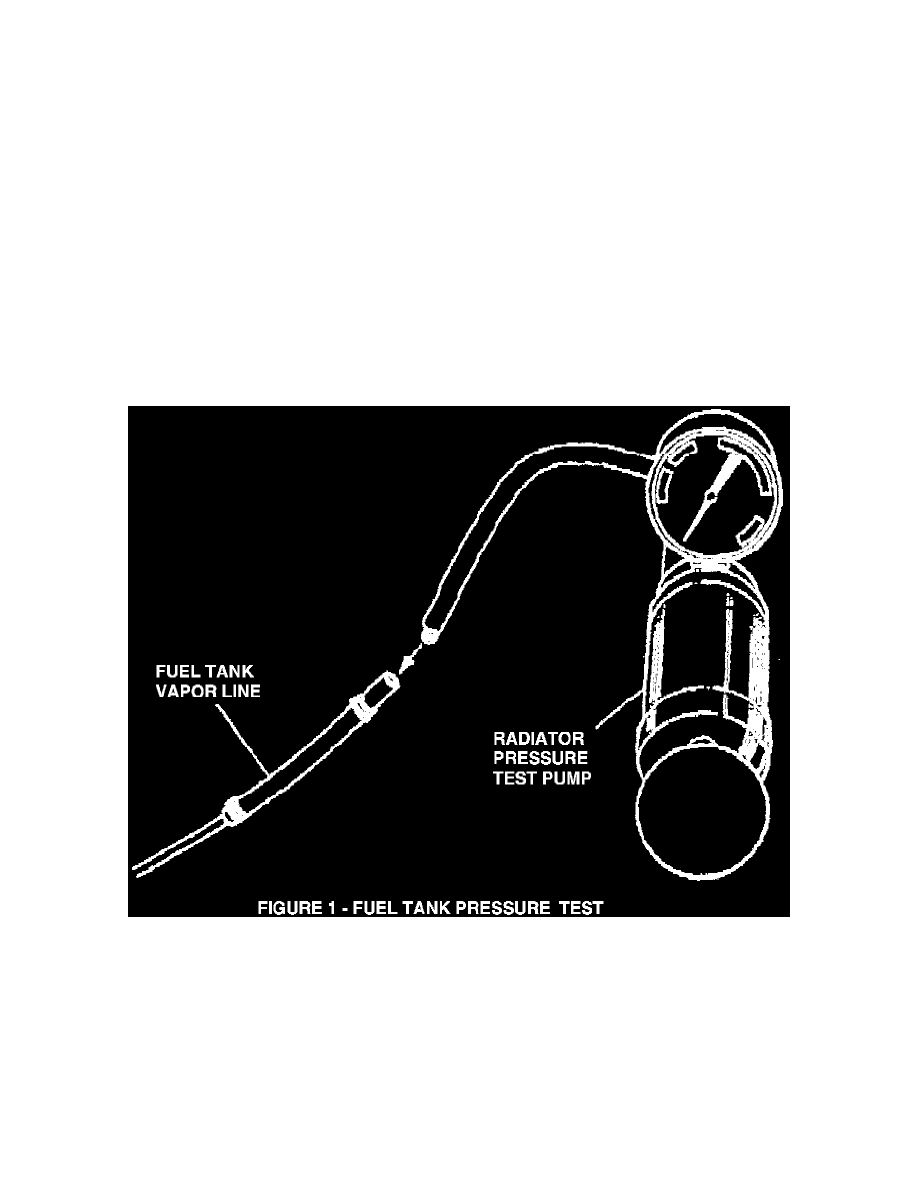
Disconnect radiator test cap from Radiator Pressure Test Pump (Kent Moore Tool J-24460-01 or equivalent) at hose to cap fitting.
4.
Pressurized fuel tank(s) in question following the applicable procedure shown below:
Trucks With One Fuel Tank:
Insert threaded end of radiator pressure tester hose fitting into fuel vapor line at fuel tank fuel vapor canister (Figure).
Trucks With Dual Tanks (RPO NL2):
Removed shield covering the electronic fuel tank transfer valve which is located inside the frame rails next to the auxiliary (right side) fuel tank.
Under the shield there is a T-connection, which connects each fuel tank vapor line to the fuel vapor canister line. For the fuel tank which is going
to be pressure tested, disconnect fuel tank vapor line from the T-connector. Insert threaded end of radiator pressure tester hose fitting into vapor
line (Figure).
5.
Pressurize fuel tank system to 1-2 psi. Note position of radiator pressure test pump gauge needle.
6.
Monitor pressure change which occurs. Note that a slow rate of pressure bleed off is normal due to radiator pressure test pump to fuel vapor