
Savana 3500 V8-4.8L (2009)
Radiator: Service and Repair
Radiator Replacement (Gas)
Special Tools
J 38185 Hose Clamp Pliers
Removal Procedure
Note: Always install a new set of insulators when replacing a radiator. Used insulators may be worn or too large for the new radiator. These conditions
may cause the new radiator to be loose.
1. Remove the air cleaner assembly. Refer to Air Cleaner Assembly Replacement (See: Engine/Tune-up and Engine Performance Checks/Air
Cleaner Housing/Service and Repair) for the 4.8L, 5.3L, 6.0L, 6.2L, 7.0L engines or Air Cleaner Assembly Replacement (See: Engine/Tune-up
and Engine Performance Checks/Air Cleaner Housing/Service and Repair) for the 4.3L engine.
2. Remove the coolant recovery reservoir. Refer to Coolant Recovery Reservoir Replacement (See: Coolant Reservoir/Service and Repair).
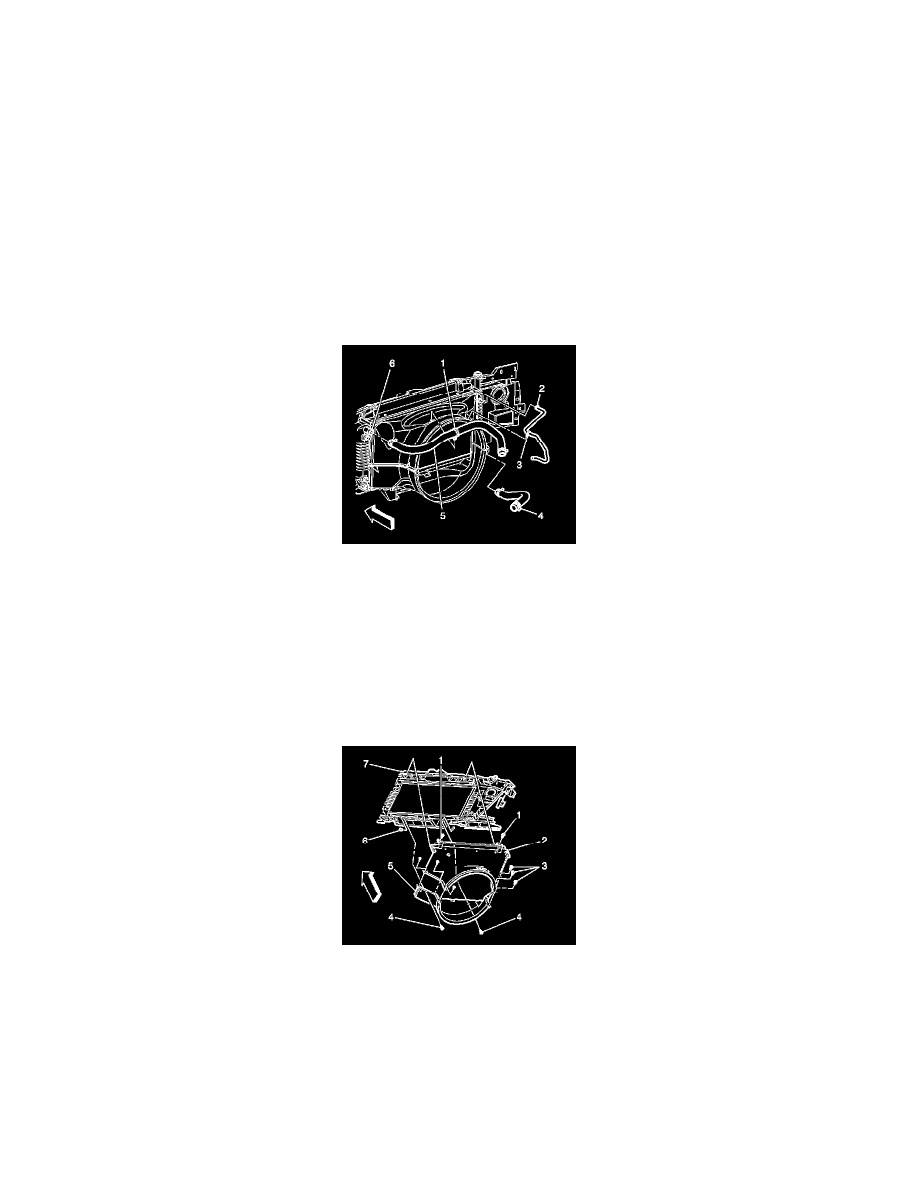
3. Remove the clamp at the radiator inlet using the J 38185 .
4. Remove the radiator inlet hose (5) from the radiator.
5. Remove the outlet heater hose clamp at the radiator using the J 38185 .
6. Remove the outlet heater hose (2) from the radiator.
7. Remove the automatic transmission cooler lines. Refer to Transmission Fluid Cooler Hose/Pipe Quick-Connect Fitting Disconnection and
Connection (See: Transmission and Drivetrain/Automatic Transmission/Transaxle/Fluid Line/Hose/Service and Repair) for the
4L60-E/4L65-E/4L70-E transmission or Transmission Fluid Cooler Hose/Pipe Quick-Connect Fitting Disconnection and Connection (See:
Transmission and Drivetrain/Automatic Transmission/Transaxle/Fluid Line/Hose/Service and Repair) for the 4L80-E/4L85-E transmission.
8. Remove the engine oil cooler lines. Refer to Engine Oil Cooler Pipe/Hose Quick Connect Fitting Replacement (See: Engine/Engine
Lubrication/Oil Cooler/Service and Repair/Engine Oil Cooler Pipe/Hose Quick Connect Fitting Replacement).
9. Remove the fan shroud bolts (1) from the top of the radiator support.
10. Remove the fan shroud bolts (3) from the sides of the fan shroud.