
Savana 3500 V8-4.8L (2009)
1. Apply a 5 mm (0.20 in) bead of sealant 20 mm (0.80 in) long to the oil pan to engine block junction. Refer to Adhesives, Fluids, Lubricants, and
Sealers (See: Specifications/Adhesives, Fluids, Lubricants, and Sealers) for the correct part number.
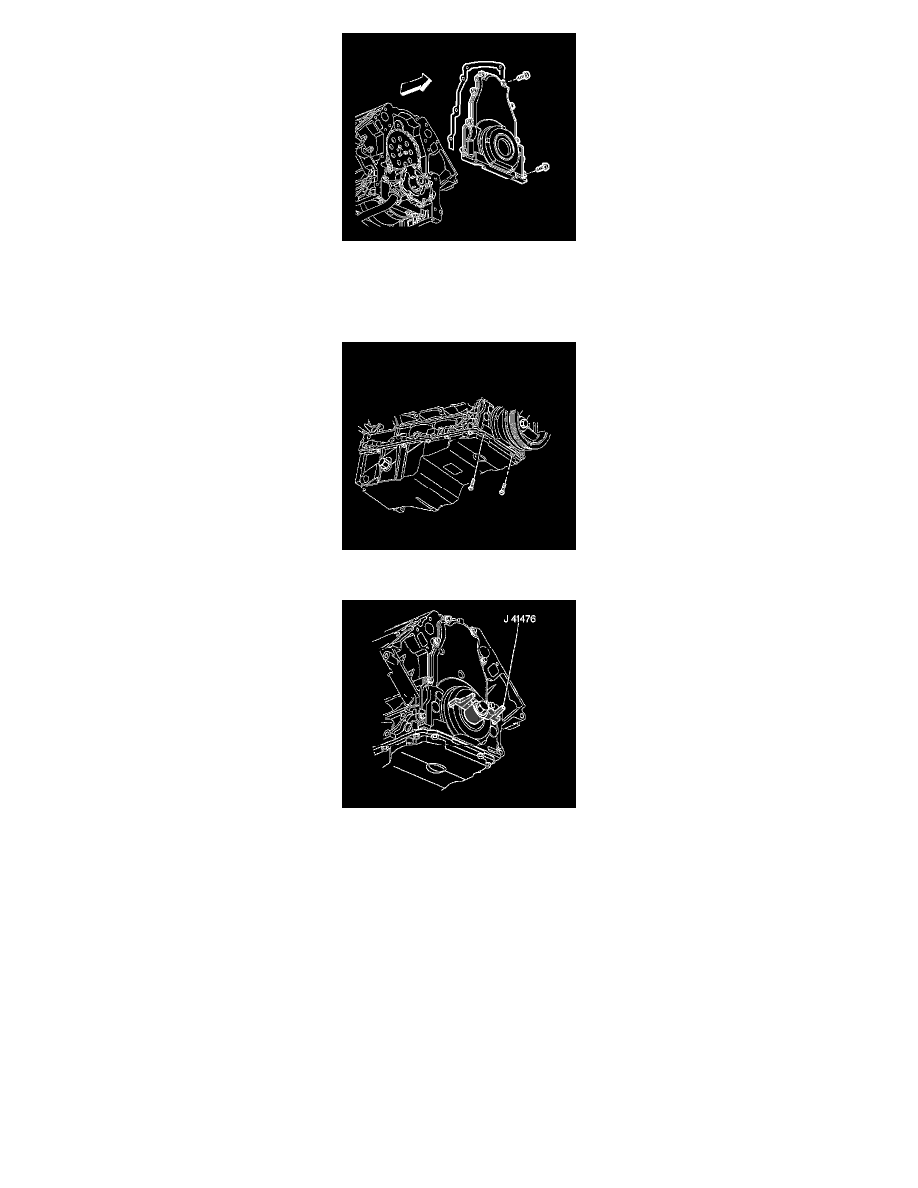
2. Install the front cover gasket and cover.
3. Install the front cover bolts until snug. Do not overtighten.
4. Install the oil pan-to-front cover bolts until snug. Do not over tighten.
5. Install J 41476 to the front cover.
6. Align the tapered legs of the J 41476 with the machined alignment surfaces on the front cover.
Caution: Refer to Fastener Caution (See: Service Precautions/Vehicle Damage Warnings/Fastener Caution).
7. Install the crankshaft balancer bolt until snug. Do not overtighten.
1. Tighten the oil pan to front cover bolts to 25 Nm (18 lb ft).
2. Tighten the engine front cover bolts to 25 Nm (18 lb ft).
8. Remove the J 41476 .
9. Install a NEW crankshaft front oil seal. Refer to Crankshaft Front Oil Seal Replacement (See: Seals and Gaskets/Front Crankshaft Seal/Service
and Repair).
10. Install the water pump. Refer to Water Pump Replacement (LU3) (See: Water Pump/Service and Repair)Water Pump Replacement (LMF/LY2)
(See: Water Pump/Service and Repair)Water Pump Replacement (LMM) (See: Water Pump/Service and Repair)Water Pump Replacement
(LY6) (See: Water Pump/Service and Repair).