
Accord L4-1955cc 2.0L SOHC 2-bbl (1986)
REPAIR PROCEDURE
1.
Shift the transmission into Park.
2.
Drain the transmission fluid.
3.
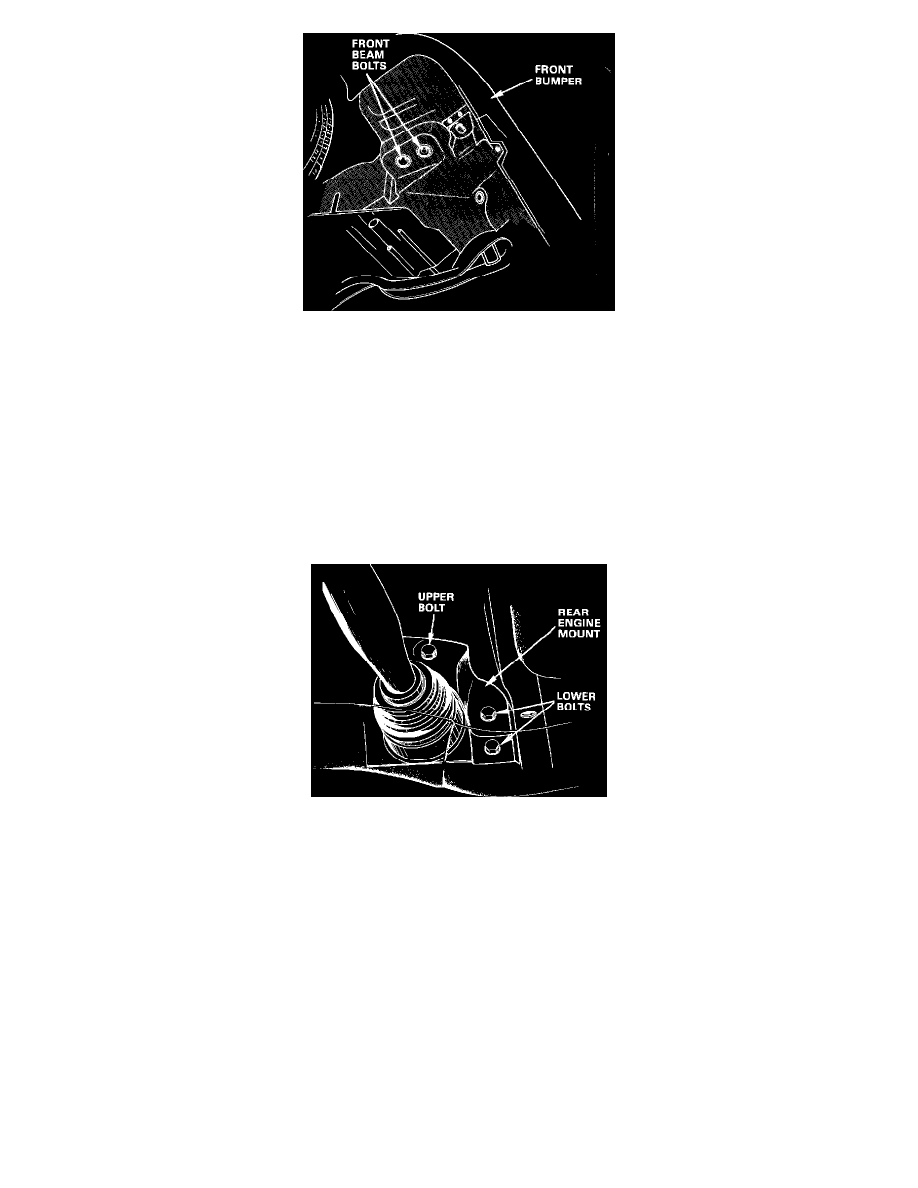
Remove the right front wheel and the right side of the splash shield.
4.
Remove the right radius rod.
5.
Remove the center beam.
6.
Support the front beam with a transmission jack and remove the 2 bolts from the right side of the beam
7.
Remove the 2 lower bolts and loosen, but do not remove, the upper bolt on the rear engine mount.
8.
Lower the front beam with the transmission jack until the transmission end cover clears the inner fender sheet metal, then remove the end cover.
CAUTION:
^
Do not lower the transmission more than necessary or you may cause the shift cable to become kinked.
^
Be careful not to bend the feed pipes when removing the end cover. (Bent feed pipes may cause O-ring failure, which may lead to clutch wear
and poor shift quality.) If a feed pipe gets bent, replace it.
9.
Using hand tools, remove the countershaft nut. CAUTION:
^
Do not use a power wrench on the countershaft flange nut, and do not push against the countershaft when removing or installing the nut.
Either of these actions may cause the split retainers on the countershaft to become dislodged, and will result in transmission damage.
^
If a piece of the countershaft nut's flange is missing, the transmission must be disassembled, inspected and repaired as necessary.
10.
Install a new countershaft flange nut and torque to 120 N-m (12 kg-m, 90 ft.lbs.) for the 20 mm nut (P/N 90201-689-900), or 140 N-m (14/kg-m,
102 ft.lbs.) for the 23 mm nut (P/N 90202-PF4-000).