Accord V6-3.0L (2003)

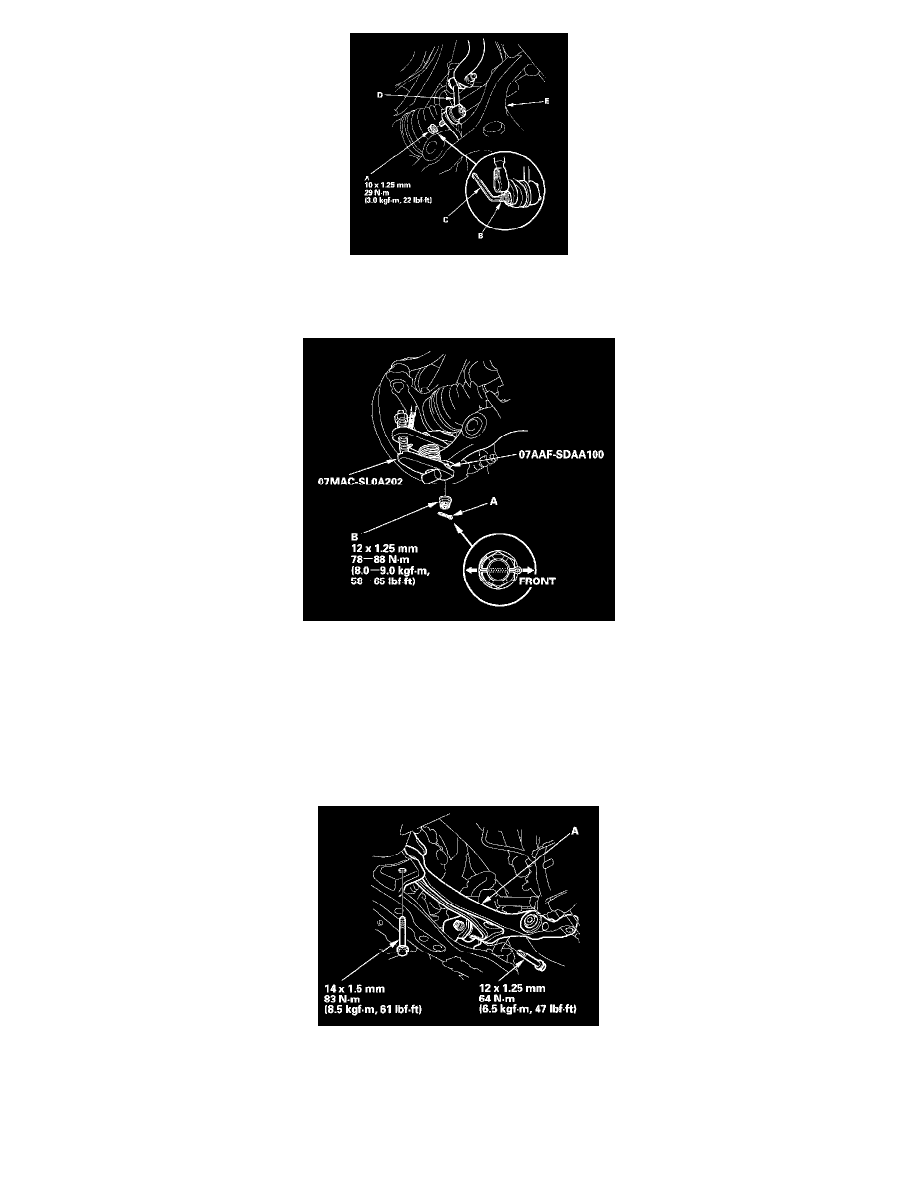
4. Remove the flange nut (A) while holding the joint pin (B) with a hex wrench (C), and disconnect the stabilizer link (D) from the lower arm (E).
NOTE: During installation, install a new flange nut.
5. Remove the cotter pin (A) from the lower arm ball joint castle nut (B), and remove the nut.
NOTE:
^
To avoid damaging the ball joint, install the ball joint thread protector on the threads of the ball joint.
^
Be careful not to damage the ball joint boot when installing the ball joint remover.
^
Do not force or hammer on the lower arm, or pry between the lower arm and knuckle. You could damage the ball joint.
^
Insert the new cotter pin into the ball joint pin hole from the front to the rear of vehicle, and bend its end as shown.
6. Disconnect the lower arm ball joint from the knuckle using the ball joint thread protector and the ball joint remover.
7. Remove the flange bolts, and remove the lower arm (A).
NOTE: During installation, install the new flange bolts.
8. Install the lower arm in the reverse order of removal, and note these items:
