
Accord V6-3.0L Hybrid (2005)
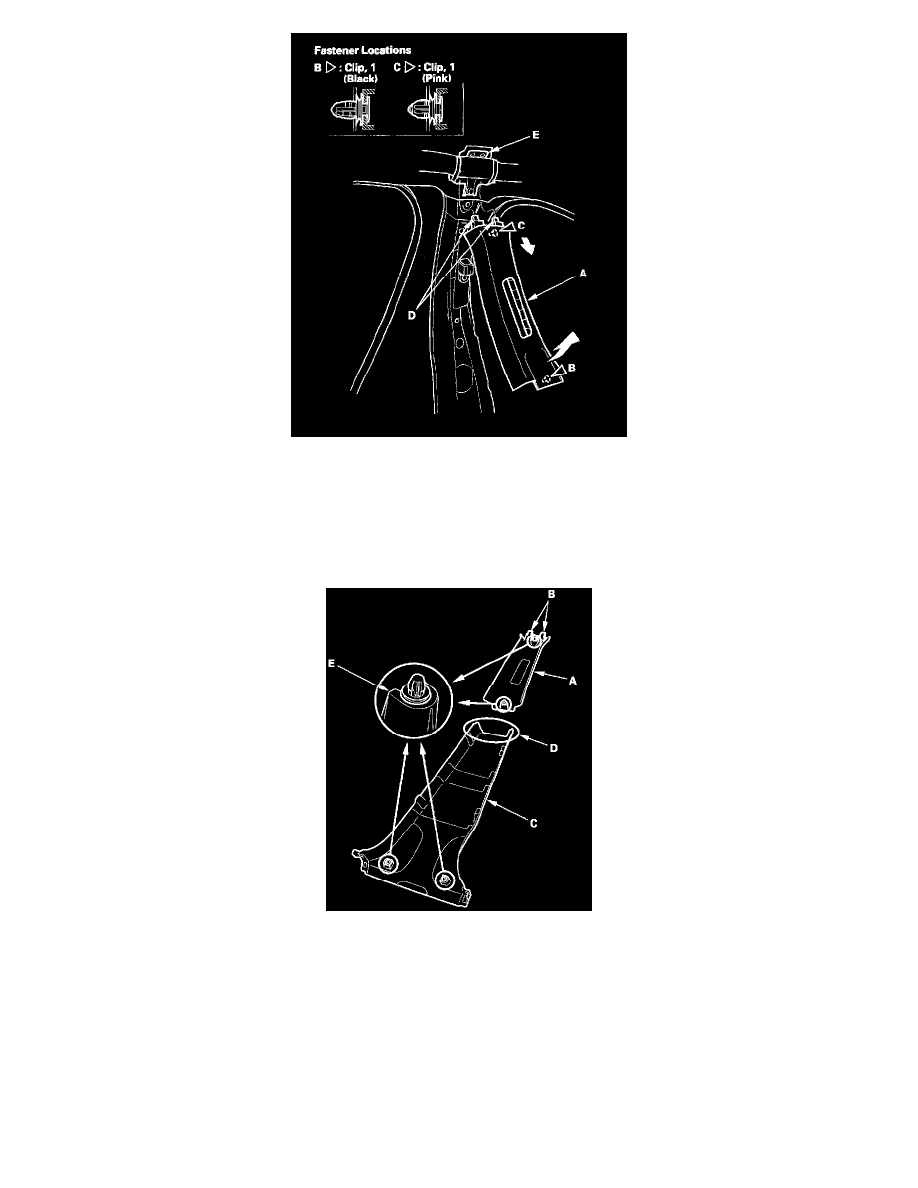
4. Remove the B-pillar upper trim (A).
1. Pull the bottom of the trim back by hand to detach the lower clip (B).
2. Detach the upper clip (C) by pulling the top of the trim.
3. Pull the trim down to release the upper hooks (D) from the side curtain airbag B-pillar bracket (E).
5. Install the trim in the reverse order of removal, and note these items:
-
Check for damaged or stress-whitened clips, and replace them with new ones.
-
If the side curtain airbag has deployed, replace the B-pillar upper trim with a new one.
-
To prevent the side curtain airbags from deploying improperly and possibly causing injury, inspect removed pieces and replace them if they
have any of these types of damage:
-
Any cracks or deformations in the B-pillar upper trim (A) and the upper hooks (B), and any stress-whitened areas in the upper part of the
trim
-
Any cracks or deformations in the B-pillar lower trim (C), and any breakages in the part (D) that fits into the B-pillar upper trim
-
Any cracks or stress-whitened areas in the clip seating surfaces (E)
-
Replace any damaged parts with new ones.
-
Make sure the top of the trim overlaps with the headliner correctly.
-
Make sure the trim hooks are installed into the holes in the side curtain airbag B-pillar bracket securely.
-
Push the clips into place securely.
-
Apply medium strength liquid thread lock to the front seat belt upper anchor bolt before reinstallation.
-
Before installing the anchor bolt, make sure there are no twists or kinks in the seat belt.