
Civic L4-1.3L Hybrid (2008)
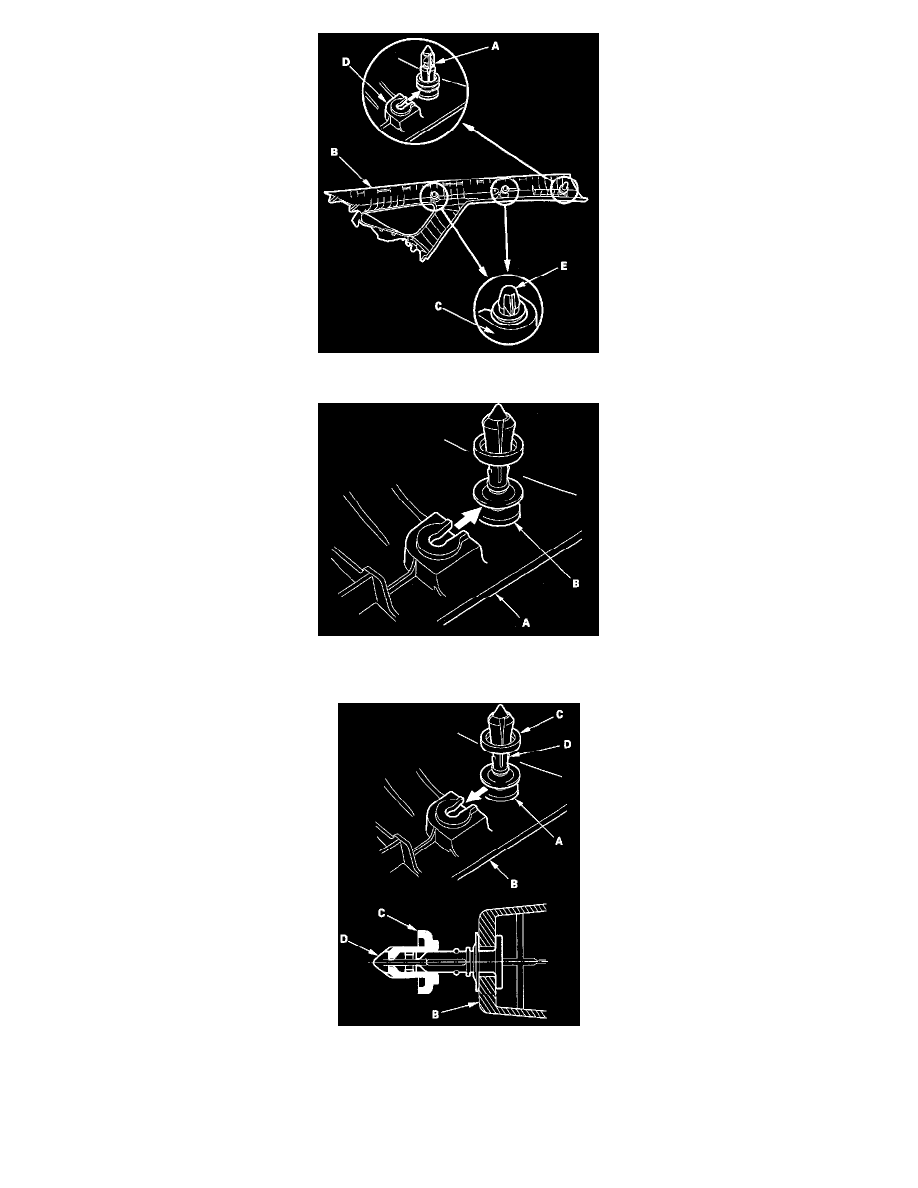
7. Before installing the A-pillar trim (A), whether it is being replaced or reinstalled, temporarily remove the new upper clip (B).
8. Check the overlap between the headliner and A-pillar trim, and if necessary, adjust it.
9. Carefully install a new upper clip (A) to the A-pillar trim (B). Be sure that the grommet (C) is nearest to the top of the pin (D) as shown.
10. Reinstall the A-pillar trim (A).
1. Insert the bottom of the trim into the dashboard (B).
2. Place the trim over the A-pillar (C), and fit its upper clip (D), and lower clips into the holes (E)in the A-pillar, then lightly push the trim into
place.
NOTE: