
Civic L4-1.8L (2006)
6.
Remove the water pump pulley.
7.
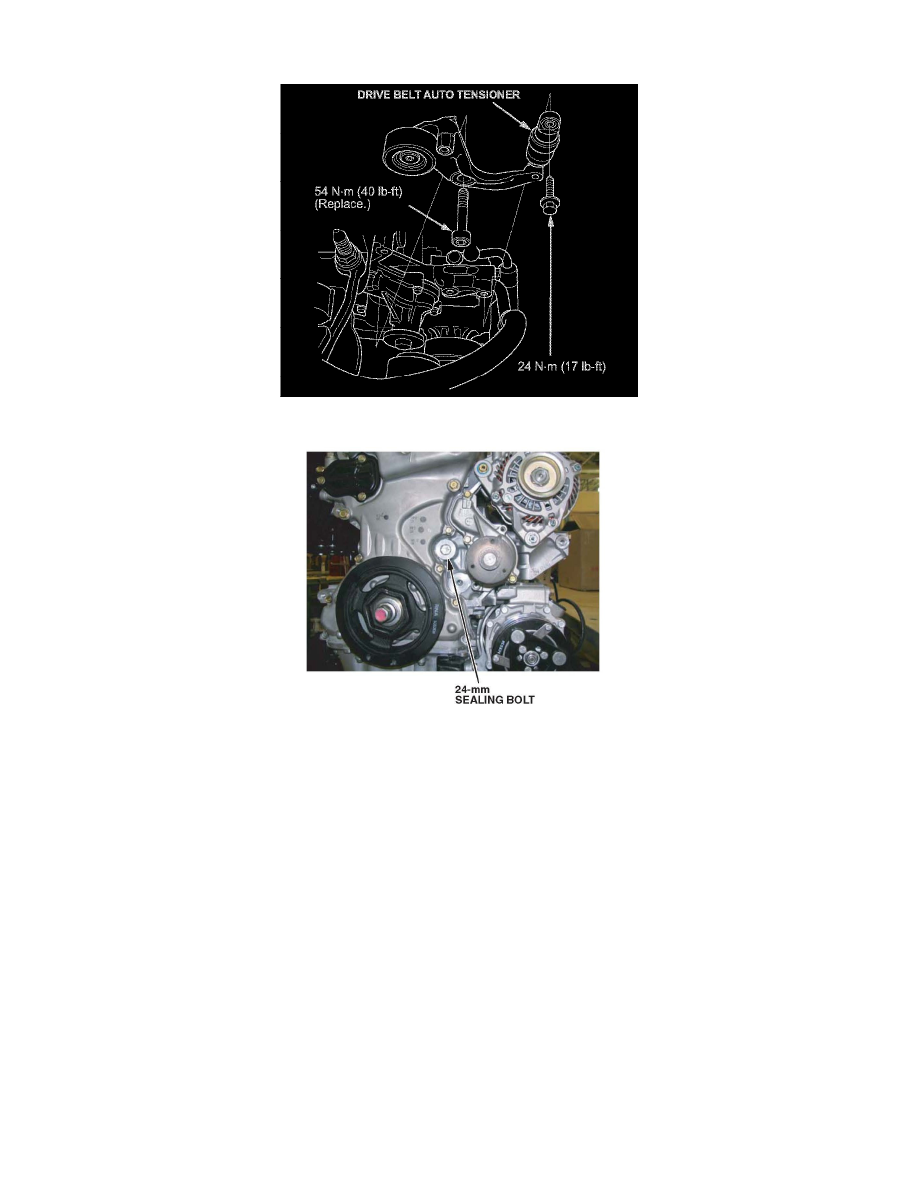
Remove the drive belt auto tensioner assembly, and store it vertically to prevent oil leakage that may change the dampening specification.
8.
Remove the 24-mm sealing bolt and its washer.
9.
Clean the sealer out of the block threads by running a pick tool or a toothbrush along the threads.
NOTE:
Pull any material from the threads out of the engine block. Do not push it in.
10.
Coat the sealing surface on the engine block with clean engine oil.
11.
Install a new sealing bolt and washer. Torque the sealing bolt to 60 N.m (45 lb-ft).
12.
Reinstall the drive belt auto tensioner, the water pump pulley, and the drive belt in the reverse order of removal.
NOTE:
*^ Use a new bolt to install the drive belt auto tensioner.
^
The bolt is located in a difficult location. Use Snap-on 8 mm hex socket (T/N FAM8E) and 3/8 flex ratchet torque wrench (T/N
QD2FR75), or equivalent, to properly torque the bolt.*
Repair Procedure B
REPAIR PROCEDURE B - REPLACE THE 24-MM BOLT ON THE TRANSMISSION END OF THE ENGINE
NOTE:
Because it is difficult to determine if the transmission end crankshaft oil seal or the sealing bolt is causing the leak, replace both parts.