
S2000 L4-2.2L (2004)
1. Apply grease to the inside surface of the pinion dust seal (A).
2. Insert the steering shaft (B) into the engine compartment carefully to avoid damaging the pinion dust seal. Make sure the shaft comes out of frame
hole.
3. Install the steering column with the column mounting nuts and column holder.
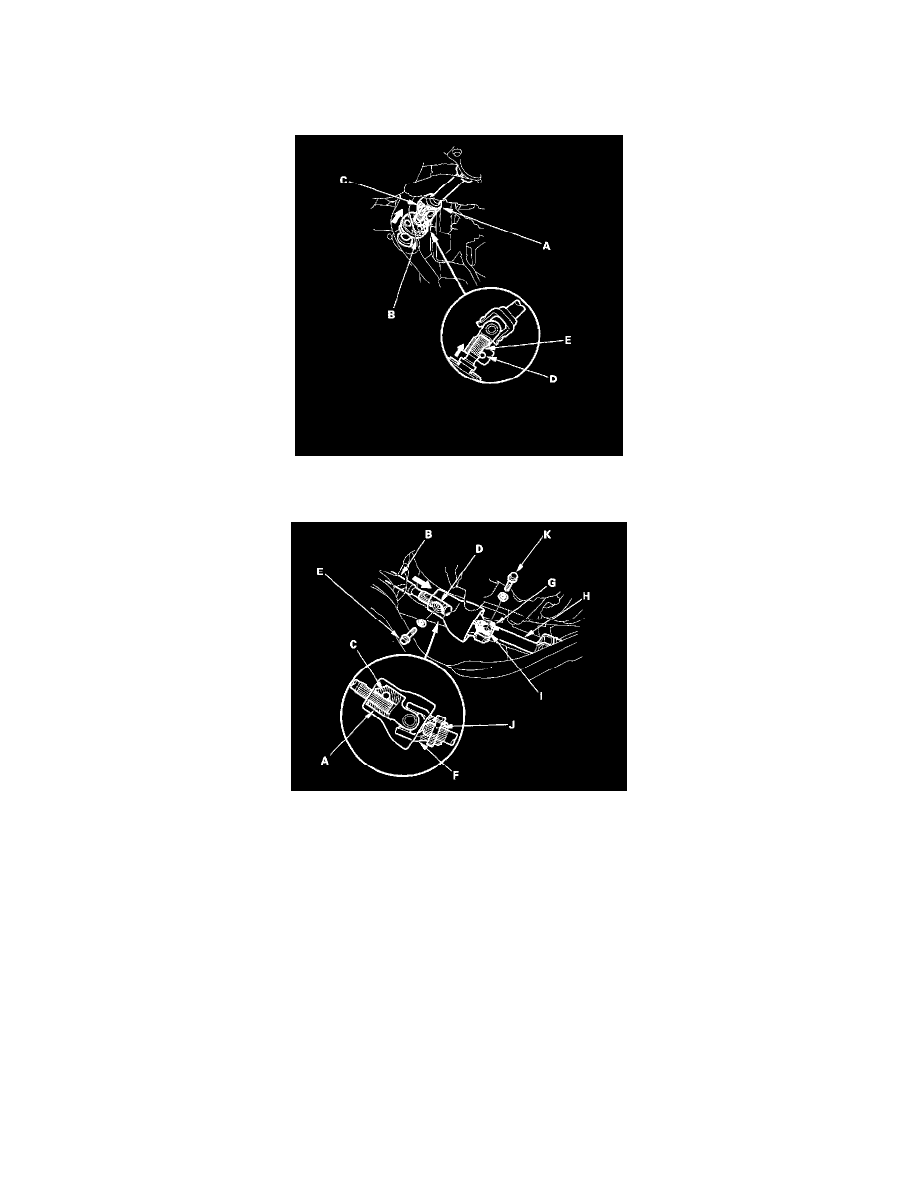
4. Slip the joint (A) of the column shaft onto the steering shaft (B), then loosely install the joint bolt (C) (line up the bolt hole (D) with the flat
portion (E) of the shaft). Pull the steering shaft toward the column.
5. Slip the upper end (A) of the steering joint onto the steering shaft (B) (from the engine compartment). Be sure the steering joint and steering shaft
are aligned with the serrations; the joint should slip on freely. If not, reposition the serration of the steering joint.
6. Line up the bolt hole (C) with the flat portion (D) of the shaft (B), and loosely install the upper joint bolt (E). Pull the steering joint to make sure
that the joint is fully seated.
7. Slip on the lower end (F) of the steering joint by aligning the marks (G) on the pinion shaft (H) and joint. Line up the bolt hole (I) with groove
around (J) the pinion shaft, and install the lower joint bolt (K) and tighten it by hand. Don't torque the bolt yet. Pull the steering joint to make sure
that the joint is fully seated.
8. Pull the steering shaft toward the pinion shaft. Then tighten the upper joint bolt (E), the lower joint bolt (K) (both in the engine compartment), and
the joint bolt on column shaft (under the dashboard) to the specified torque.
US thru VIN JHMAP 114YT008411
Canada thru VIN JHMAP 114.YT800750
Torque: 22 Nm (2.2 kgf-cm, 16 ft. lbs.)
US from VIN JHMAP 11 4YT008412
Canada from VIN JHMAP 114YT800751
Torque: 29 Nm (3.0 kgf-cm, 22 ft. lbs.)