
S2000 L4-2.2L (2004)
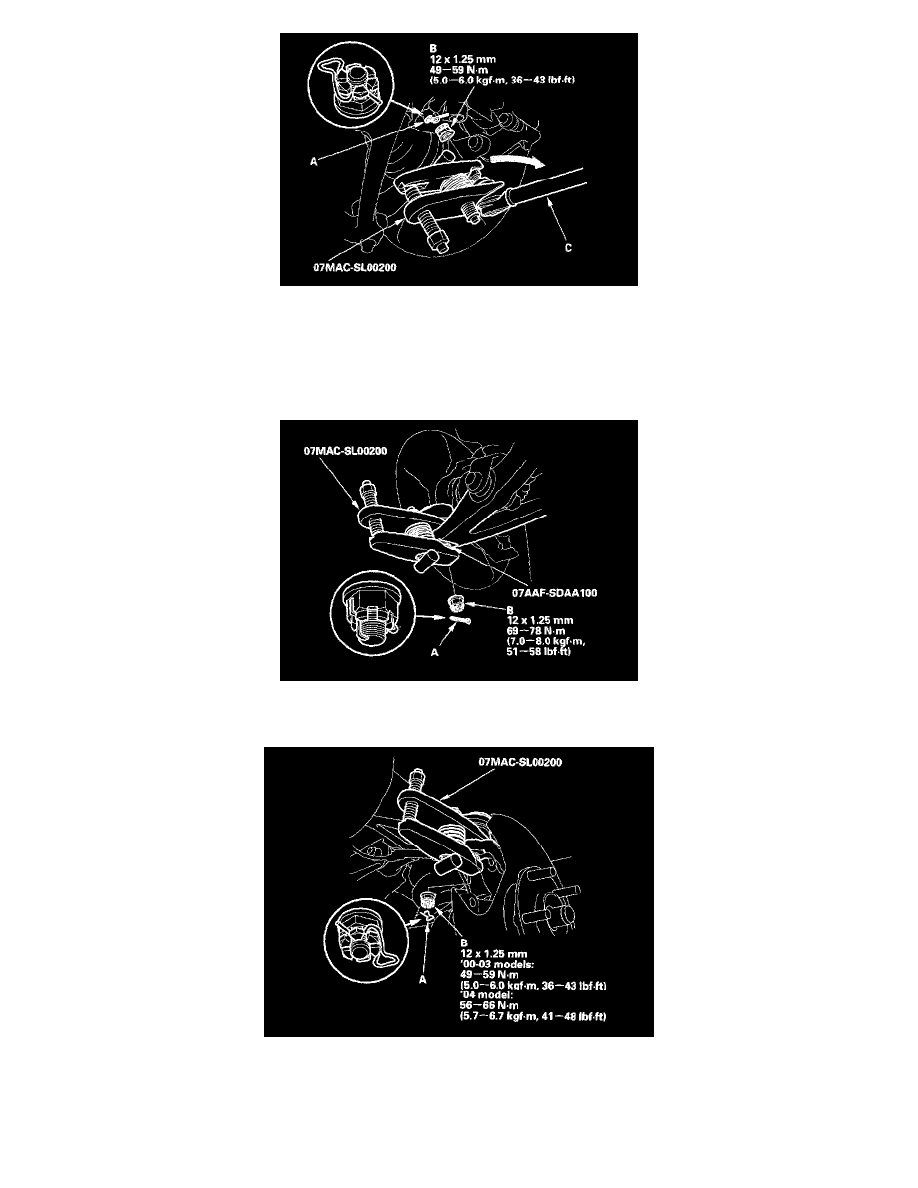
11. Remove the lock pin (A) from the control arm ball joint, and remove the castle nut (B).
12. Disconnect the control arm ball joint from the knuckle using the special tool.
NOTE: Turn the control arm (C) outward to install the ball joint remover.
13. Remove the control arm.
14. Remove the cotter pin (A) from the lower arm ball joint, and remove the castle nut (B).
15. Disconnect the lower arm ball joint from the knuckle using the special tools.
16. Remove the lock pin (A) from the upper arm ball joint, and remove the castle nut (B).
17. Disconnect the upper arm ball joint from the knuckle using the special tool.