
Accent L4-1.6L (2003)
1. Remove the vacuum hose.
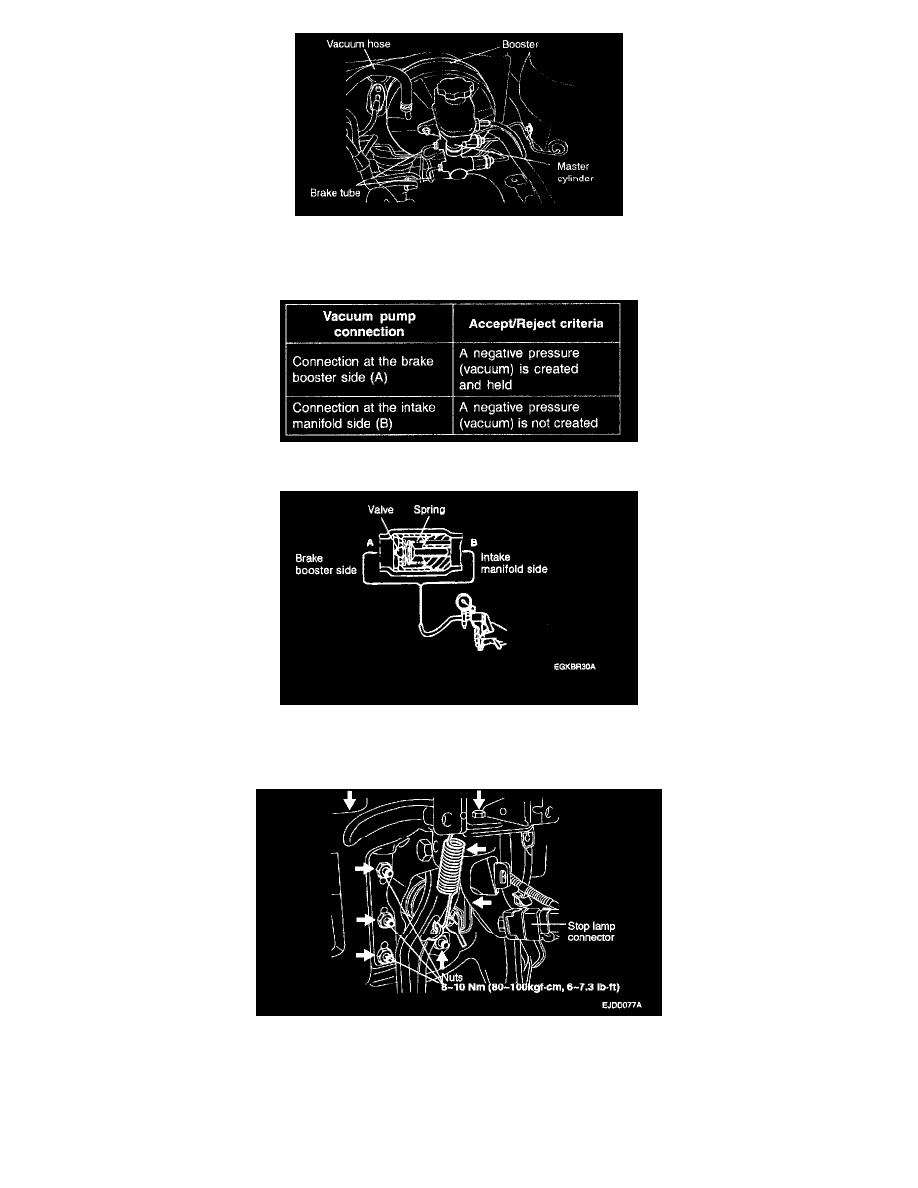
NOTE: The check valve is press-fitted inside the vacuum hose at the position of the marking.
2. Check the operation of the check valve by using a vacuum pump.
CAUTION: If the check valve is defective, replace it if an assembly unit together with the vacuum hose.
INSTALLATION
1. Install the brake booster and tighten the mounting nut.
Tightening torque Nm (kgf-cm, ft. lbs.)
Brake booster mounting nut: 8 - 10 Nm (80 - 100 kgf-cm, 6 - 7.3 ft. lbs.)
2. Apply grease to the contact points of the brake pedal and the push rod.
3. Connect the brake pedal and the clevis with a clevis pin and install the split pin to the clevis pin.