
Sonata GLS V6-2.7L (2002)
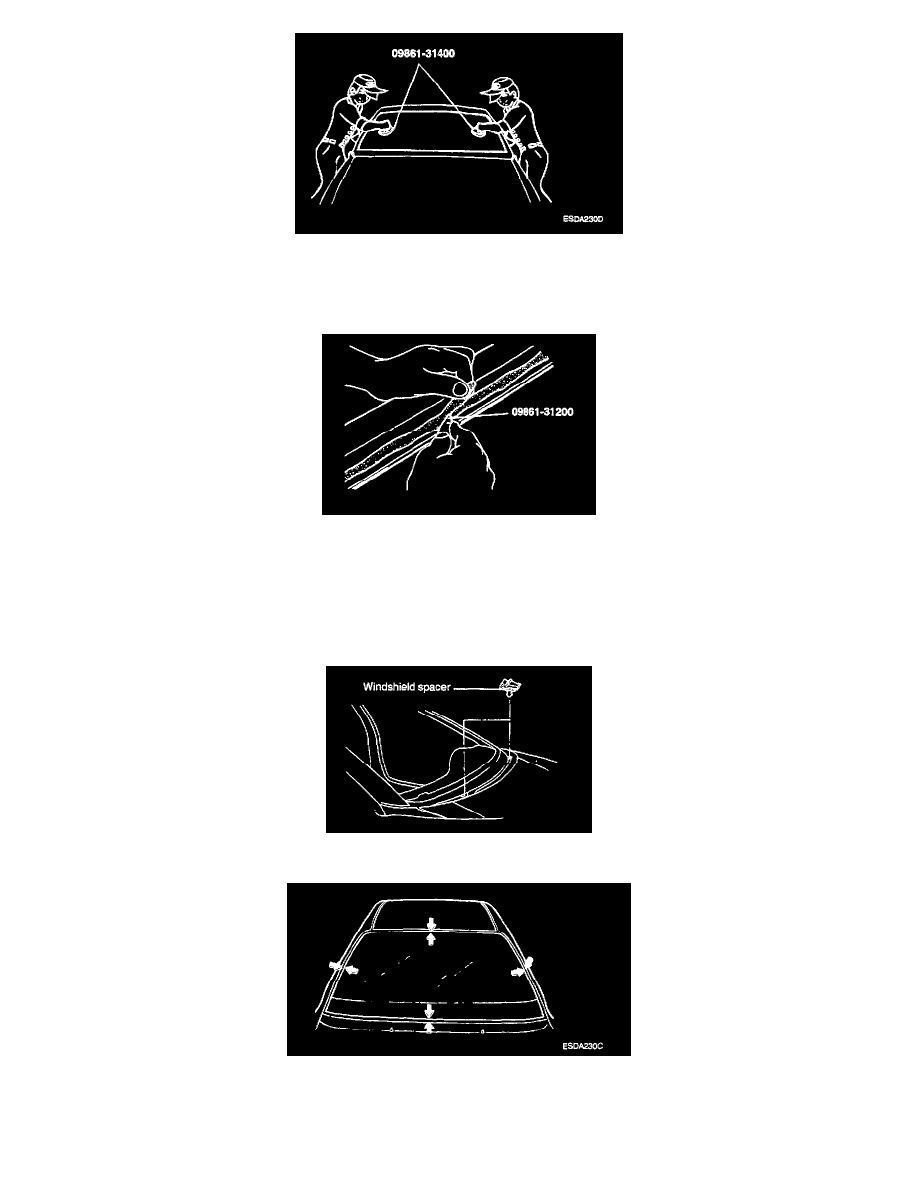
7. Take out the windshield glass with the special tool (09861 - 31400), Glass Holder.
8. Check the body flange for deformation.
INSTALLATION
1. Using a knife or the special tool (09861 - 31200), Cut the old sealant smoothly to a thickness of about 2 mm (0.08 in.) on the bonding surface
around the entire windshield flange.
CAUTION: Be careful not to remove more adhesive than necessary, and also not to damage the paint work on the body surface with the knife. If
the paint work is damaged, repair the damaged area with touch-up paint.
2. Clean the body bonding surface with a sponge dampened in alcohol, or wax and grease remover.
3. Install the windshield glass spacer at the locations as shown in the illustration.
4. Center the new windshield glass in the opening. Mark the location by scribing lines across the glass and body with a grease pencil at the four
points as shown.