
Sonata GLS V6-2.7L (2002)
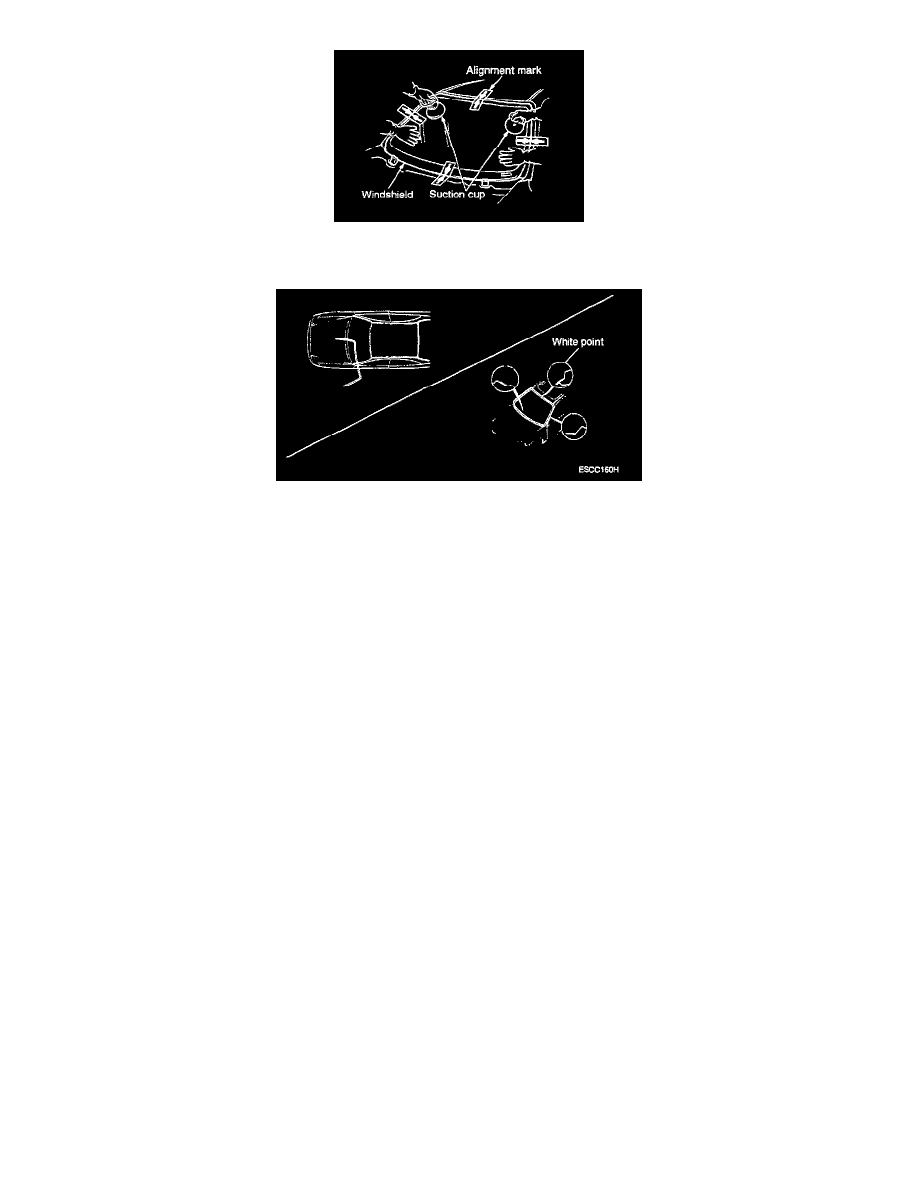
10. Using the suction cups or the special tool(09861 - 31400), lower the glass over the opening to align it with the marks made in step 4 and set it
down on the sealant. Insert two lower spacers to prevent the windshield from moving downward.
11. Align marks of the windshield glass molding (white point in the glass molding) and inside roof molding.
12. Press the glass molding from center of the car to the left pillar and right pillar simultaneously.
13. Let the adhesive dry for at least one hour, then spray water over the windshield and check for leaks. If there are leaks, dry the affected area, then
apply sealant.
NOTE
-
Let the car stand for at least four hours after windshield installation. If the car has to be used within the first 8 hours, it must be driven slowly.
-
Keep the windshield dry for the first hour after installation.
14. Install the removed parts.
NOTE: Advise the customer not to do the following things for two to three days:
-
Slam the doors with all the windows rolled up.
-
Twist the body excessively (such as when going in and out of driveways at an angle or driving over rough, uneven roads).