
Tiburon L4-1.8L (1997)
Drive Belt: Adjustments
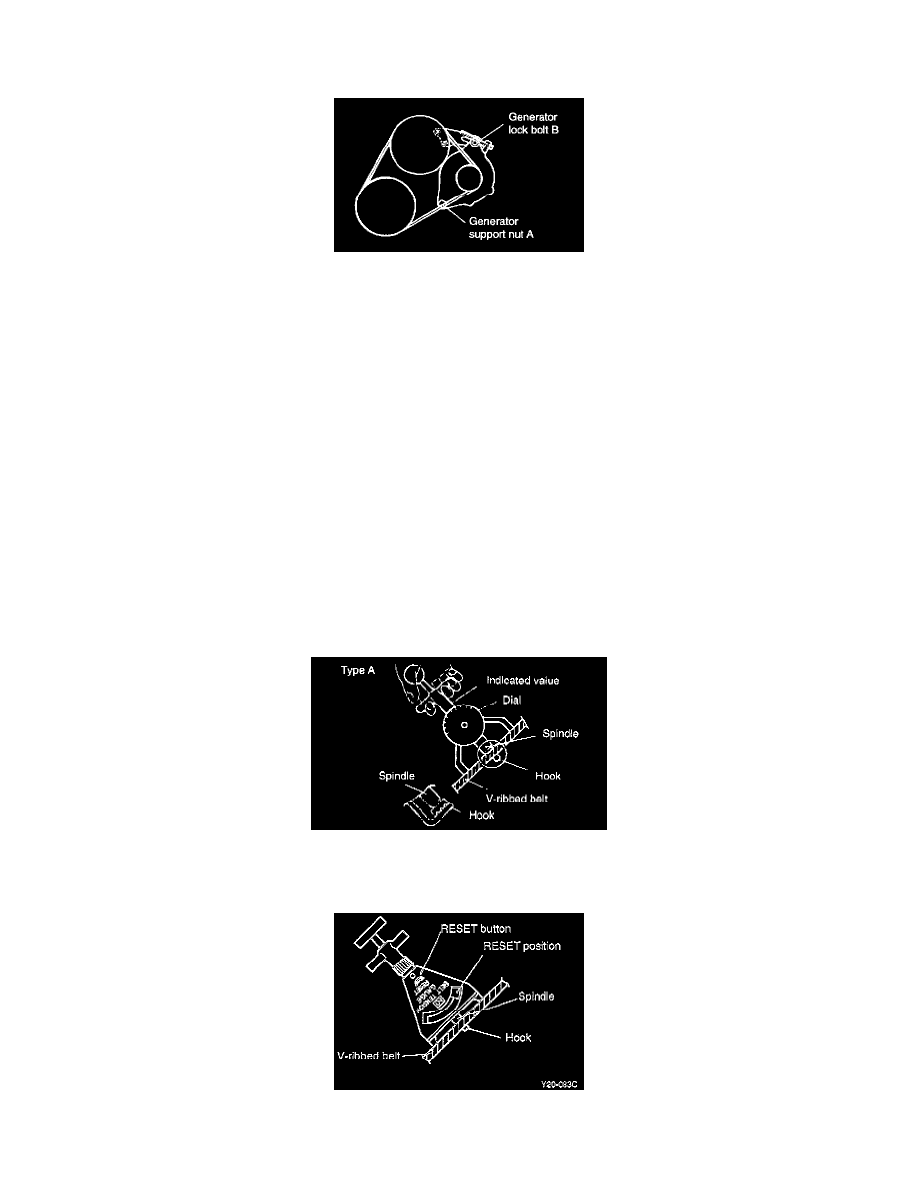
Alternator
ADJUSTMENT PROCEDURE
NOTE:
-
The belt tension/deflection must be measured between the specified pulleys.
-
When a new belt is installed, adjust the tension/deflection to the center of the standard range indicated under "New." Let the engine idle for 5
minutes or more, and check the standard value indicated under "inspection."
-
When adjusting a used belt or a newly installed belt after 5 minutes or more of operation, refer to the standard value indicated under "Used."
-
Refer to the standard value indicated under "Inspection" for periodic inspections.
CAUTION:
-
If the belt is too loose, there will be noise or premature wear.
-
If the belt is too tight, the water pump bearing or the alternator will be damaged.
1. Loosen the alternator support nut "A" and the tension adjuster lock bolt "B"
2. Using the tension adjuster bolt, adjust the belt tension to specification.
3. Tighten the adjuster lock bolt "B" to 12-12Nm (120-150 kg.cm, 9-11 lb.ft).
4. Tighten the alternator support nut "A" to 20-25Nm (200-250 kg.cm, 14-18 lb.ft).
5. Check the tension or the deflection of belt as follows:
CHECKING PROCEDURE
Tension Method
With Type "A" Tension Gauge
Do not let the dial section of the tension gauge contact other objects during measurement.
With Type "B" Tension Gauge
1.
When measuring, turn the reset button in the direction of the arrow to set the gauge needle to the RESET position.
2.
When the tension gauge is removed from the belt, the needle will still indicate the tension. Read the tension after removing the gauge.