
XG 350 V6-3.5L (2002)
INSTALLATION
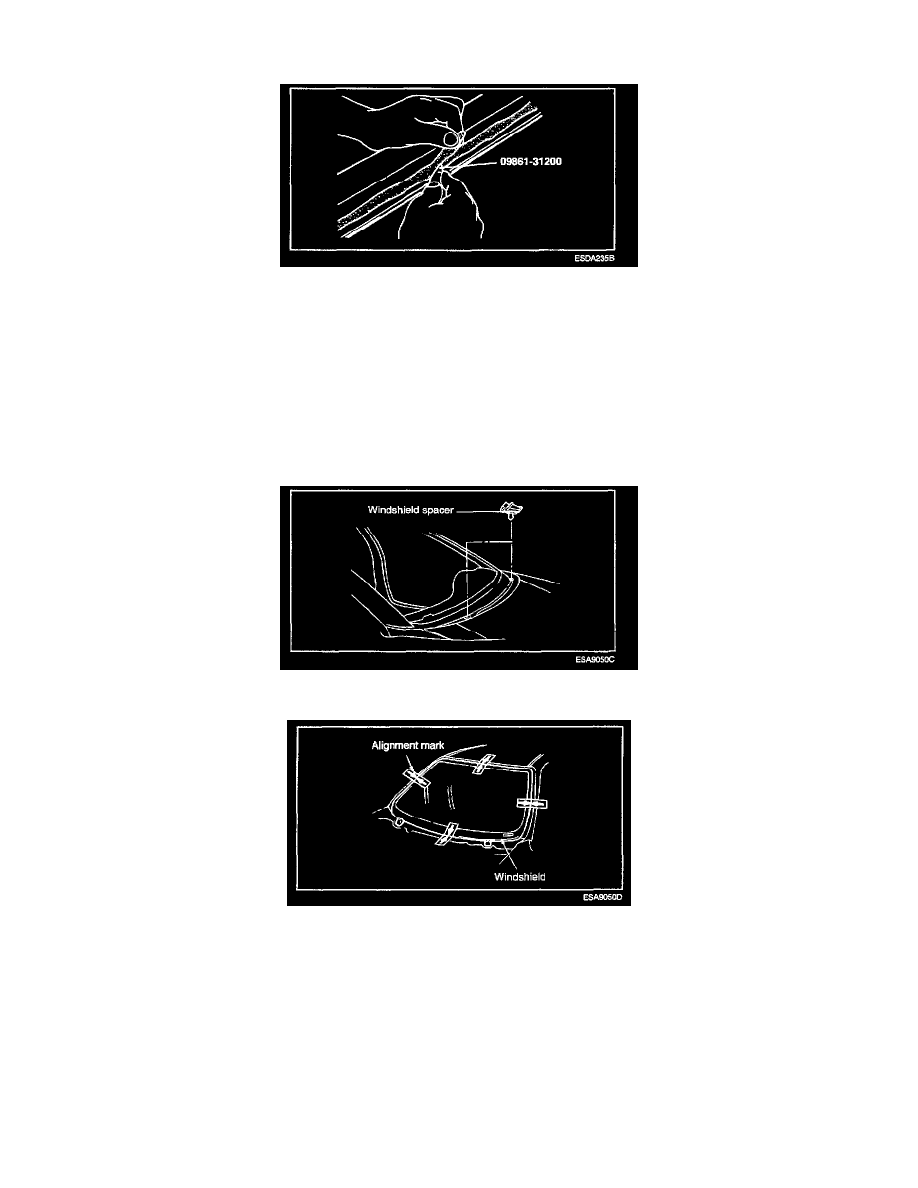
1. Using a knife or the special tool (09861 - 31200), cut the old sealant smoothly to a thickness of about 2 mm (0.08 in.) on the bonding surface
around the entire windshield flange.
CAUTION: Be careful not to remove more adhesive than necessary, and also not to damage the paint- work on the body surface with the knife. If
the paint work is damaged, repair the damaged area with touch-up paint.
2. Clean the body bonding surface with a sponge dampened in alcohol, or wax and grease remover.
3. When reusing the glass, remove the adhesive still adhered to the glass, and clean with isopropyl alcohol. Clean the body side in the same way.
CAUTION: Let the cleaned areas stand for 1 minutes or more, and carry out the next procedures after they have dried. Also, do not touch any
surface that has been cleaned.
4. Install the windshield glass spacer at the locations as shown in illustration.
5. When replacing the glass, temporarily set the glass against the body, and place mating marks on the glass and body.
Use unleaded petrol to degrease the inside and outside of the windshield glass and the body flanges.