
Commander 2WD V8-4.7L Flex Fuel (2009)
Trunk / Liftgate Motor: Service and Repair
Power Liftgate Drive Unit - Removal
REMOVAL
1. Open the liftgate.
2. Disconnect and isolate the battery negative cable.
3. Remove the link rod assembly from the liftgate attachment point, See: Power Liftgate Link Rod - Removal.
4. Remove the left rear D-pillar trim panel from the vehicle, See: Interior Moulding / Trim/Trim Panel/Service and Repair/Pillar Trim/D-Pillar
Trim/Removal.
5. Remove the left quarter trim panel, See: Interior Moulding / Trim/Trim Panel/Service and Repair/Luggage Compartment Trim/Quarter Trim Panel
- Removal.
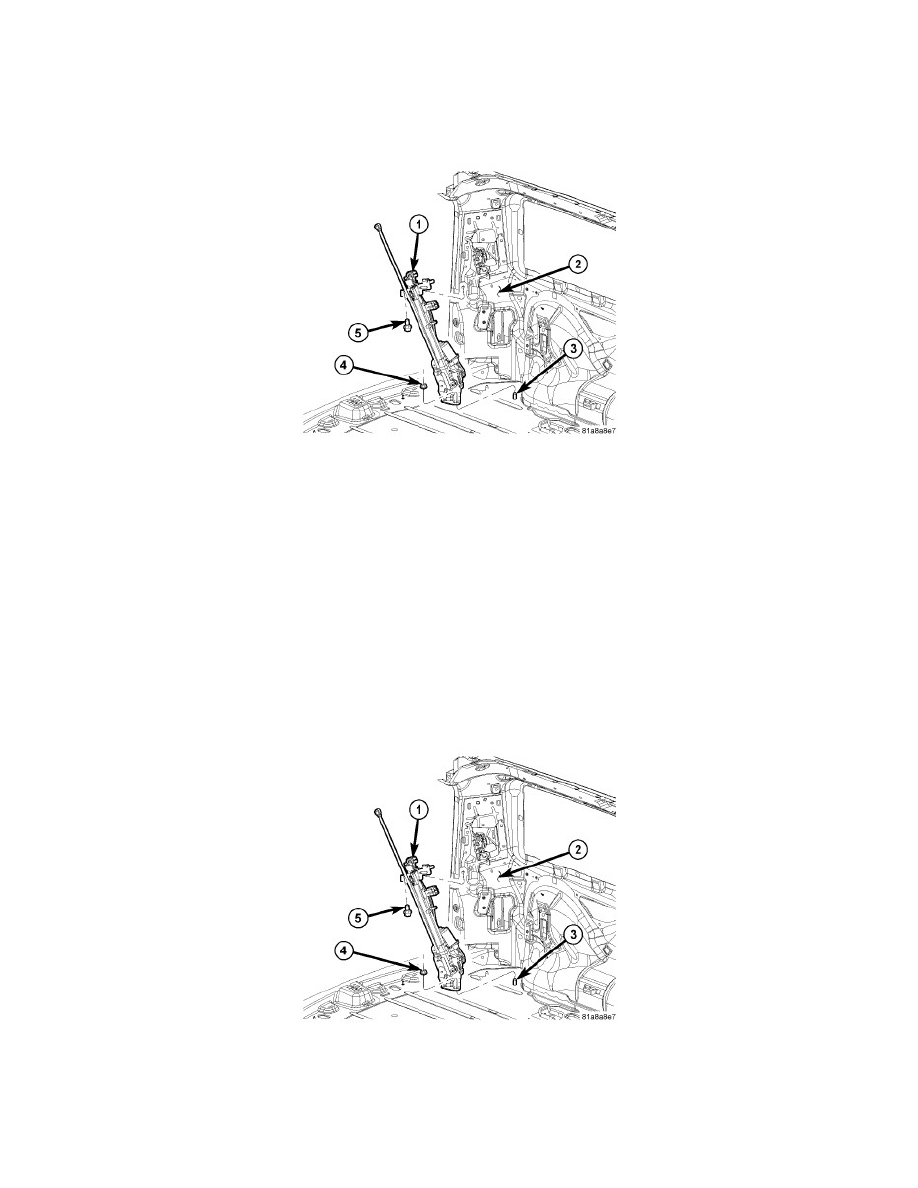
6. Disconnect the wire harness connector from the power liftgate drive unit assembly (1).
7. Remove the drive unit assembly retaining bolts (5).
8. Remove the drive unit assembly retaining nut (4).
9. Unhook the drive unit assembly (1) from the D-pillar (2) and remove the unit from the vehicle.
Power Liftgate Drive Unit - Installation
INSTALLATION
1. Position the power liftgate drive unit assembly (1) into the vehicle.
2. Position the drive unit assembly lower mounting bracket onto the cargo floor stud (3).
3. Hook the drive unit assembly upper mounting bracket onto the D-pillar (2).
4. Install the drive unit retaining nut (4). Tighten the nut to 28.5 Nm (21 ft. lbs.).
5. Install the drive unit retaining bolts (5). Tighten the bolts to 28.5 Nm (21 ft. lbs.).
6. Connect the wire harness connector to the drive unit assembly (1).