
Commander 4WD V8-4.7L VIN N (2006)
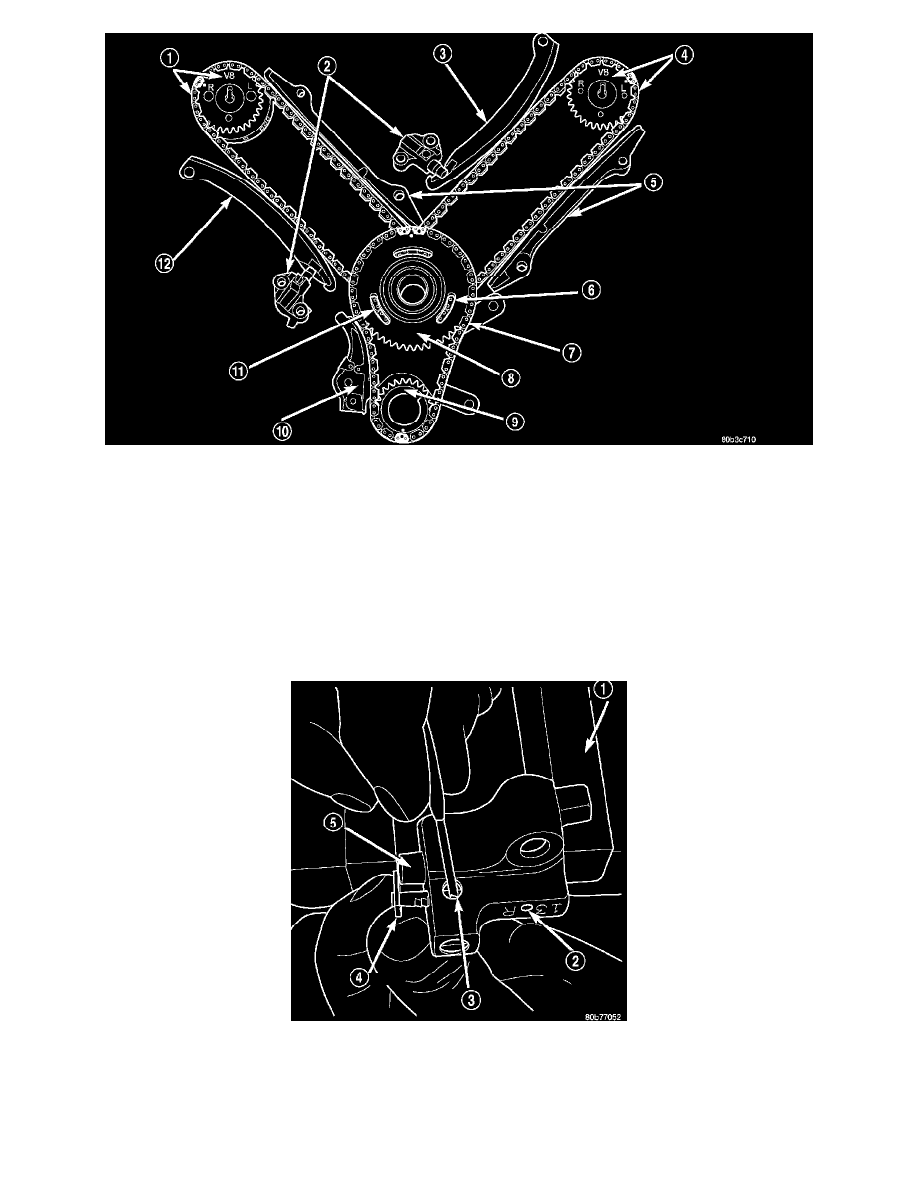
Inspect the following components: Sprockets for excessive tooth wear. Some tooth markings are normal and not a cause for sprocket replacement.
Idler sprocket assembly bushing and shaft for excessive wear. Idler sprocket assembly spline joint. The joint should be tight with no backlash or axial
movement. Chain guides and tensioner arms. Replace these parts if grooving in plastic face is more than 1 mm (0.039 inch) deep. If plastic face is
severely grooved or melted, the tensioner lube jet may be clogged. The tensioner should be replaced. Secondary chain tensioner piston and ratcheting
device. Inspect for evidence of heavy contact between tensioner piston and tensioner arm. If this condition exist the tensioner and tensioner arm should
be replaced. Primary chain tensioner plastic faces. Replace as required.
INSTALLATION
1. Using a vise, lightly compress the secondary chain tensioner piston until the piston step is flush with the tensioner body. Using a pin or suitable
tool, release ratchet pawl by pulling pawl back against spring force through access hole on side of tensioner. While continuing to hold pawl back,
Push ratchet device to approximately 2 mm from the tensioner body. Install Special Tool 8514 lock pin into hole on front of tensioner. Slowly
open vise to transfer piston spring force to lock pin.
2. Position primary chain tensioner over oil pump and insert bolts into lower two holes on tensioner bracket. Tighten bolts to 28 Nm (250 inch lbs.).
CAUTION: Overtightening the tensioner arm Torx bolt can cause severe damage to the cylinder head. Tighten Torx bolt to specified torque only.
3. Install right side chain tensioner arm. Apply MOPAR Lock N, Seal to Torx bolt, tighten bolt to 17 Nm (150 inch lbs.).