
Grand Cherokee 2WD V6-3.7L (2008)
Heater Core: Service and Repair
Installation
INSTALLATION
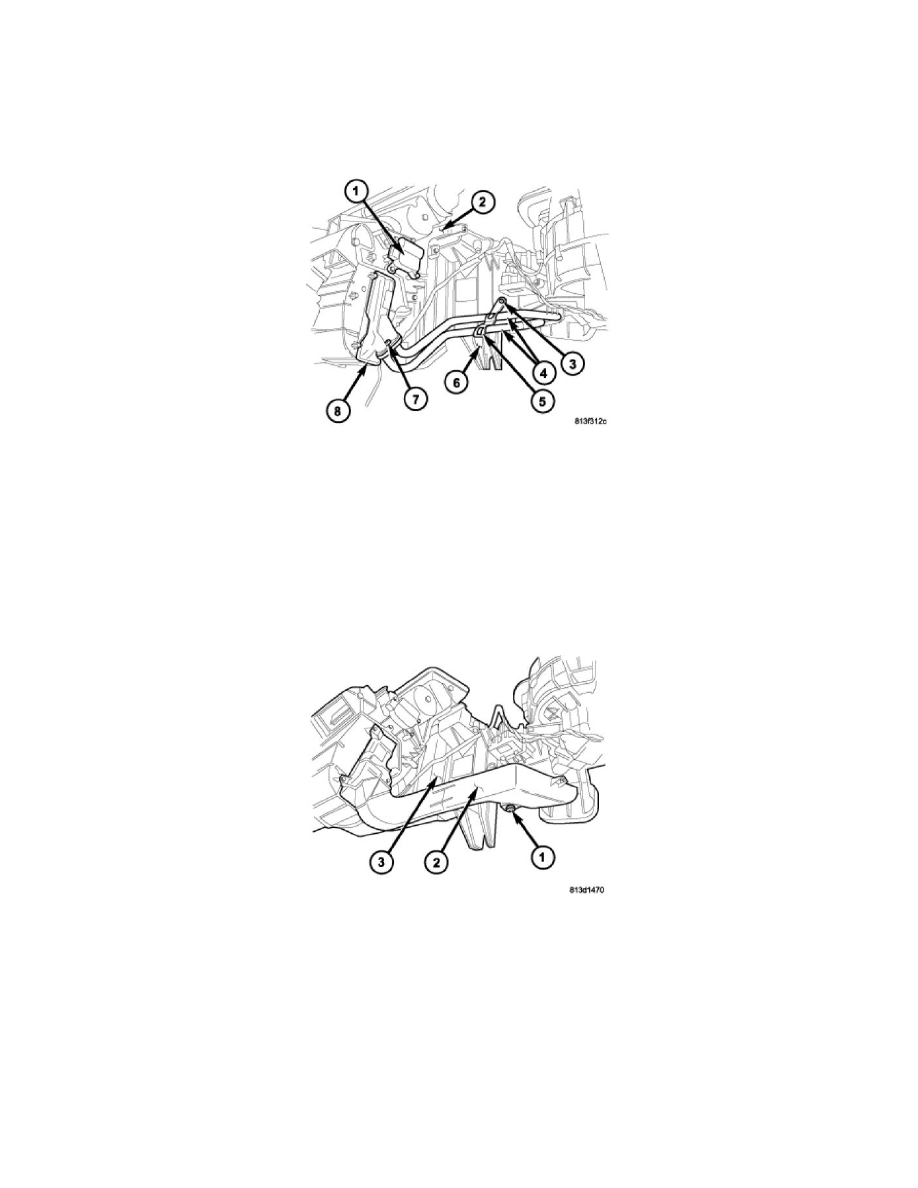
NOTE: LHD model shown in illustrations. RHD model similar.
1. Carefully install the heater core (8) into the passenger side of the HVAC air distribution housing (2).
2. Remove the tape or plugs from the heater core ports.
3. If removed, position the heater core tubes (4) into the vehicle.
4. Lubricate new rubber O-ring seals with clean engine coolant and install them onto the heater core tubes. Use only the specified O-ring as they are
made of a special material for the engine cooling system.
5. Connect the heater core tubes to the heater core.
6. Install the bolt (7) that secures the heater core tubes to the heater core. Tighten the bolt securely.
7. Install the screw (3) that secures the heater core tube retaining bracket (5) to the HVAC housing (6). Tighten the screw to 2.2 Nm (20 in. lbs.).
8. If equipped with dual zone heating-A/C, install the blend door actuator (1) onto the passenger side of the HVAC air distribution housing See:
Heating and Air Conditioning/Air Door/Air Door Actuator / Motor/Service and Repair/Blend Door Actuator - Installation.
9. Install the heater core and tube cover (2) onto the HVAC housing (3).
10. Install the five screws (1) that secure the heater core and tube cover to the HVAC housing. Tighten the screws to 2.2 Nm (20 in. lbs.).
11. Install the instrument panel See: Body and Frame/Interior Moulding / Trim/Dashboard / Instrument Panel/Service and Repair/Instrument Panel -
Installation.
12. If disconnected, connect the heater hoses to the heater core tubes in the engine compartment.
13. Connect the negative battery cable.
14. If the heater core is being replaced, flush the cooling system See: Service and Repair.
15. Refill the engine cooling system See: Service and Repair.