
Grand Cherokee 2WD V8-5.2L VIN Y (1998)
Engine Mount: Service and Repair
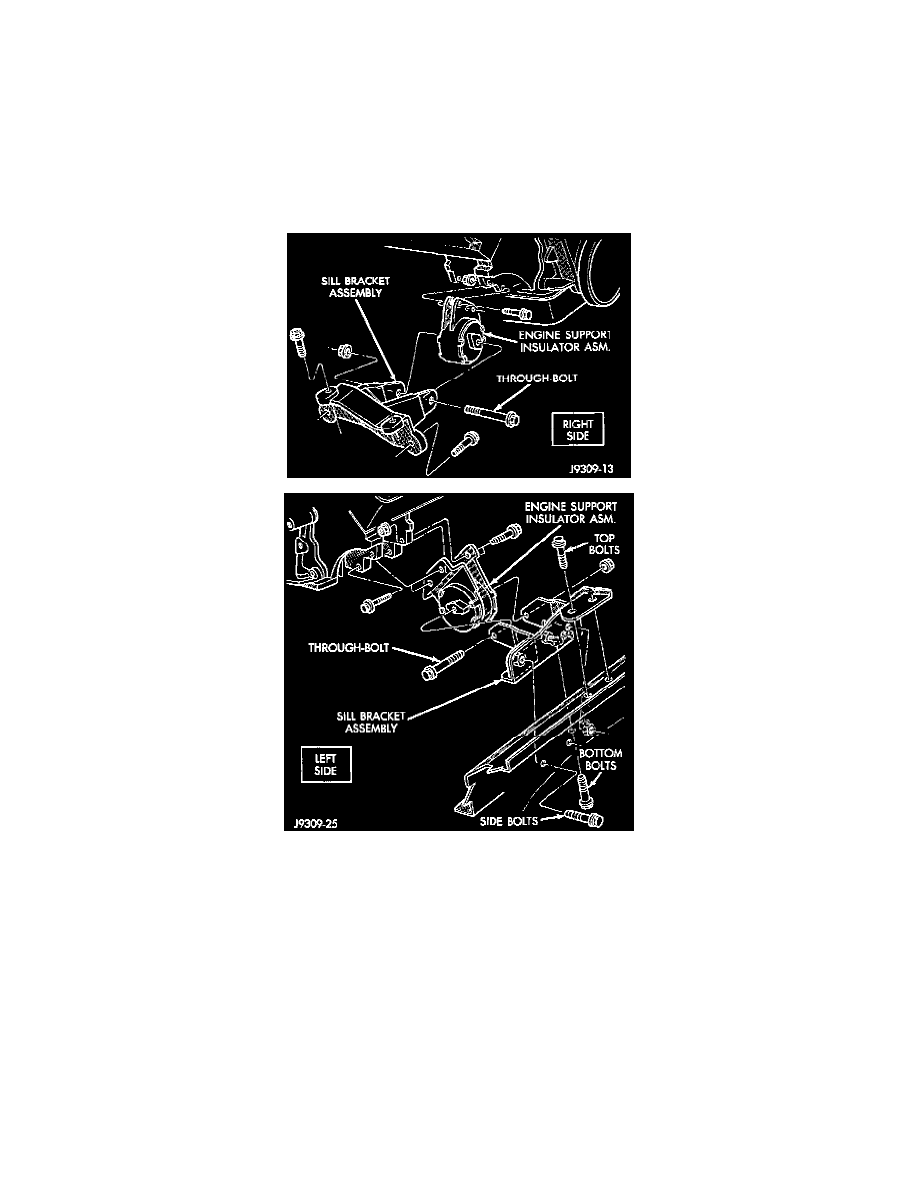
Front Mount
REMOVAL
1. Disconnect the negative cable from the battery.
2. Position fan to assure clearance for radiator top tank and hose.
CAUTION: DO NOT lift the engine by the intake manifold.
3. Install engine lifting fixture.
4. Raise vehicle on hoist.
5. Remove the engine support insulator thru-bolts and nuts.
6. Raise engine SLIGHTLY. Remove the engine support insulator bolts. Remove the engine support insulator assembly.
7. If required, remove the sill bracket assembly.
INSTALLATION
1. If the sill bracket assembly was removed, install the bracket to the sill assembly.
(a) RIGHT SIDE-Install the sill bracket assembly onto the sill assembly. Install and tighten the bolts to 65 Nm (48 ft. lbs.) torque.
(b) LEFT SIDE-Install the sill bracket assembly onto the sill assembly. Install and tighten the 2 top bolts to 65 Nm (48 ft. lbs.) torque. Install and
tighten the 2 side bolts to 95 Nm (70 ft. lbs.) torque. Install and tighten the 2 bottom bolts to 121 Nm (89 ft. lbs.)torque.
2. With the engine raised SLIGHTLY, position engine support insulator assembly onto the engine block. Install bolts and tighten to 88 Nm (65 ft.
lbs.) torque.
3. Lower engine with lifting fixture while aligning engine support insulator assembly into sill bracket assembly.
4. Install the thru bolt and nut. Tighten the RIGHT SIDE nut to 81 Nm (60 ft. lbs.) torque. Tighten the LEFT SIDE nut to 81 Nm (60 ft. lbs.) torque.
5. Lower the vehicle.
6. Remove lifting fixture.
7. Connect the negative cable to the battery.