
Liberty 2WD V6-3.7L (2008)
Hood Latch Release: Service and Repair
Hood Latch Release
Removal
REMOVAL
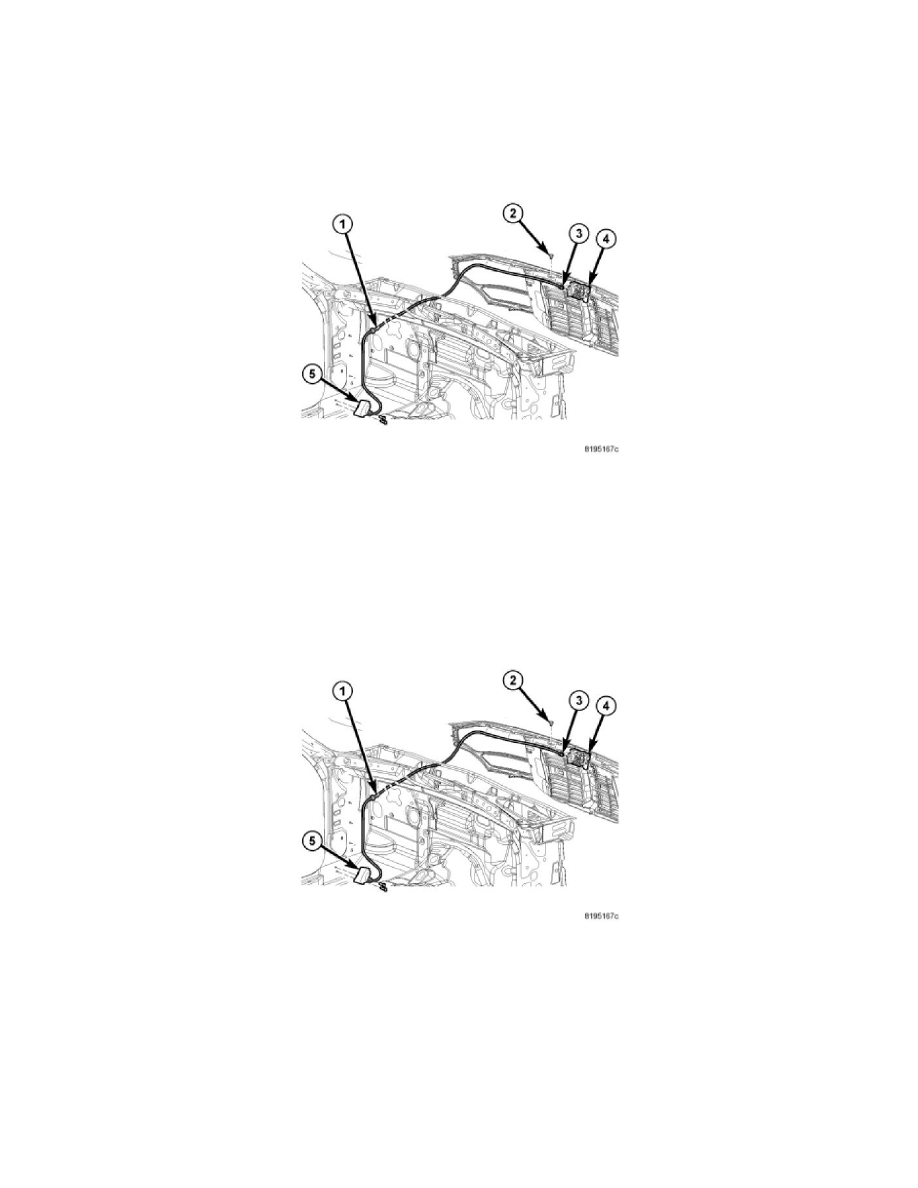
1. Remove the latch release cable (3) from the latch (4).
2. Remove the push pin (2) from the grille, carefully remove the latch release cable from under the grille and from the retaining tabs on the grille.
3. Remove the cowl trim cover.
4. Remove the bolts from the hood latch handle (5).
5. Pull from the inside of the vehicle to remove the cable. Disconnect any remaining attaching clips and pull the cable grommet (1) and cable from
the body.
Installation
INSTALLATION
NOTE: Lubricate the grommet with soapy water to ease with installation of the latch release cable to the body.
1. Install the latch release cable (1) through the opening in the body from the inside of the vehicle. Pull from the engine compartment until the
grommet is seated properly in the body.
NOTE: Route the latch release cable in the same position as noted during removal.
2. Install the latch release cable to the grille retaining tabs, carefully route under the push pin (2) connection on the grille.
3. Install the push pin (2) to the grille.
4. Install the latch release cable (3) to the latch (4).
5. Install the bolts to the hood latch handle (5) and tighten to 4 Nm (33 in. lbs.).
6. Install the cowl trim cover.