
Wrangler L6-4.0L VIN S (2000)
Front Fender: Service and Repair
Right Front Fender
RIGHT FRONT FENDER
REMOVAL
1. Remove the battery tray.
2. Remove the air cleaner housing.
3. Remove the bolts attaching the Power Distribution Center (PDC) to the fender.
4. Disengage the PDC wire harness retainers on the battery tray and fender.
5. Move and secure the PDC.
6. Disengage the high pressure air conditioning line retainer on the fender.
7. Disengage the front end lighting wire harness retainers on the fender.
8. Disengage the battery temperature sensor connector.
9. Disengage the vacuum line at the reservoir under the battery tray reinforcement bracket.
10. Disengage the headlamp wire connector.
11. Route the fog lamp (if equipped), park lamp and side marker wire harness through the access hole in the fender well.
12. If equipped, remove the fender flare extension.
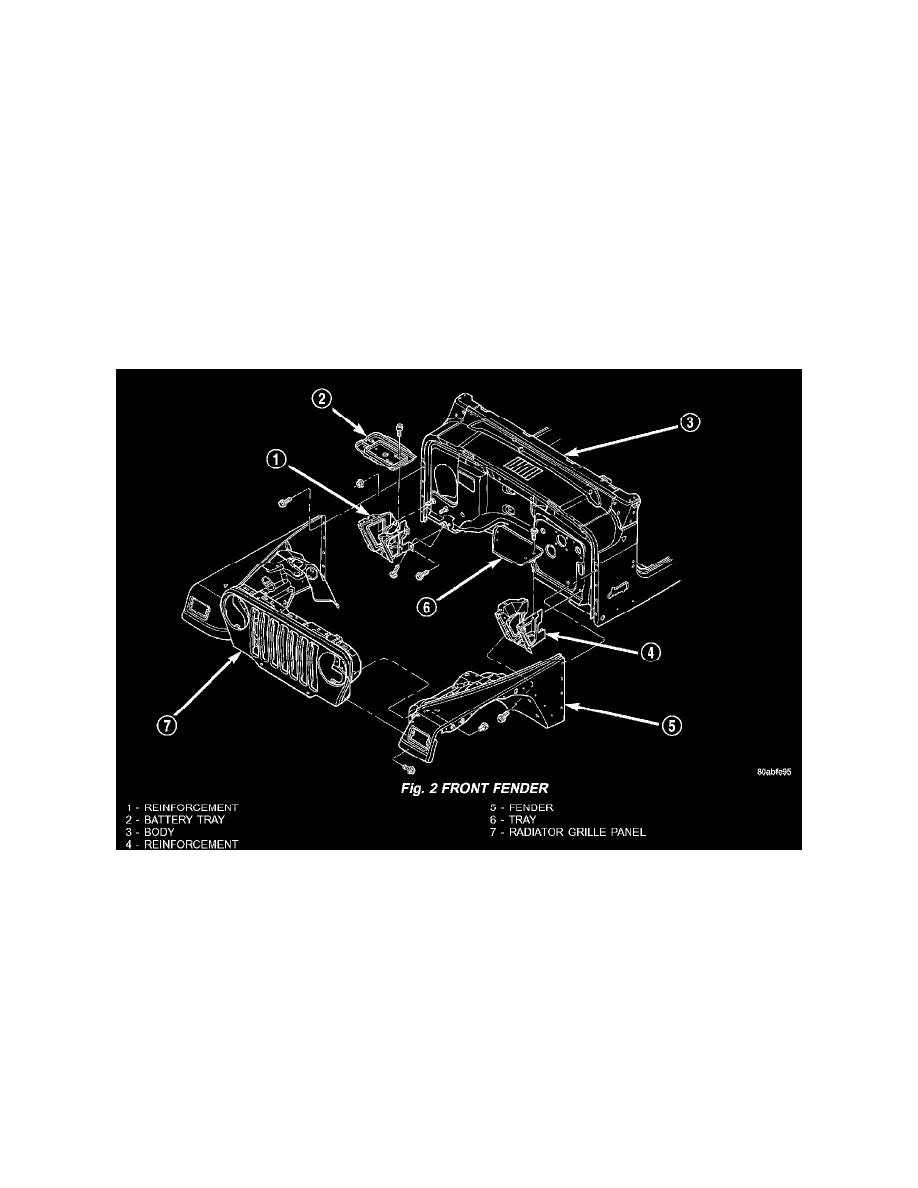
Fig. 2
13. Remove the bolts attaching the fender to the cowl (Fig. 2).
14. Remove the bolts attaching the fender to the battery tray reinforcement bracket.
15. Remove the bolts attaching the fender to the grille.
16. Separate the fender from the vehicle.
INSTALLATION
Transfer all related components. Replace harness retainers if damaged.
1. Position the fender on the vehicle.
2. Install the bolts attaching the fender to the grille.
3. Install the bolts attaching the fender to the battery tray reinforcement bracket.
4. Install the bolts attaching the fender to the cowl.
5. If equipped, install the fender flare extension and body side molding.