
Rio L4-1.6L (2004)
7. Use a ring expander and install top ring.
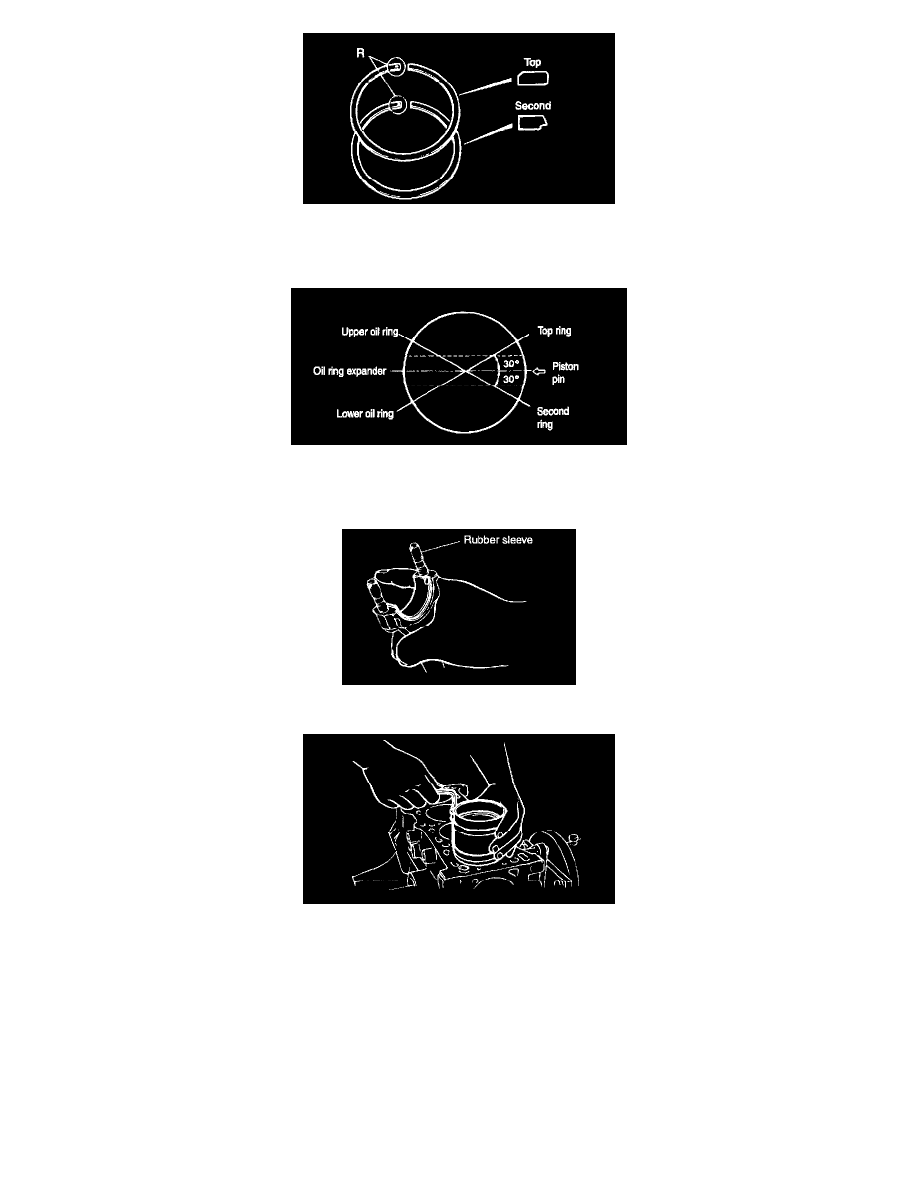
NOTE: Top ring and second ring should be installed with "R" or "Y" mark facing up.
8. Align piston ring gaps as shown.
9. Install a bearing into connecting rod.
10. Place rubber sleeves on connecting rod bolts to protect crankshaft from damage.
11. Check piston rings for correct end gap stagger.
12. Place piston with "F" mark facing front of engine block, then slip piston and connecting rod assembly into a piston ring compressor.
13. Rotate crankshaft so that crank pin journal for specific cylinder is at its lowest point (bottom dead center).
14. Lower piston and connecting rod assembly until piston ring compressor makes contact with deck surface of engine block.
15. Using butt end of a hammer, tap the top of piston into cylinder and continue tapping until connecting rod makes contact with crankshaft.
NOTE: Follow this procedure for remaining piston and connecting, rod assemblies.
16. Install a connecting rod bearing in each connecting rod cap.
17. Place a piece of Plastigauge(R) on crank pin journals.
18. Install connecting rod caps, aligning marks made previous to disassembly and torque to specification.
Tightening torque: 22 - 24 ft. lbs. (29 - 34 Nm, 3.0 - 3.5 kgf-cm)
NOTE: