
Discovery II
INTERIOR TRIM COMPONENTS
76-3-4
REPAIRS
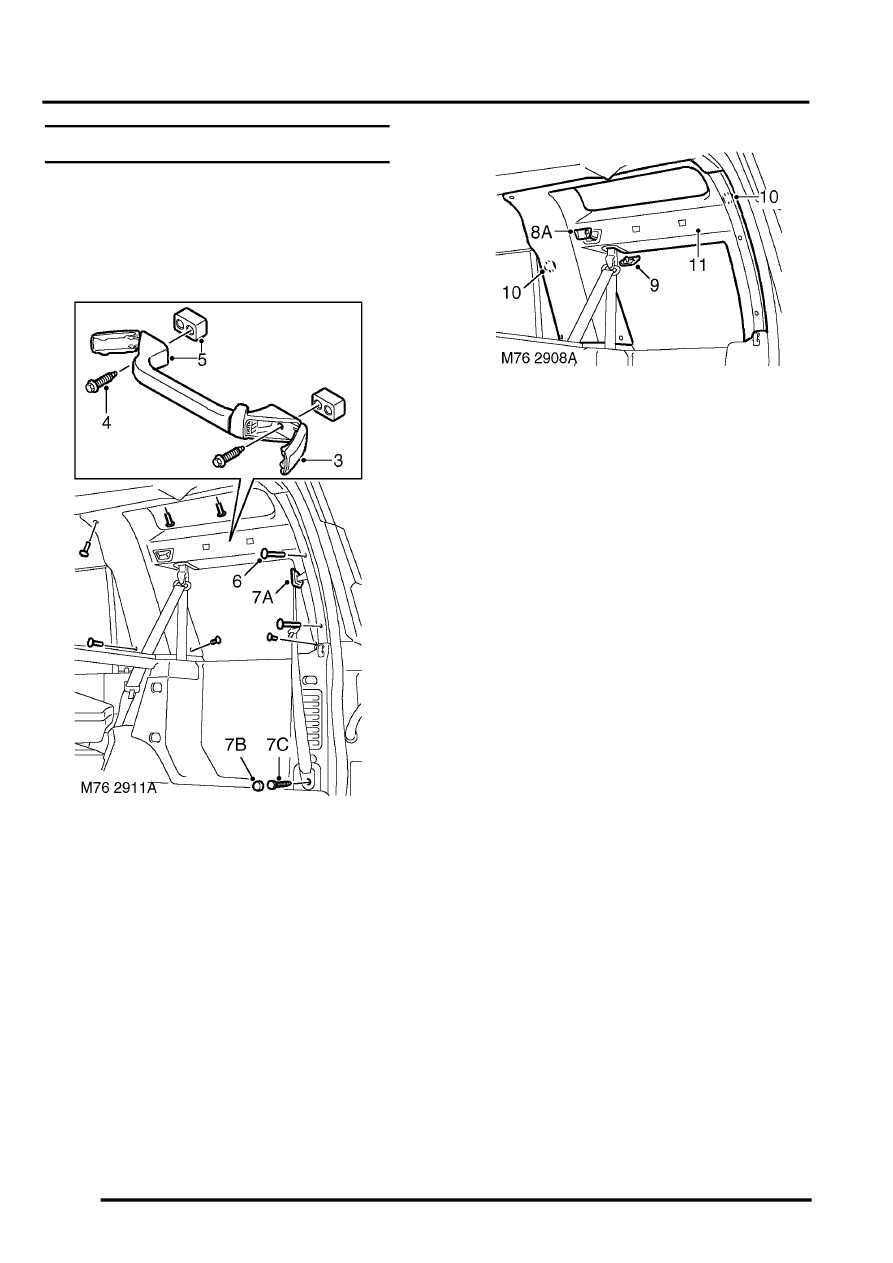
Trim casing - 'D' post
$% 76.13.73
Remove
1. Fold rear seat forward.
2. Remove tail door aperture upper trim casing.
3. Release caps from end of grab handle.
4. Remove 2 bolts securing grab handle to body.
5. Remove grab handle and collect two spacers.
6. Remove 8 trim clips securing trim casing to
body.
7. Models with third row seats:
a Remove third row seat belt escutcheon.
b Remove cap from lower anchorage of third
row seat belt.
c Remove lower anchorage bolt.
8. Models with volumetric alarm:
a Release volumetric sensor from trim casing.
b Disconnect multiplug from volumetric
sensor.
c Remove volumetric sensor.
9. Remove rear seat belt blanking plate.
10. Release 2 clips securing trim casing to body.
11. Remove trim casing.
Refit
1. Fit trim casing and secure with clips.
2. Fit rear seat belt blanking plate.
3. Models with volumetric alarm:
a Position volumetric sensor to trim casing
and connect multiplug.
b Fit volumetric sensor to trim casing.
4. Models with third row seats:
a Fit lower anchorage of third row seat belt
and tighten bolt to 32 Nm (24 lbf.ft).
b Fit cap to lower anchorage bolt.
c Fit third row seat belt escutcheon to trim
casing.
5. Fit trim clips securing trim casing to body.
6. Position grab handle and spacers to trim
casing.
7. Fit and tighten bolts securing grab handle to
body to 3 Nm (2.2 lbf.ft).
8. Close caps on ends of grab handle.
9. Fit tail door aperture upper trim casing.
10. Reposition rear seat.