
3 L4-2.5L (2010)
Variable Valve Timing Actuator: Service and Repair
VARIABLE VALVE TIMING ACTUATOR REMOVAL/INSTALLATION [LF, L5]
NOTE:
-
Variable valve timing actuator can not be disassembled because it is a precision unit.
-
Intake camshaft sprocket is integrated with the variable valve timing actuator and cannot be disassembled.
1. Refer to the "VALVE CLEARANCE ADJUSTMENT" procedure and remove the variable valve timing actuator and the camshaft on the intake
side as a single unit. See: Cylinder Head Assembly/Valve Clearance/Adjustments
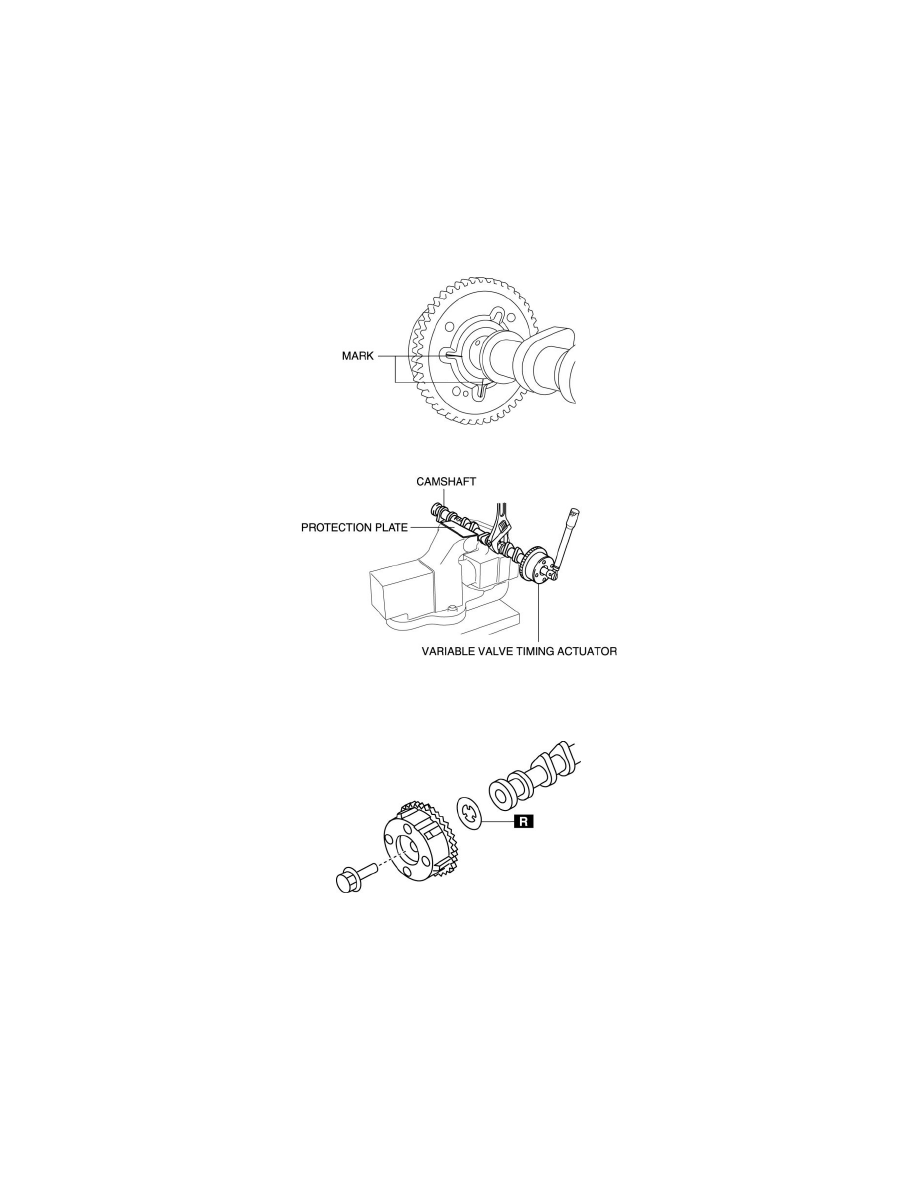
2. Remove the variable valve timing actuator.
a. Mark the camshaft and variable valve timing actuator as shown in the figure to make sure they are installed in their original position.
b. Secure the camshaft in a vise.
c. Loosen the variable valve timing actuator tightening bolt.
3. Install a new washer.
4. Install the variable valve timing actuator.
NOTE:
-
When the variable valve timing actuator is replaced with a new one, mark it in the same location as the old one.
a. Secure the camshaft in a vise.
b. Align the marks of the camshaft and variable valve timing actuator.
c. Tighten variable valve timing actuator tightening bolt.
Tightening torque
-
69-75 Nm {7.1-7.6 kgf-m, 51-55 ft-lbf}
5. Refer to the "VALVE CLEARANCE ADJUSTMENT" procedure and install the variable valve timing actuator and the camshaft on the intake side