
3 L4-2.5L (2010)
Timing Chain: Service and Repair
TIMING CHAIN REMOVAL/INSTALLATION [LF, L5]
1. Remove the battery cover. See: Starting and Charging/Battery/Service and Repair/Removal and Replacement
2. Disconnect the negative battery cable.
3. Remove the plug hole plate. See: Service and Repair/Removal and Replacement/Plug Hole Plate Removal/Installation
4. Disconnect the wiring harness.
5. Remove the ignition coils. See: Powertrain Management/Ignition System/Ignition Coil/Service and Repair
6. Remove the spark plugs. See: Tune-up and Engine Performance Checks/Spark Plug/Service and Repair
7. Remove the ventilation hose.
8. Remove the coolant reserve tank with the hose still connected and set it out of the way. See: Cooling System/Coolant Reservoir/Service and
Repair
9. Remove the front wheel and tire. (RH) See: Steering and Suspension/Suspension/Service and Repair
10. Remove the aerodynamic under cover No.2 and splash shield as a single unit. See: Body and Frame/Splash Guard/Service and
Repair/Aerodynamic Under Cover No.2 Removal/Installation See: Body and Frame/Splash Guard/Service and Repair/Splash Shield
Removal/Installation
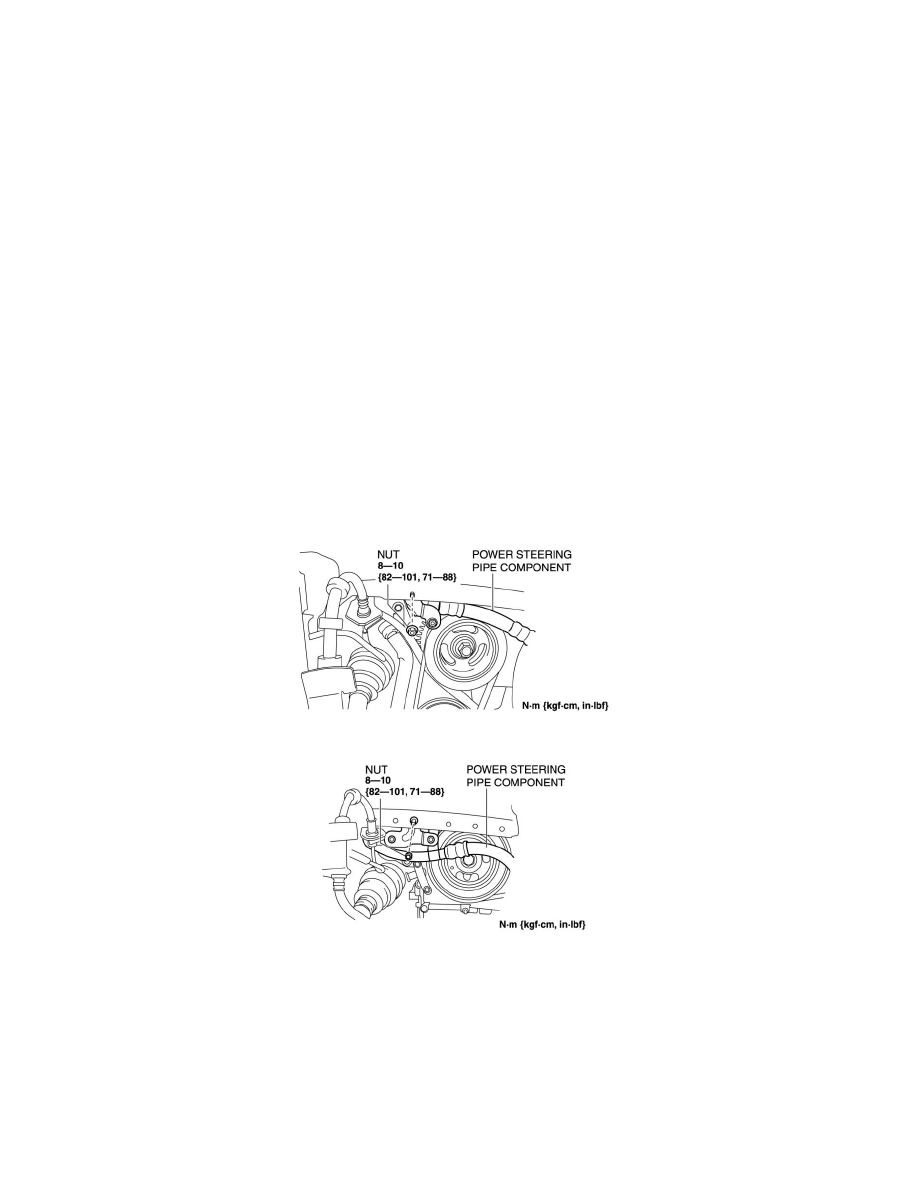
11. Remove the nut shown in the figure and set the power steering pipe component out of the way.
LF
L5
12. Remove the drive belt. See: Drive Belts, Mounts, Brackets and Accessories/Drive Belt/Service and Repair
13. Remove the crankshaft position (CKP) sensor. See: Powertrain Management/Computers and Control Systems/Crankshaft Position Sensor/Service
and Repair
14. Remove the A/C compressor with the cooler hose still connected and secure it using wire or rope so that it is out of the way. (LF) See: Heating
and Air Conditioning/Compressor HVAC/Service and Repair
15. Disconnect the drive shaft (RH) from joint shaft, set the drive shaft (RH) out of the way. (MTX) See: Transmission and Drivetrain/Drive Axles,
Bearings and Joints/Axle Shaft Assembly/Service and Repair/Removal and Replacement/Drive Shaft Removal/Installation