
6 L4-2.5L (2010)
f.
B-pillar lower trims See: Body and Frame/Interior Moulding / Trim/Trim Panel/Service and Repair/B-Pillar Lower Trim Removal/Installation
g. B-pillar upper trims See: Body and Frame/Interior Moulding / Trim/Trim Panel/Service and Repair/B-Pillar Upper Trim Removal/Installation
h. Rear seat cushion See: Body and Frame/Seats/Seat Cushion/Service and Repair/Rear Seat Cushion Removal/Installation
i.
Rear side seat back See: Body and Frame/Seats/Service and Repair/Overhaul/Rear Side Seat Back Removal/Installation
j.
Tire house trims
k. C-pillar trims See: Body and Frame/Interior Moulding / Trim/Trim Panel/Service and Repair/C-Pillar Trim Removal/Installation
5. Disconnect the auto-dimming mirror connector. (vehicles with auto-dimming mirror)
6. Remove the sunvisors. See: Body and Frame/Interior Moulding / Trim/Sun Visor/Service and Repair
7. Remove the front map light. See: Lighting and Horns/Map Light/Service and Repair/Map Light Removal/Installation
8. Remove the assist handle. See: Body and Frame/Interior Moulding / Trim/Passenger Assist Handle/Service and Repair
9. Remove the headliner. See: Body and Frame/Interior Moulding / Trim/Headliner/Service and Repair
10. Remove the curtain air bag module. See: Air Bag Systems/Air Bag/Service and Repair/Removal and Replacement/Curtain Air Bag Module
Removal/Installation
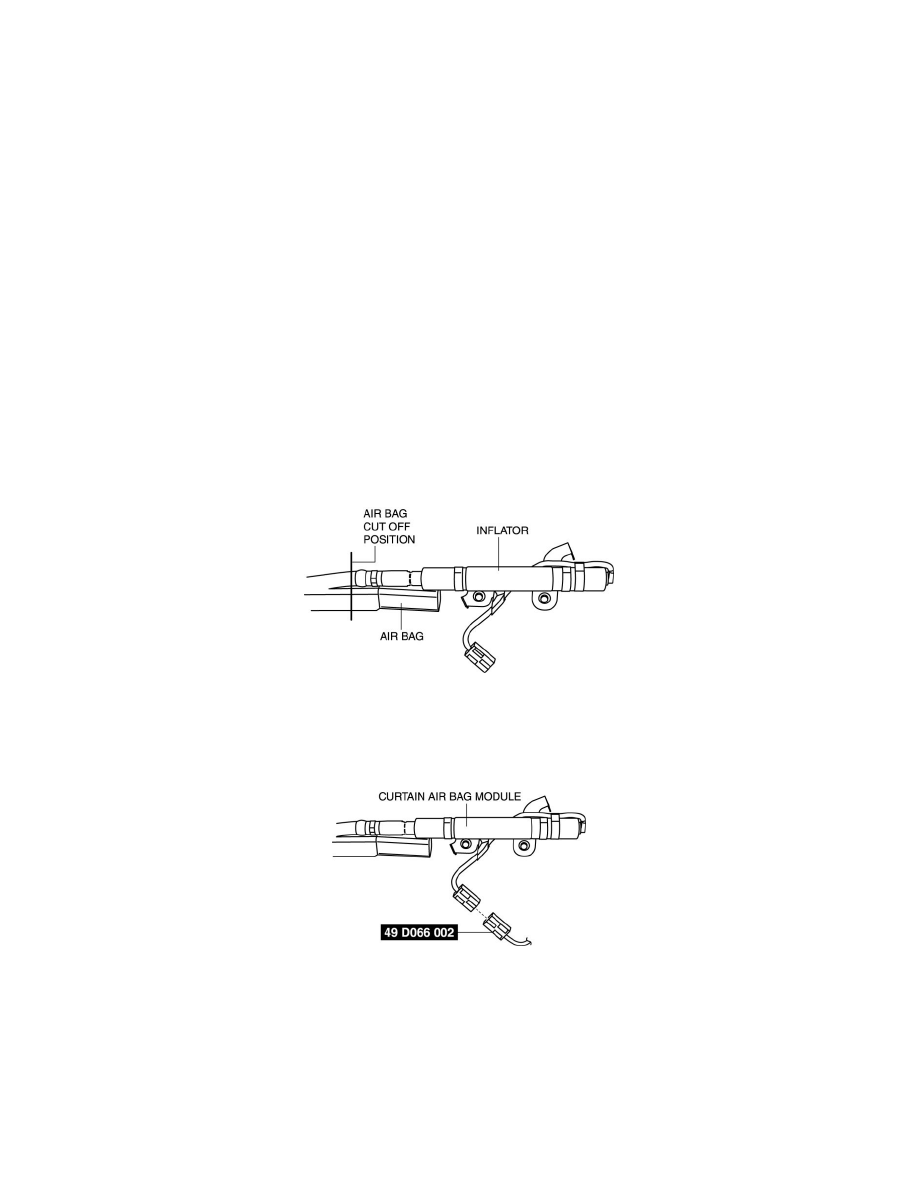
11. Cut off the air bag part of the curtain air bag module at the position shown in the figure.
WARNING:
-
Be sure not to crush the pipe on the side where it is cut. If it is crushed completely, the interior pressure of the pipe will build up and can cause
it to explode during air bag module operation (deployment).
12. Connect the SST (Adapter harness) to the curtain air bag module as shown in the figure.
13. Secure the curtain air bag module to the tire, by wrapping a wire (cross 1.25 mm2 {0.002 in2} or more) through the tire and the bolt installation
holes at least 4 times as shown in the figure.