6 L4-2.5L (2010)

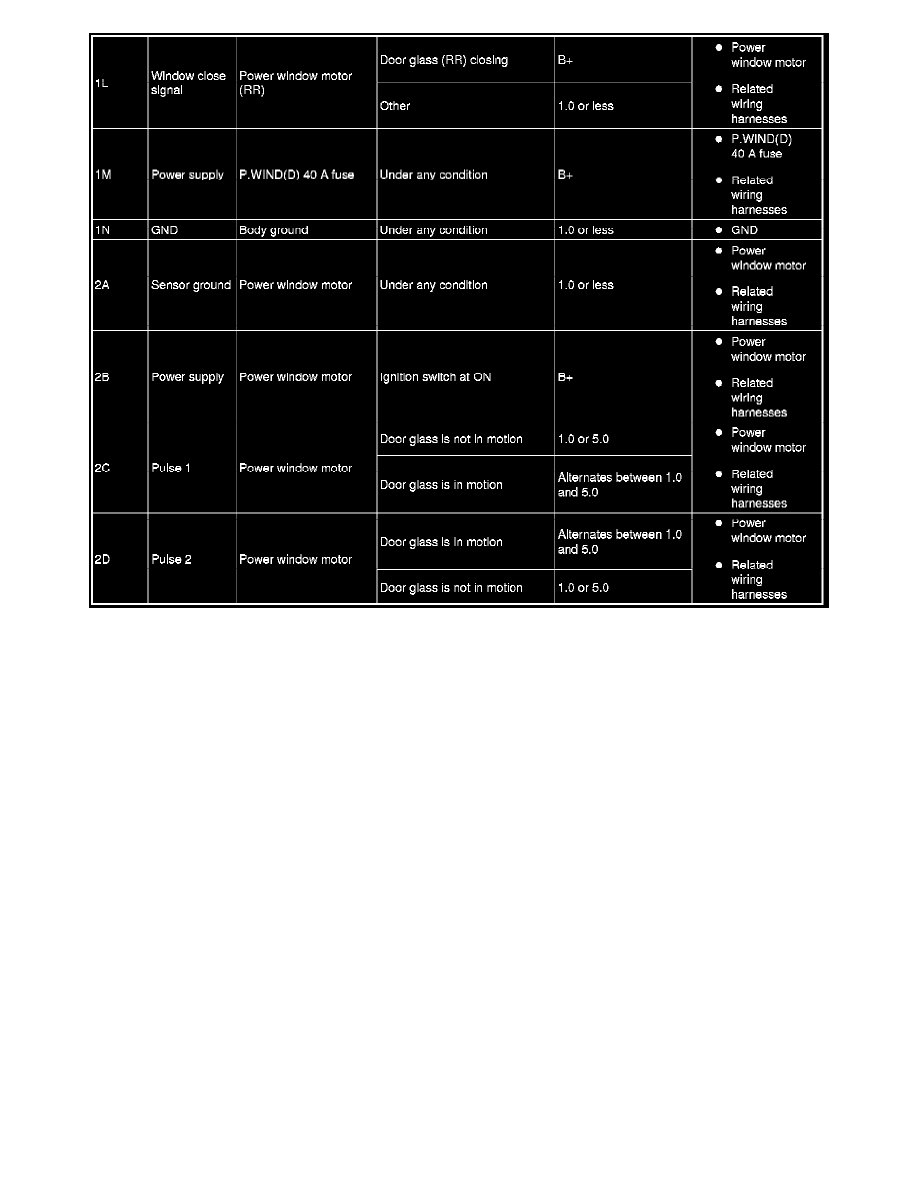
Terminal Voltage Table (Reference) (Part 2)
Power Window Subswitch Inspection
POWER WINDOW SUBSWITCH INSPECTION
Passenger's side (With Auto-open/close Function)
1. Disconnect the negative battery cable.
2. Remove the inner garnish. (front passenger's side) See: Body and Frame/Doors, Hood and Trunk/Doors/Front Door/Front Door Panel/Service and
Repair/Removal and Replacement/Inner Garnish Removal/Installation
3. Remove the front door trim. (front passenger's side) See: Body and Frame/Doors, Hood and Trunk/Doors/Front Door/Front Door Panel/Service
and Repair/Removal and Replacement/Front Door Trim Removal/Installation
4. Remove the rear door trim. (rear side) See: Body and Frame/Doors, Hood and Trunk/Doors/Front Door/Front Door Panel/Service and
Repair/Removal and Replacement/Front Door Trim Removal/Installation
5. Connect the negative battery cable.
6. Measure the voltage at each terminal (other than terminals H and I).
-
If the voltage is not as specified in the Terminal Voltage Table, inspect the parts under "Inspection item(s)" and related wiring harnesses.
7. Inspect the power window subswitch connector for continuity at terminals H and I.
8. If the system does not work properly even though the inspection items or related wiring harnesses do not have any malfunction, replace the power
window subswitch.
