
929 V6-3.0L SOHC (1989)
Parking Brake System: Service and Repair
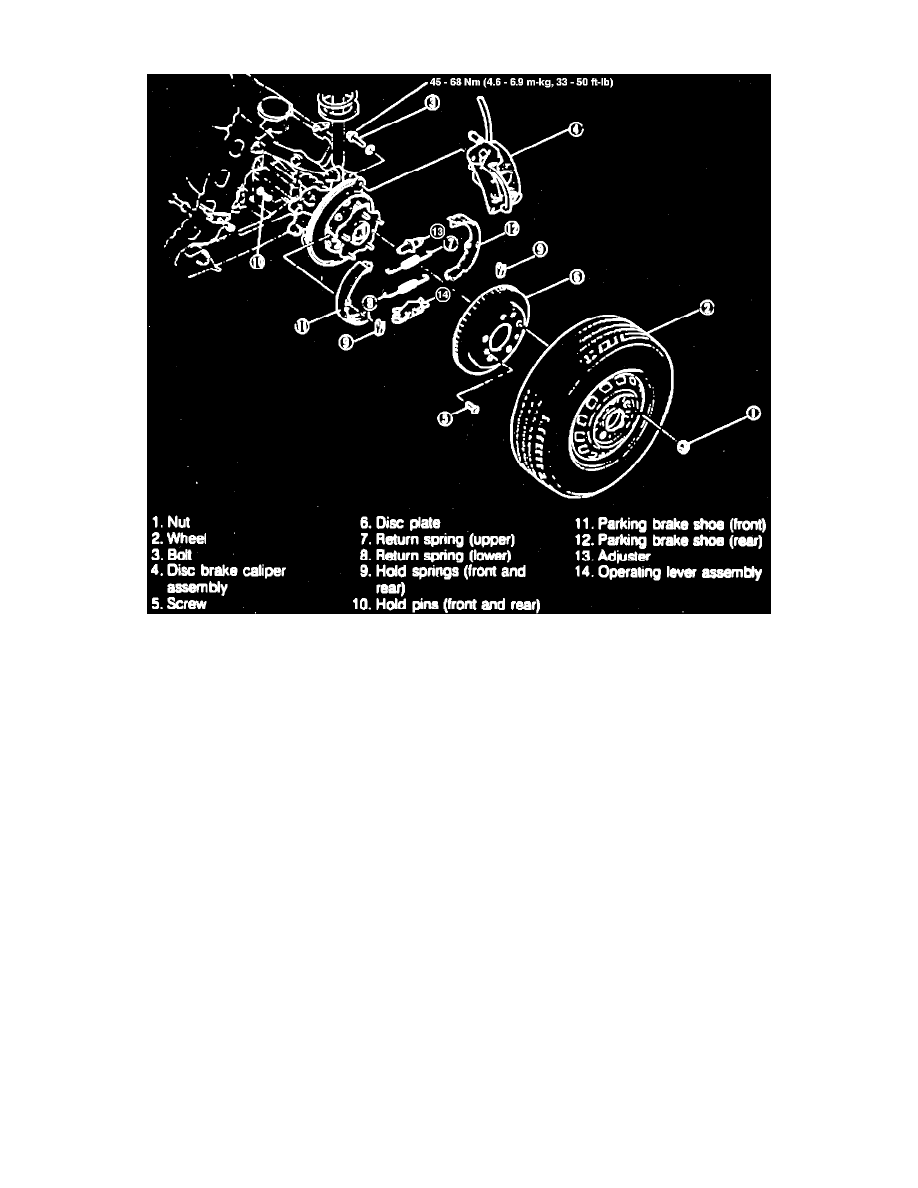
Fig. 14 Exploded View Of Parking Brake
1.
Raise and support vehicle and remove rear wheel assembly.
2.
Remove caliper attaching bolts, then the caliper, leaving brake hose attached, and position caliper out of way.
3.
Remove disc plate attaching screws and the disc plate, Fig. 14. If disc plate is difficult to remove, remove dust cap, insert screwdriver into hole
and turn adjuster to increase shoe clearance.
4.
Remove upper and lower return springs, then the front and rear hold pins.
5.
Remove brake shoes, then separate adjuster and operating lever assembly from shoes.
6.
Check inside of disc plate for scratching and uneven or abnormal wear, repairing or replacing as necessary.
7.
Check inner diameter of disc plate, which should be 6.69 inches (170mm). If diameter exceeds 6.73 inches (171mm), replace disc plate. When
repairing or replacing disc plate, check contact of shoes.
8.
Reverse procedure to install, noting the following:
a. Apply suitable grease to to projections on backing plate, adjuster and operating lever.
b. When installing operating lever, ensure arrow faces front.
c. When installing adjuster, ensure threaded part faces front on left wheel and faces rear on right wheel. Screw threaded part of adjuster in
completely before installing.
9.
When installation is completed, adjust parking brake.