
CX-9 AWD V6-3.7L (2008)
Trunk / Liftgate Motor: Service and Repair
Power Liftgate (PLG) Arm Removal/Installation
POWER LIFTGATE (PLG) ARM REMOVAL/INSTALLATION
NOTE: If the negative battery cable is disconnected with the liftgate half opened, the clutch cannot be disengaged resulting in difficulty in
opening/closing operation of the liftgate. Disconnect the negative battery cable with the liftgate in the fully open/close position.
1. Disconnect the negative battery cable.
2. Remove the following parts:
1. Trunk box
2. Seat side box (LH)
3. Trunk end trim
4. Third-row seat
5. Third-row seat belt lower anchor installation bolt (LH)
6. Rear scuff plate inner (LH)
7. Trunk side trim (LH)
8. Roof side trim (LH)
9. Second-row seat belt upper anchor installation bolt (LH)
10. C-pillar trim (LH)
11. Third-row seat belt upper anchor installation bolt (LH)
12. D-pillar trim (LH)
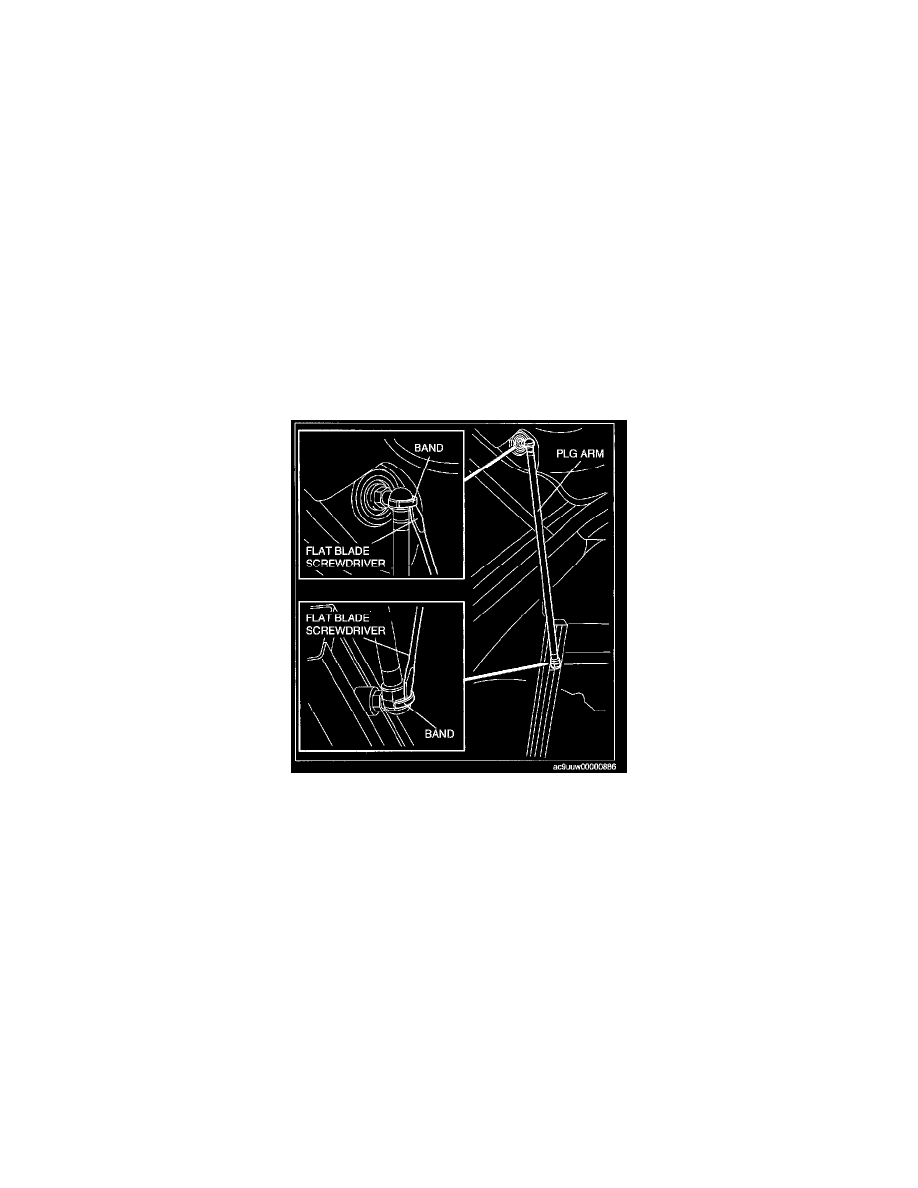
3. Disconnect the PLG arm band with using the flat blade screwdriver.
4. Remove the PLG arm.
5. Install in the reverse order of removal.