
CX-9 AWD V6-3.7L (2008)
Trunk / Liftgate Motor: Service and Repair
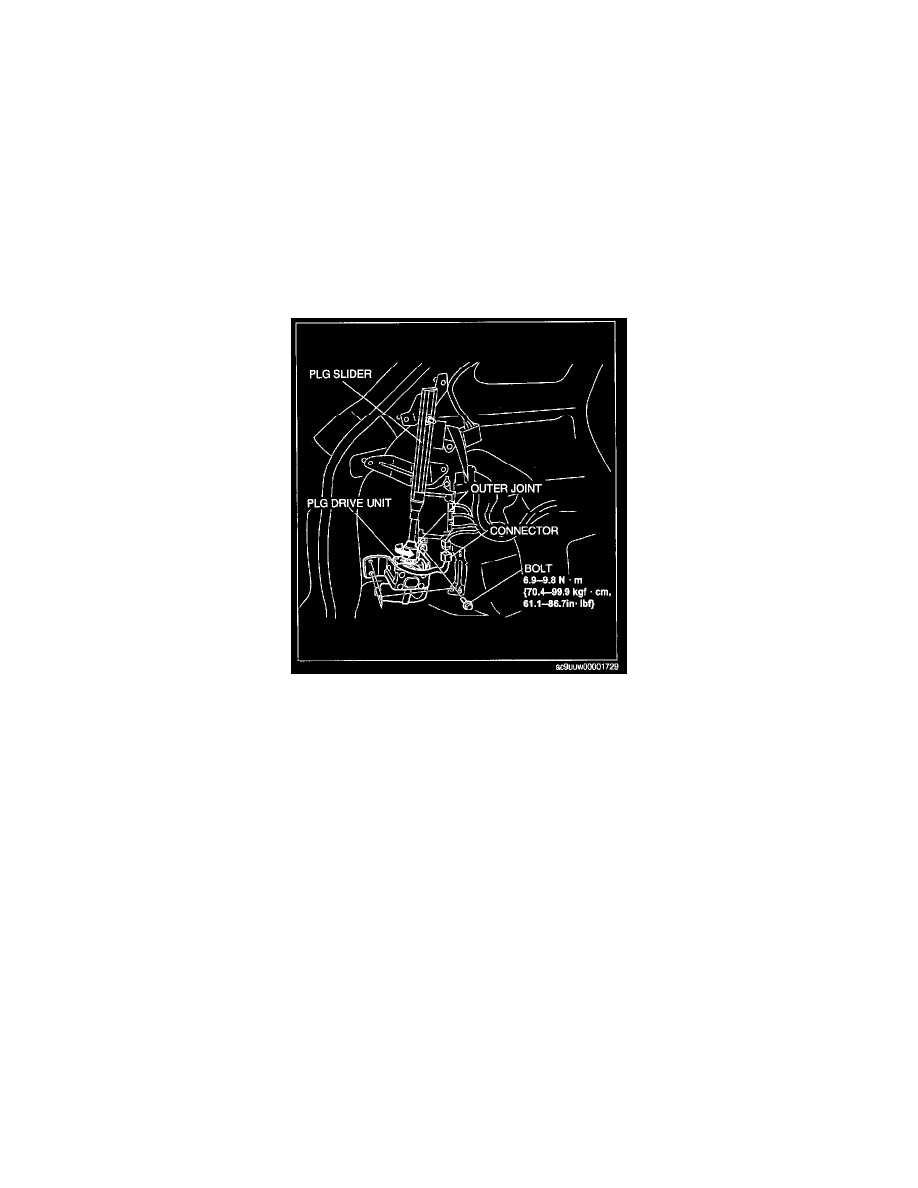
Power Liftgate (PLG) Drive Unit Removal/Installation
POWER LIFTGATE (PLG) DRIVE UNIT REMOVAL/INSTALLATION
NOTE: If the negative battery cable is disconnected with the liftgate half opened, the clutch cannot be disengaged resulting in difficulty in
opening/closing operation of the Liftgate. Disconnect the negative battery cable with the liftgate in the fully open/close position.
1. Disconnect the negative battery cable.
2. Remove the following parts:
1. Trunk box
2. Seat side box (LH)
3. Trunk end trim
4. Third-row seat
5. Third-row seat belt lower anchor installation bolt (LH)
6. Trunk side trim (LH)
3. Revolve the outer joint in the direction of the arrow to disconnect from the PLG drive unit and the PLG slider.
4. Disconnect the PLG drive unit connector.
5
Remove the bolts.
6. Remove the PLG drive unit.
7. Install in the reverse order of removal.