
Mazdaspeed6 L4-2.3L Turbo (2006)
6. Insert a tape-wrapped flathead screwdriver between the body and the grommet.
7. Press the tabs and remove the grommet.
8. Install the new grommet to the body.
9. Install the new clip B to the A-pillar trim.
10. Install the A-pillar trim.
B-Pillar Lower Trim Removal/Installation
B-PILLAR LOWER TRIM REMOVAL/INSTALLATION
1. Remove the front scuff plate.
2. Remove the rear scuff plate.
3. Pull the area marked A, then remove one side of the B-pillar lower trim.
4. Pull the B-pillar lower trim, then remove the pin from the body.
5. Remove the B-pillar lower trim.
6. Install in the reverse order of removal.
B-Pillar Upper Trim Removal/Installation
B-PILLAR UPPER TRIM REMOVAL/INSTALLATION
1. Remove the following parts:
1. Remove the upper anchor of the front seat belt.
2. Front scuff plate
3. Rear scuff plate
4. B-pillar lower trim
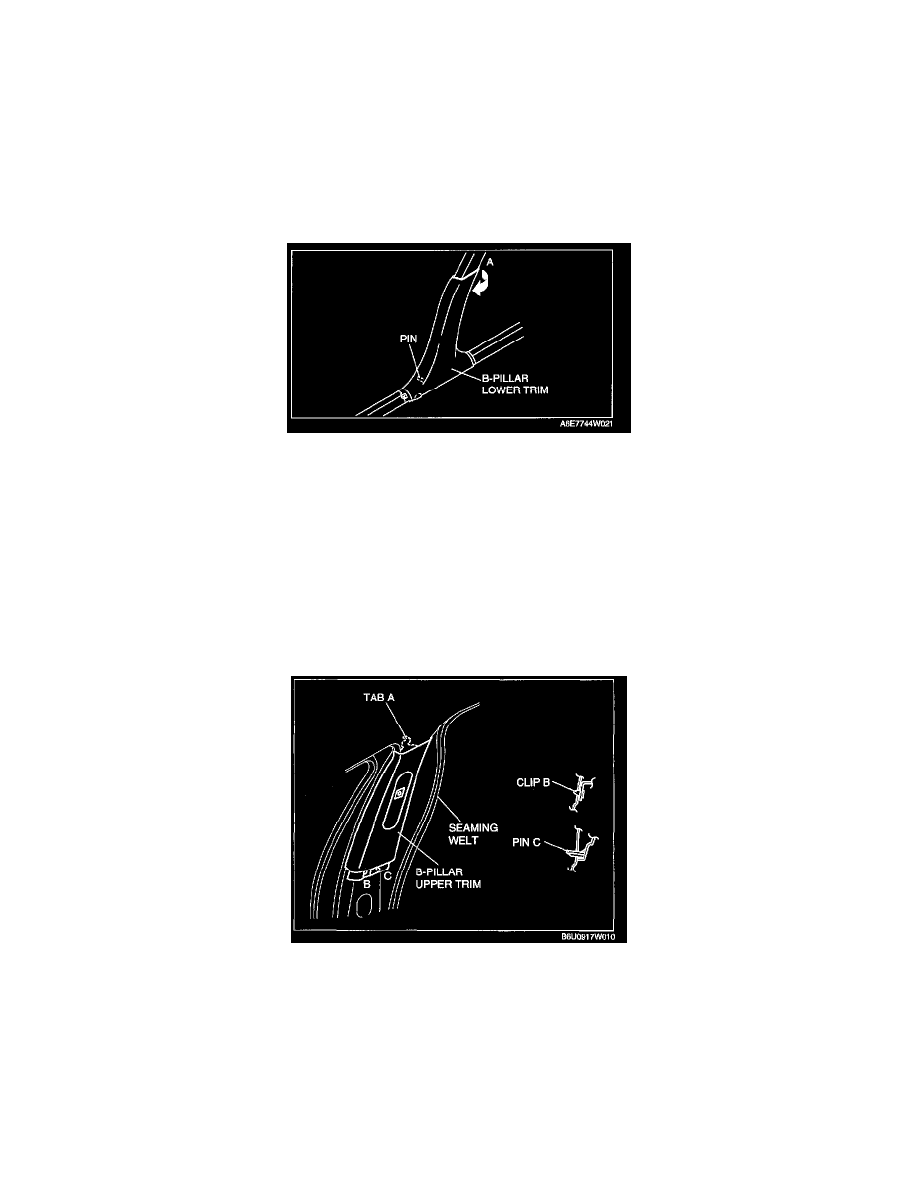
2. Partially peel back the seaming welt.
3. Pull the B-pillar upper trim outward, then disengage clip B and pin C from the body.
4. Disengage tab A from the body, then remove B-pillar upper trim.
5. Install in the reverse order of removal.
C-Pillar Trim Removal/Installation
C-PILLAR TRIM REMOVAL/INSTALLATION
Sport Sedan
1. Remove the rear scuff plate.
2. Remove the rear side seat.