
Mazdaspeed6 L4-2.3L Turbo (2006)
SHOCK ABSORBING PAD REMOVAL/INSTALLATION
1. Disconnect the negative battery cable.
2. Partially peel back the seaming welt.
3. Remove the following parts:
1. Microphone (vehicles with car-navigation system)
2. Sunroof seaming welt (vehicles with sunroof only)
3. A-pillar trims
4. Upper anchor of the front seat belt
5. Front scuff plate
6. Rear scuff plate
7. B-pillar lower trims
8. B-pillar upper trims
9. C-pillar trims
10. D-pillar trims (Sport Wagon)
11. Front and rear map lights
12. Cargo compartment light
4. Disconnect the auto-dimming mirror connector. (vehicles with auto-dimming mirror only)
5. Remove the sunvisors.
6. Remove the assist handle.
7. Remove the headliner.
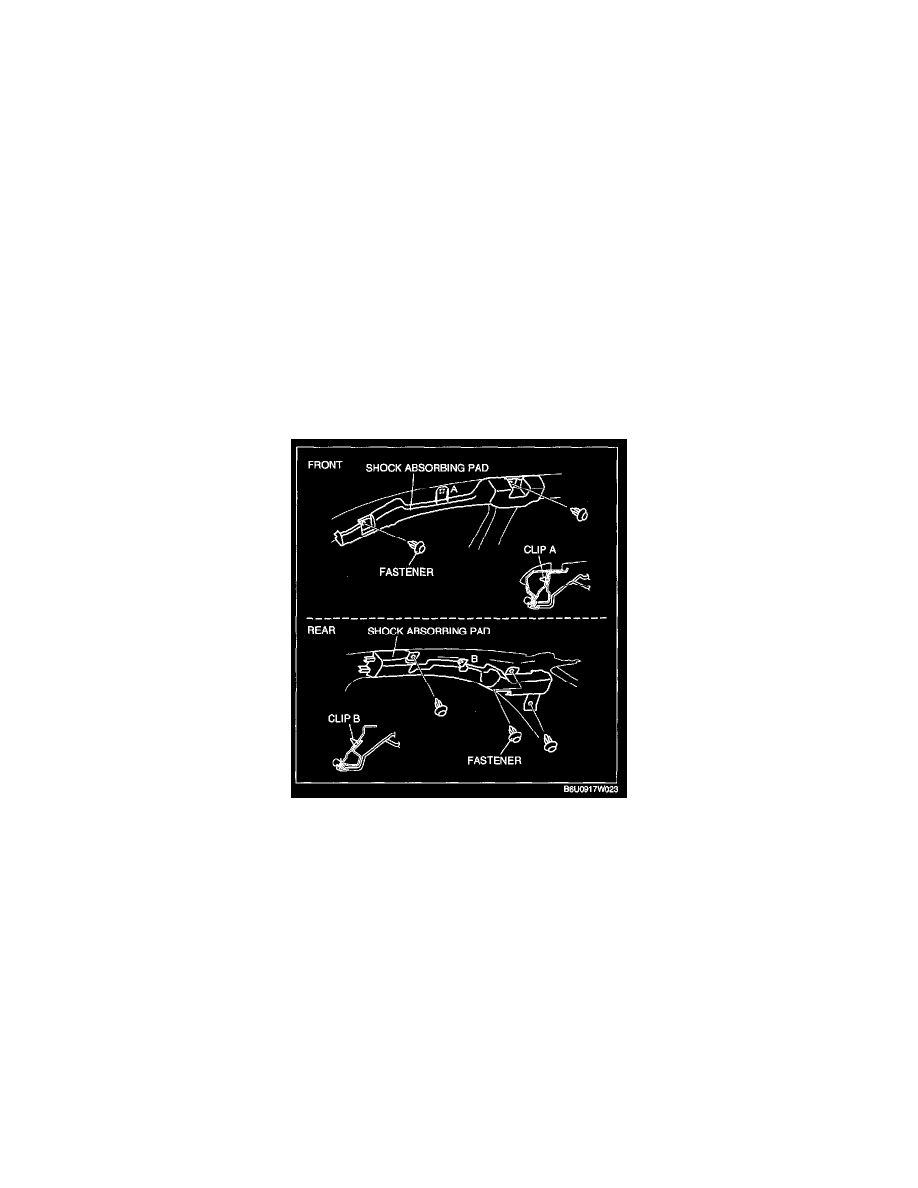
8. Remove the fasteners.
9. Pull the shock absorbing pad, then disengage the clip A or B from the body.
10. Install in the reverse order of removal.
Trunk Side Trim Removal/Installation
TRUNK SIDE TRIM REMOVAL/INSTALLATION
Sport Sedan
1. Remove the trunk end trim.