
Mazdaspeed6 L4-2.3L Turbo (2006)
Transmission Cooler: Service and Repair
Oil Cooler Removal/Installation [AW6A-EL]
OIL COOLER REMOVAL/INSTALLATION [AW6A-EL]
1. Disconnect the negative battery cable.
2. Remove the air cleaner component.
3. Remove the under cover.
4. Drain the ATF into a container.
5. Drain the engine coolant.
6. Remove the following parts.
1) Hood
2) Front bumper
3) Front combination light.
4) Front bumper reinforcement.
5) Shroud panel.
6) Cooler pipe slay.
7) Cooling fan.
8) Engine coolant reserve hose
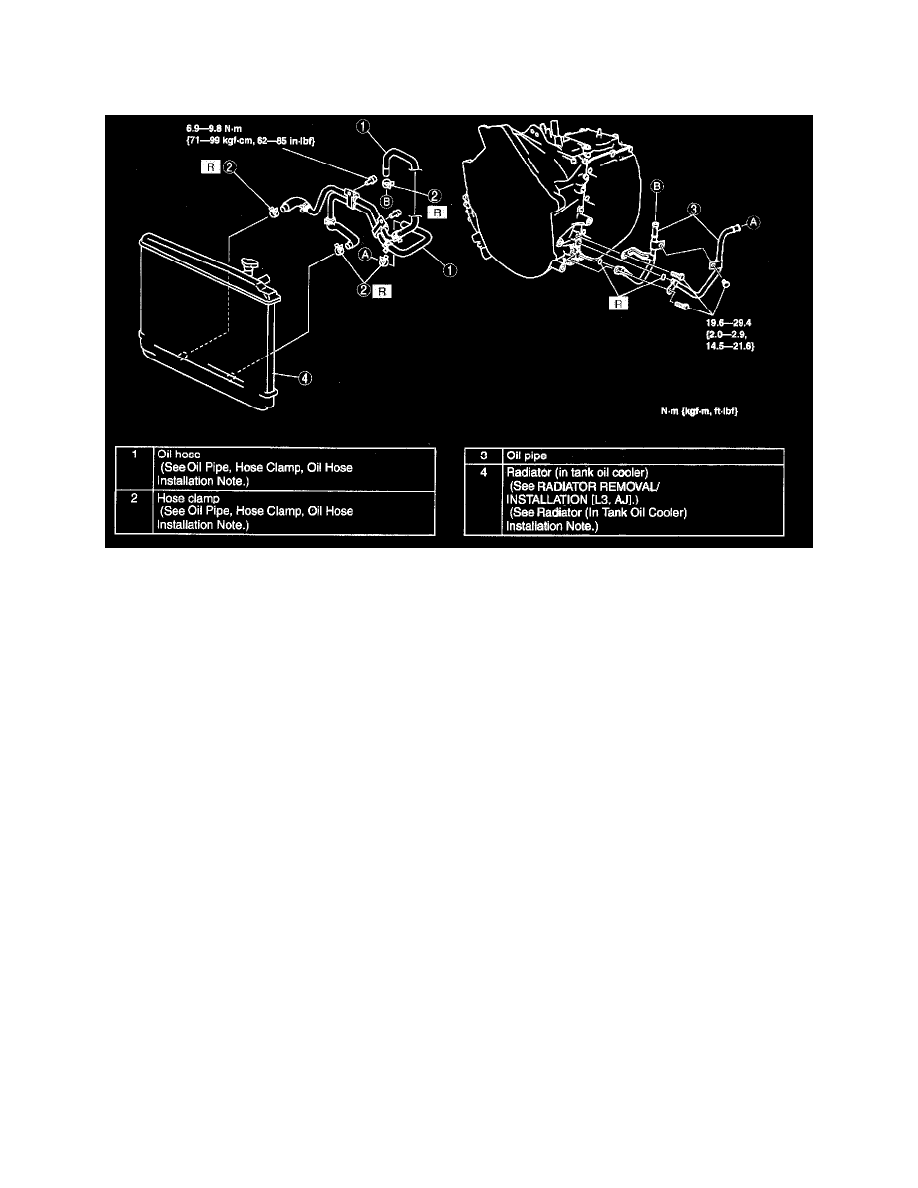
7. Remove in the order indicated in the table.
8. Install in the reverse order of removal.
9. Add the engine coolant.
10. Add ATF to the specified level.
11. Install the under cover.
12. Install the air cleaner component.
13. Connect the negative battery cable.
14. Inspect for oil leakage from the oil pipes and oil hoses.
15. Inspect for coolant from the hoses.
16. Inspect for engine coolant leakage.
17. Inspect the ATF level and condition.
18. Perform the line pressure test.
Radiator (in Tank Oil Cooler) Installation Note
1. The automatic transaxle oil cooler flushing must be performed whenever a transaxle is removed for service because the existing fluid may be
contaminated, and to prevent contamination of new fluid.
Note:
^
Flushing must be performed after installation of an overhauled or replaced transaxle.