Mazdaspeed6 L4-2.3L Turbo (2006)

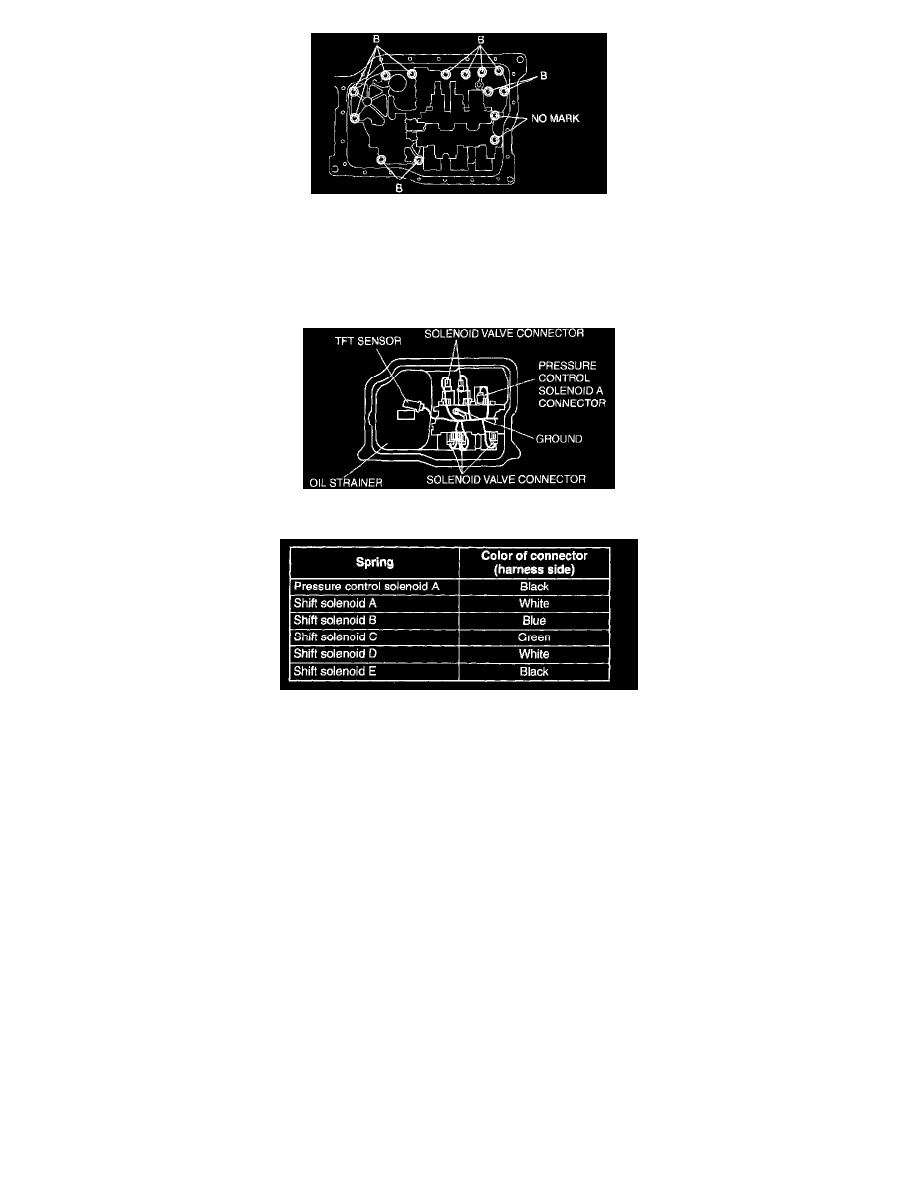
2. Install the primary control valve body component.
Tightening torque 7.8 - 10.8 Nm (80 - 110 kgf-cm, 70 - 95 inch lbs.)
Bolt length (measured from below the head)
B: 40 mm 11.575 inch)
No mark: 70 mm (2.756 inch)
3. Install the oil strainer.
4. Match the harness colors, then connect the solenoid connectors and GND, and install the TFT sensor.
Tightening torque 7.8 - 10.8 Nm (80 - 110 kgf-cm, 70 - 95 inch lbs.)
5. Apply a light coat of silicon sealant to the contact surfaces of the oil pan and transaxle case.
6. Install the oil pan.
Tightening torque 6 - 8 Nm (62 - 81 kgf-cm, 53 - 70 inch lbs.)
7. Install the crossmember.
8. Install the front tires and splash shield.
9. Install the under cover.
10. Connect the negative battery cable.
11. Add ATF
12. Carry out the mechanical system test.
13. Carry out the road test.
